
tl;dr version
7 pitches, some climbing up to 5.8, and a walk-off with one rappel. Gear to 3″.
9 hours car-to-car at an unhurried pace. A slightly-chillier-than-expected wind is typical on this wall.
Routefinding is intuitive except: Pitch 4 bolted-anchor is to your right, easy to miss, just before passing half-rope on a 60m rope. Pitch 5 ends in a deep notch, requires a trad-gear anchor.
https://www.mountainproject.com/route/119210014/
Trip report
On Saturday, May 6, 2023, I climbed the second route I’ve tried on Goose Egg Mountain out in Tieton. Evan F & Nina E climbed with me, so we climbed as a party of 3, where I led all pitches, and brought them up on two separate 60m ropes. It was a great climb and we had a ton of fun!! I feel the route is a bit under-appreciated, it doesn’t seem like it gets climbed as often as it probably deserves. The route’s original name, unfortunately, is rather racist, possibly even more sexist, and either way ends up being gross and unappealing. I think this route needs a new name! For lack of a better idea, I’m inclined to take inspiration from its 7th pitch, and call the route “Sidewalk Jenga” going forward (If you really want to know the route’s old name, I’ve included it in white-on-white text just below this. Have fun looking that up in the compassionate & cerebral world of Urban Dictionary.)
“Dirty Sanchez”
UPDATE: I had made a suggestion on MountainProject to change the name. A moderator asked me to reach out the the first-ascenionists. While I agree in principle, there were practical problems. Unfortunately, Joe Puryear passed away in 2011, and Stoney Richards had seemingly zero internet prescense, I couldn’t find him. Fortunately, Stoney Richards reached out! Here’s what he said:
Rob thank you for enjoying the route. If you want to change names of a route that’s 20 years old please consider contacting me. The mountain was subject to the volcanic forces of Mt. St Helen’s, the exfoliating nature of the rock captured ash. The cleaning of the route had some help from friends and everyone was covered head to toe in ash including Jose Sanchez.
I’d like to name the route myself. If you can please change the name to “The Dirty” which was what we called it while working on it. I’d appreciate it. Thank you
Rack
- Cams: doubles of Black Diamond cam sizes #0.4 to #3, plus singles of a #0.3 & a #0.2 (optionally a #0.1 too if you want)
- I heavily used the purple #0.5 cam, that and the adjacent sizes were my most used pieces of trad gear on this route.
- Optionally, if you’re feeling confident, you could leave the second big blue #3 at home, and just bring one #3
- Nuts: just a regular set (though one red BD Offset stopper #7 is useful in one spot)
- Slings: I had 8 singles as alpine draws, 3 doubles, and 6 quickdraws, which was great. (Or optionally, subtract two quickdraws, bringing 4 quickdraws instead, and just use those alpine draws more often when clipping bolts.)
Ropes & Retreat-options
I definitely recommend bringing two 60-meter ropes. If you had to bail before reaching the top, you’d really want to be able to make some rappels that are longer than just 30-meters. If you’re going as a team of two, either bring a pair of skinny twin-ropes, or bring one regular single-rated 60m rope plus a 60m tag line. If you’re going as a team of 3, you might as well just bring two 60m single-rated ropes. If you’re going as a party of 4, i.e. two rope-teams of two each, that would also give you two 60m single-rated ropes you could all rappel on if you needed two. (However, be aware that there is a non-trivial amount of loose rock on this wall–average by alpine standards, but more than front-country craggers on uber-popular lines are used to–so being the second rope-team behind anyone ahead does come with a slightly increased risk.)
Speaking of bailing: rappelling the 1st pitch is fairly easy, the big tree has some faded tat and a steel quicklink on it, though you should probably tie some new cord around it rather than trust the old sun-bleached stuff. (The tree is huge, 10′ of material just barely goes around it enough to be knotted.) After that, the anchors at the tops of pitches 2, 3, & 4 are all just a pair of naked bolts; where you’d want to leave a tied-double-runner and rap-ring or taped-shut-carabiner at each. Once you’ve made it to the top of pitch 5, where you belay in the notch using a gear anchor you build yourself, at that point it is probably easier to push on over the top of the route and use some other descent-option than it is to try to rappel from there. Anyway, bring some double-runners and cordelettes as tied-material so that you can untie them to build good bail anchors, just in case you need to.
Other Gear
- Pack -> I’d recommend only bringing a tiny climbing pack, like an REI Flash 18 pack, or a running-pack. (Running-packs are really nice, with front-pockets providing snack-access without having to take the pack off.) You can put your harness on at the car, wear your little climbing pack from the beginning, backpack-coil the rope, and not have to leave a single thing at the base of the route.
- Approach shoes -> You definitely want some other type of footwear that you can change into at the top and use to walk-off. Some light-weight approach shoes, or trail-runners that do well at rock-scrambling, are best.
- Layers -> I highly recommend bringing both a rain/wind shell, plus at least one more light insulating layer. Every time I’ve been on any route on this particular wall, it’s always a bit windy and notably chillier once you’re a pitch or two off the ground. Whatever temperature it feels like at the car or at the base of the route, it’s gonna feel like ~15°F chillier up on the route. I always think “Oh it’s south-facing, the sun will provide a lot of warmth,” and it never ends up as warm as I think it’s going to be. Also, 3 out of 4 times I’ve been on this wall, a brief 10-minute sprinkle of rain has randomly come through at some point, even with near-zero precent chance a precip in the forecast. So bring that rain shell.
- (Optional) Crack gloves -> There were a few crack-moves, but not many. I think I did less than 10 hand-jams all day. I brought crack-gloves, did not wear them, did the hand-jams anyway, and managed not to tear up any skin on the back of my hands. I didn’t really need them (certainly not compared to Ride the Lightning, where hand-jams are so much more central to the movement.)
- (Optional) Radios -> Radios are nice-to-have. Many pitches end just barely out of sight of your belayer. Are radios mandatory? No. Yelling would probably be fine for all climbing commands. But I still appreciated having radios.
Locating the Route
Map: https://caltopo.com/m/N0U5G
From Hwy 12, there’s a brown & yellow wooden sign that says “Rimrock Lake Recreation Area”, marking the Tieton Reservoir Rd. Go south on that road for 2 miles, and observe a little pulloff on the righthand side that’s at a small spring and a split-rail fence. (At 46.64728, -121.10367) That’s just a land-mark, don’t park there, instead go 0.1 miles further to the next pulloff, this time on the left-hand side. Park there. (Park at 46.64636, -121.10546)
To get to “The Dirty”, it’s most direct to just punch into the forest there, right where you parked. There is no visible trail beginning at this time. Follow the flow of rock debris fairly straight uphill, angling right once you’re closer to the wall. The big tree at the top of the 1st pitch of “The Dirty” is at 46.64861, -121.10597.


Pitches
I found that I had different opinions about pitch-difficulty breakdown than what old Tieton Guidebook (by Ford & Yoder, in 2004) says. IMO, the difficulties were:
P1 5.4R, P2 5.7, P3 5.7, P4 5.5, P5 5.8, P6 5.8+, P7 5.5.
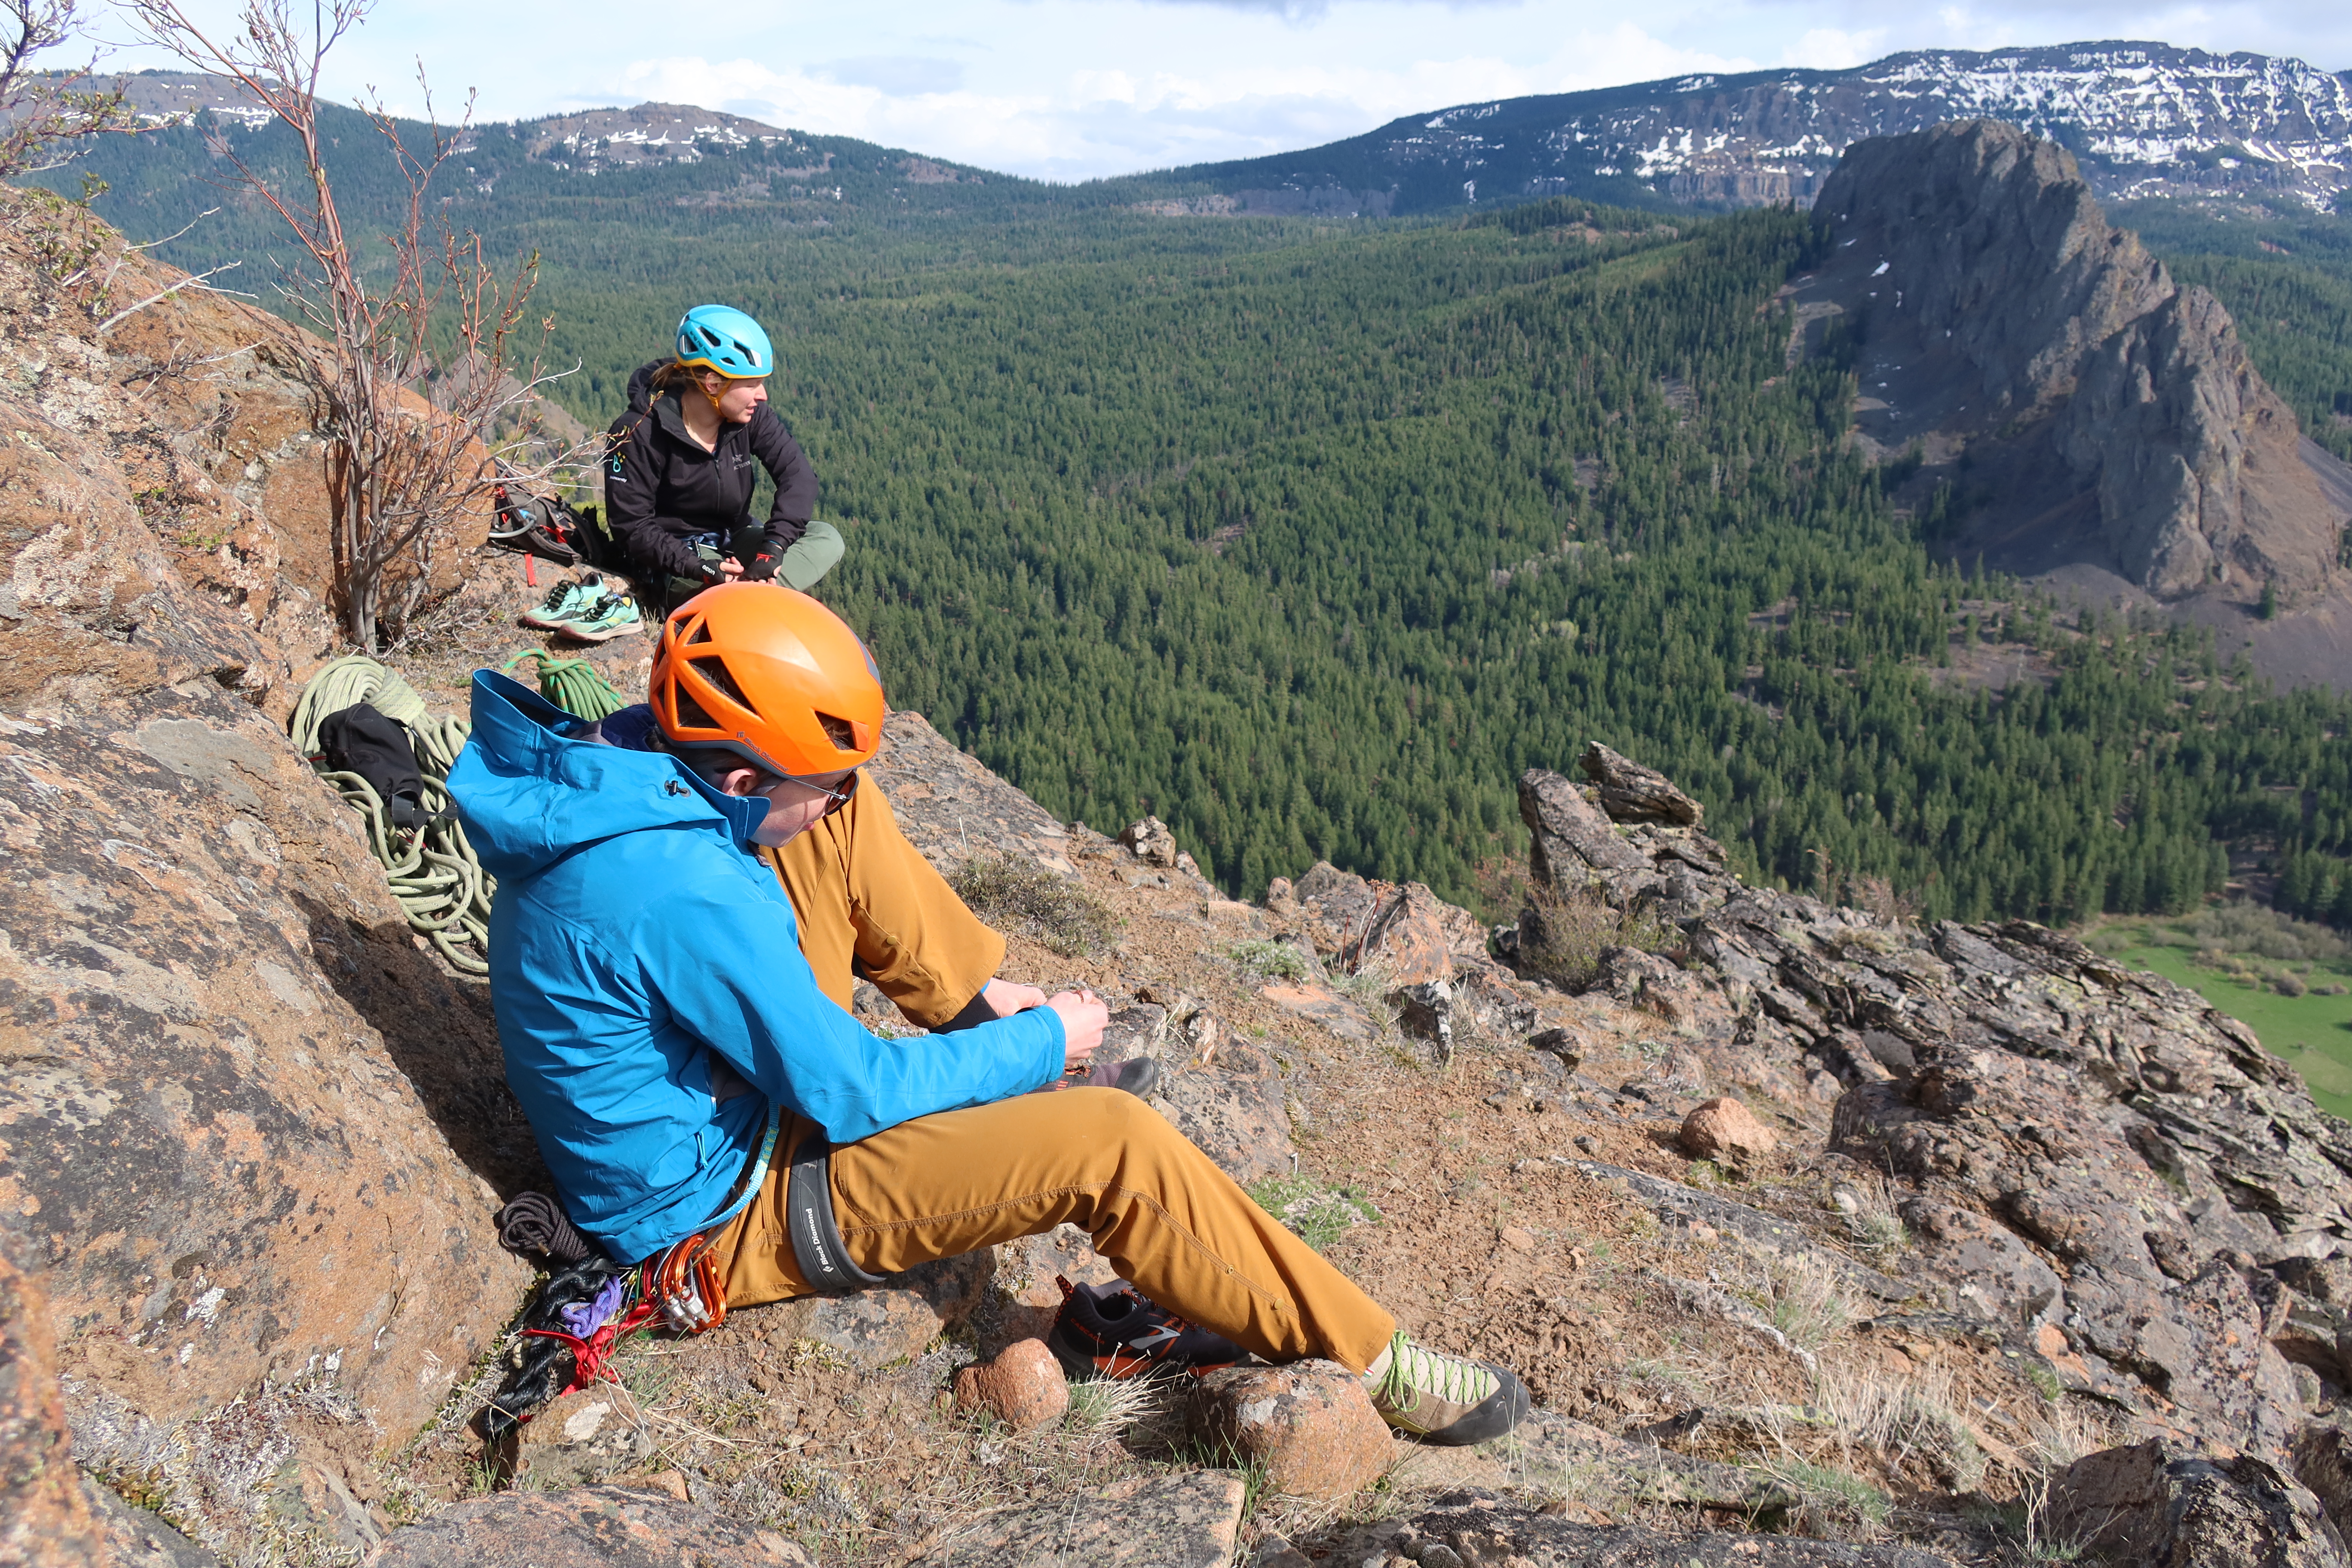
If you hope to take a break mid-route, the notch at the top of pitch 5 is the most comfortable place for it.
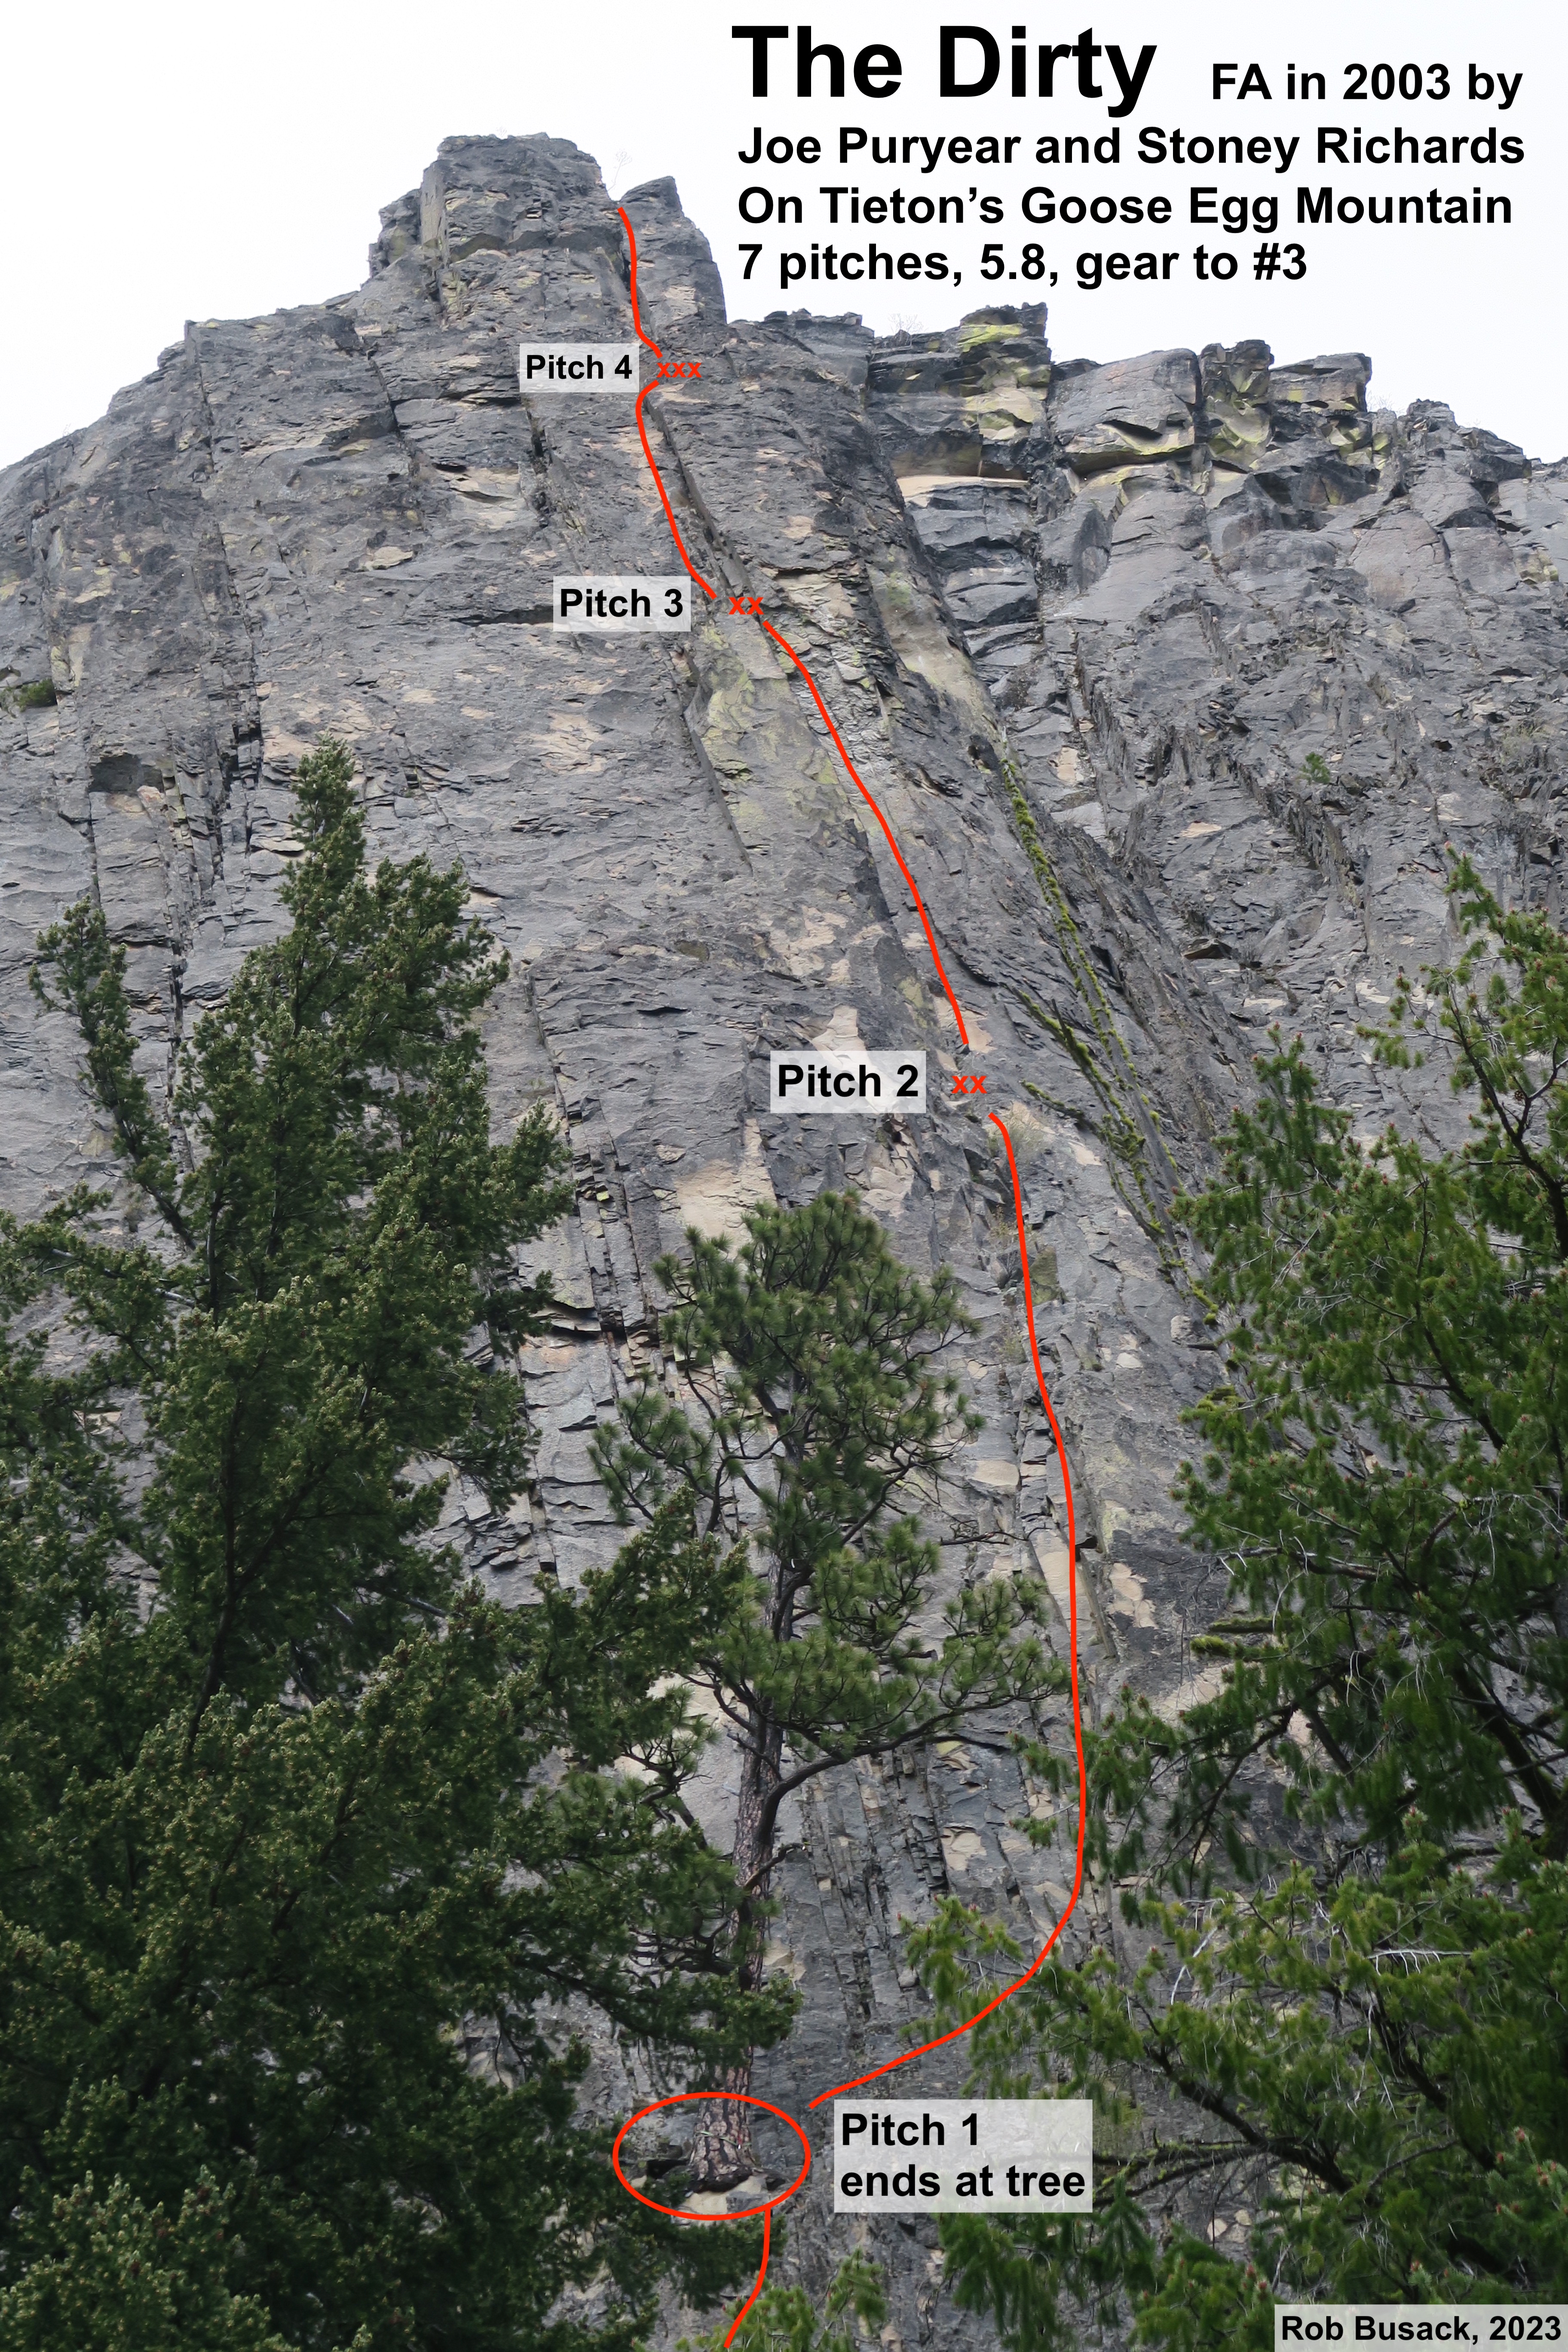
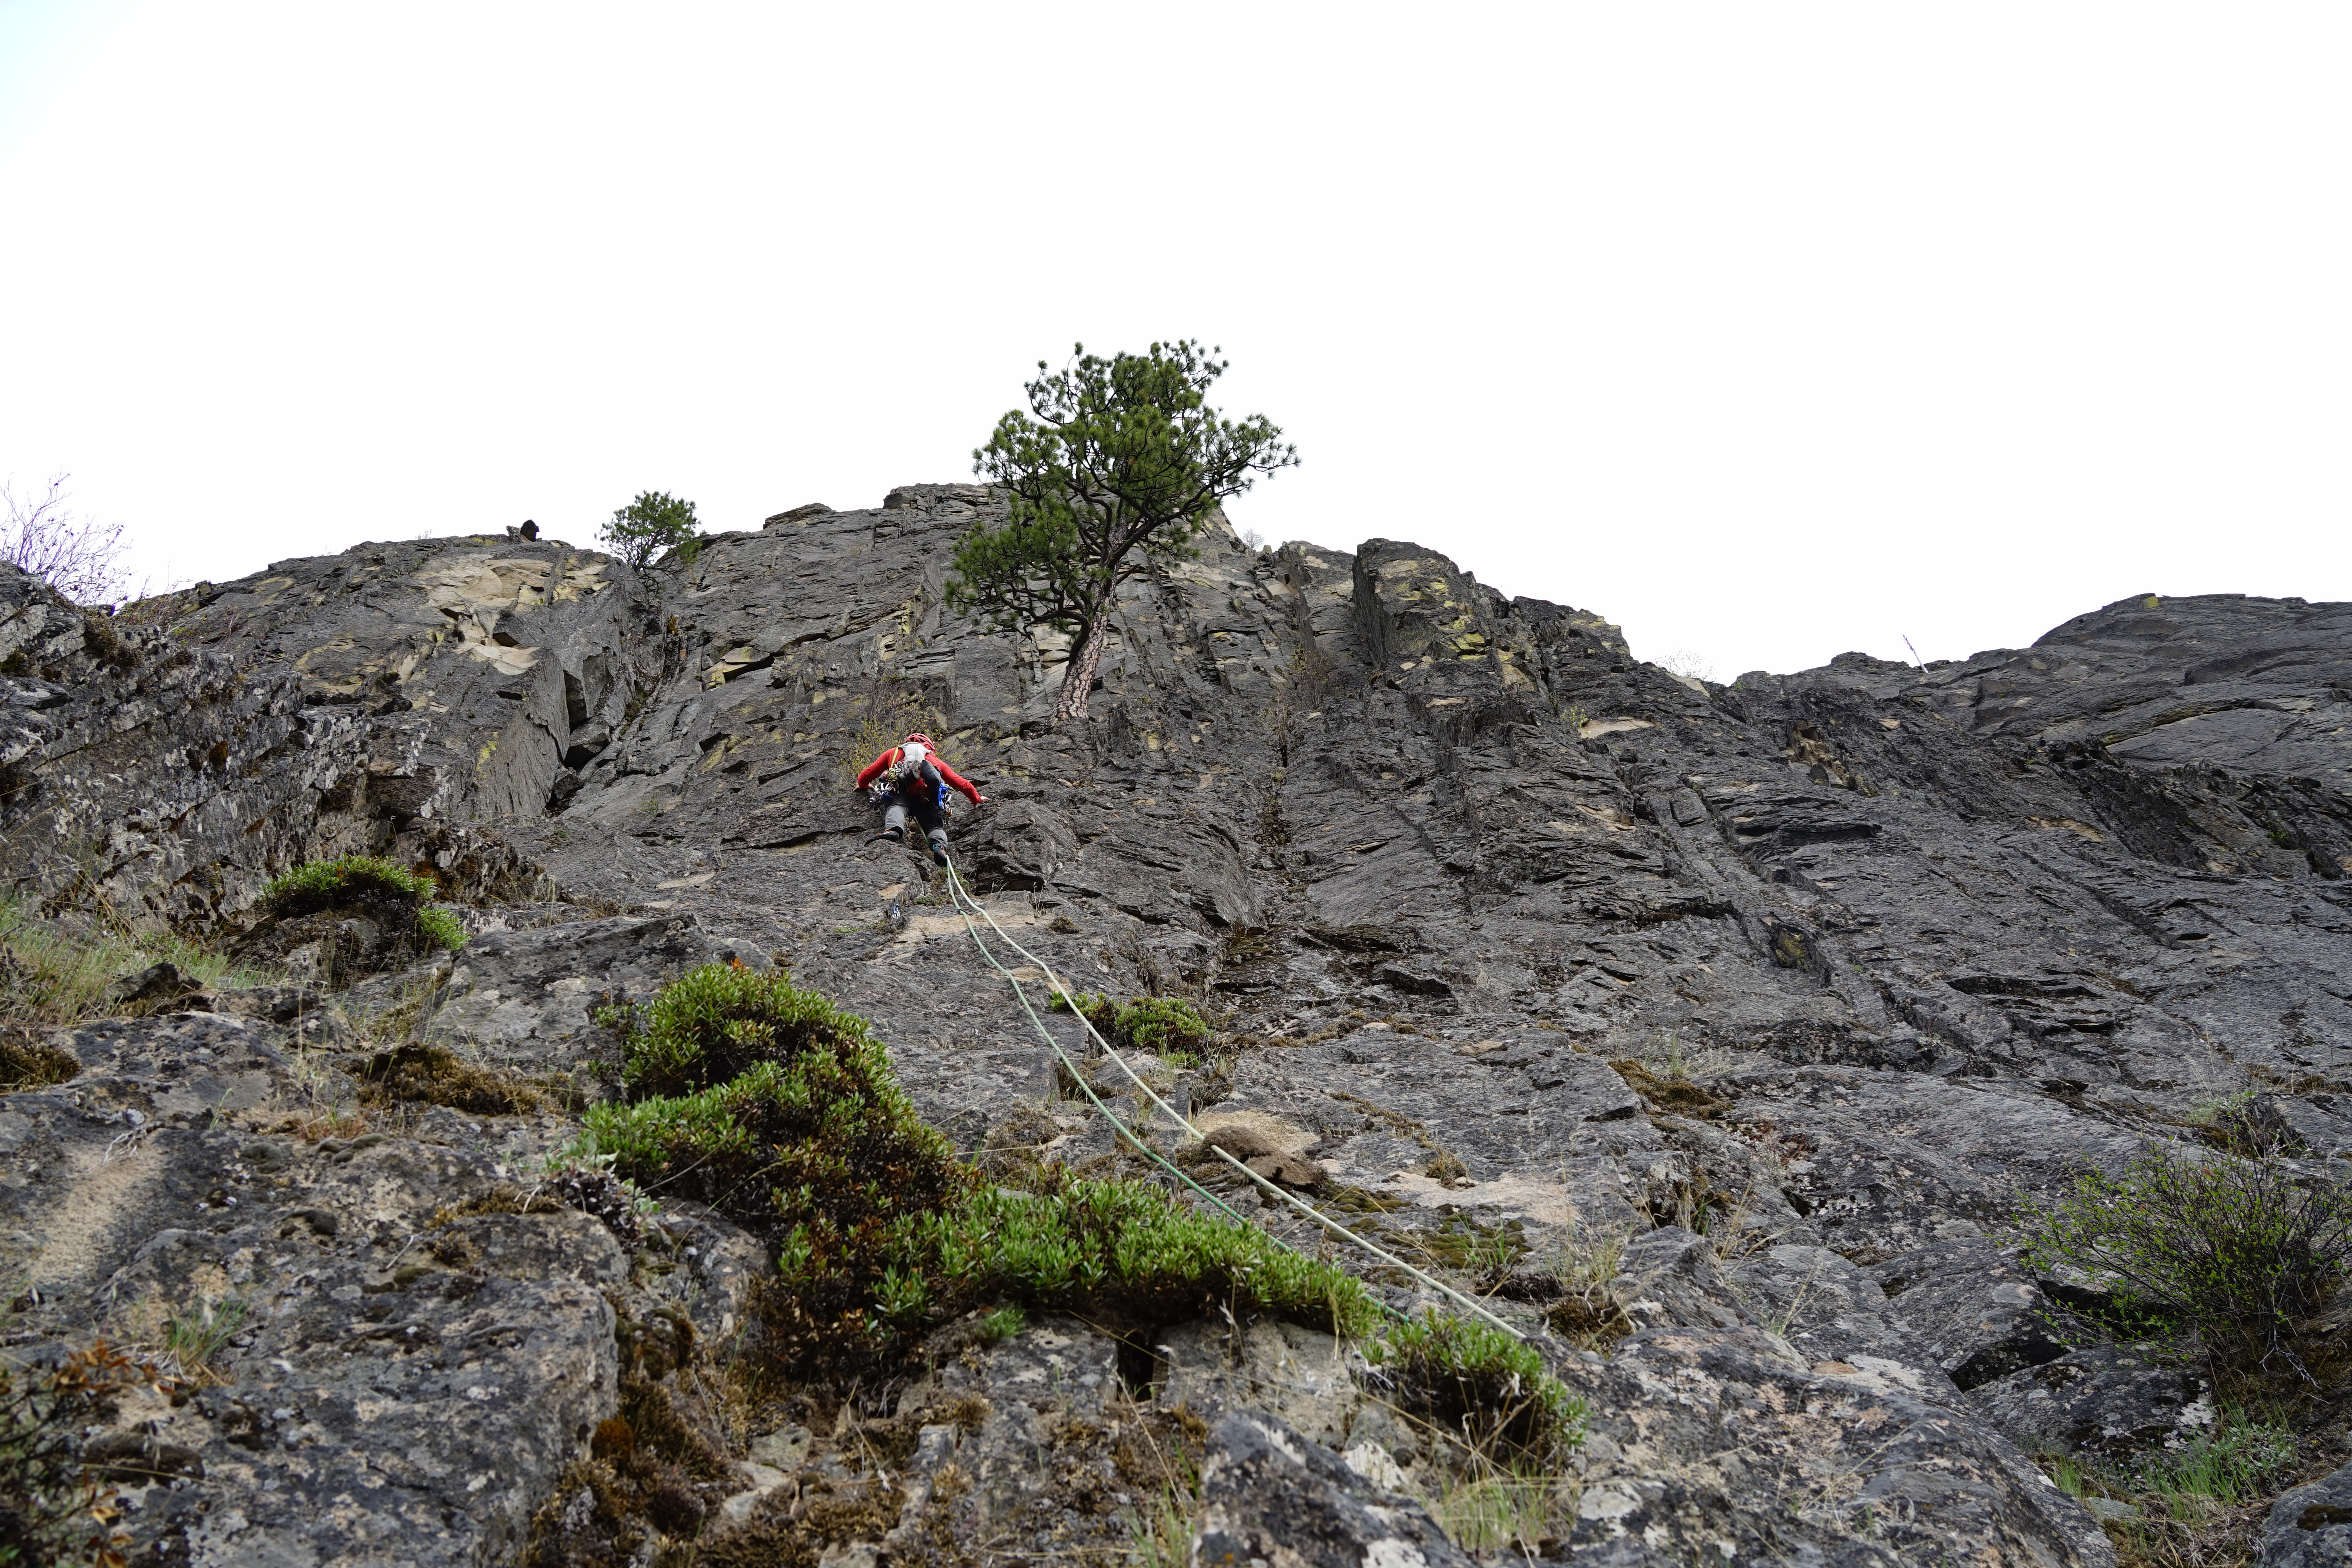
Pitch 1: 5.4 R. Most of a rope-length. Ends at the giant tree.
IMHO, this was the scariest pitch. Easy movement, but terribly run-out. It starts scrambly, just 3rd class, and works up to low-fifth as it gets closer to the big tree. There is a single bolt shortly before reaching the big tree, but for a large portion of this, if you did biff a move, you’re looking at a tumbling ground-fall. Opportunities for trad gear before that bolt are next to nil.
Pitch 2: 5.7. ~130 feet. Ends at a pair of bolts.
Go right from the big tree, and it’s easy to spot the line of shiny bolts going up that big left-facing corner. The movement is sporty and fun! When the bolts get less frequent, I found a couple of nice spots to supplement them with a purple #0.5, a green #0.75, etc. When you feel like the pitch should be done by now, keep going straight up another 20 feet or so past two small shrubs and a nice horn to sling, and eventually you’ll find yourself face-to-face with pair of shiny bolts with Fixe hangers to end at.


Pitch 3: 5.7, ~90 feet. Ends at a pair of bolts.
A very cool corner-system with an upward scoop. This one is entirely trad-gear protected, with plenty of opportunities to get gear in as the pitch steepens. The wall on your left has many little in-cuts that work nicely for both hands and feet, if you take an extra moment to look or feel around for them. I thought this was a really fun pitch. A satisfying top-out to the left brings to the next anchor bolt pair.

Pitch 4: 5.5, ~90 feet. Ends at a trio of bolts off aways to your right, easy to miss and accidentally climb past.
The pitch before this had been a right-facing corner with interesting climbing, but now you’re in a left-facing corner with less interesting climbing. Cruise up easy terrain, but pay attention to when this left-facing corner peters out, that’s when it’s time to think about going right and looking for the bolts to end at.
Pitch 5: 5.8, ~130 feet. Ends in a deep notch. Build your own trad gear anchor.
The vertical cleft in the rock above you makes route-finding obvious. To get there though, the pitch starts with a slightly long ramble up unprotectable 5.0 until you get to the start of the crack, but fortunately you can get some gear in that crack before the climbing difficulty starts to change. Moving up into the cleft, things get cruxy, but a great high left hand, then a couple hand-jams and finger-locks are available, then you’re through it and into easier terrain, continuing up yet another right-facing corner system. Midway up this corner-system, there is bolt high up on your left (or rather two bolts, but one is missing a hanger,) but the bolt is optional because the trad placements keep coming and the bolt is easy to overlook. Eventually the corner system tops out, and you step down into a deep notch in the ridge. I placed a silver #0.4 cam high just before the step-down so the rope would run through a smooth carabiner rather than drag abrasively through the V of rock at that step-down. The big notch makes for a secure-feeling place to hang out, but the options for building a trad-anchor are not as good as I’d like. I found that I could get many small nuts in between the vertical plates at the top of the notch, plus a really good yellow #0.2 placement in the grassy crack just below them.


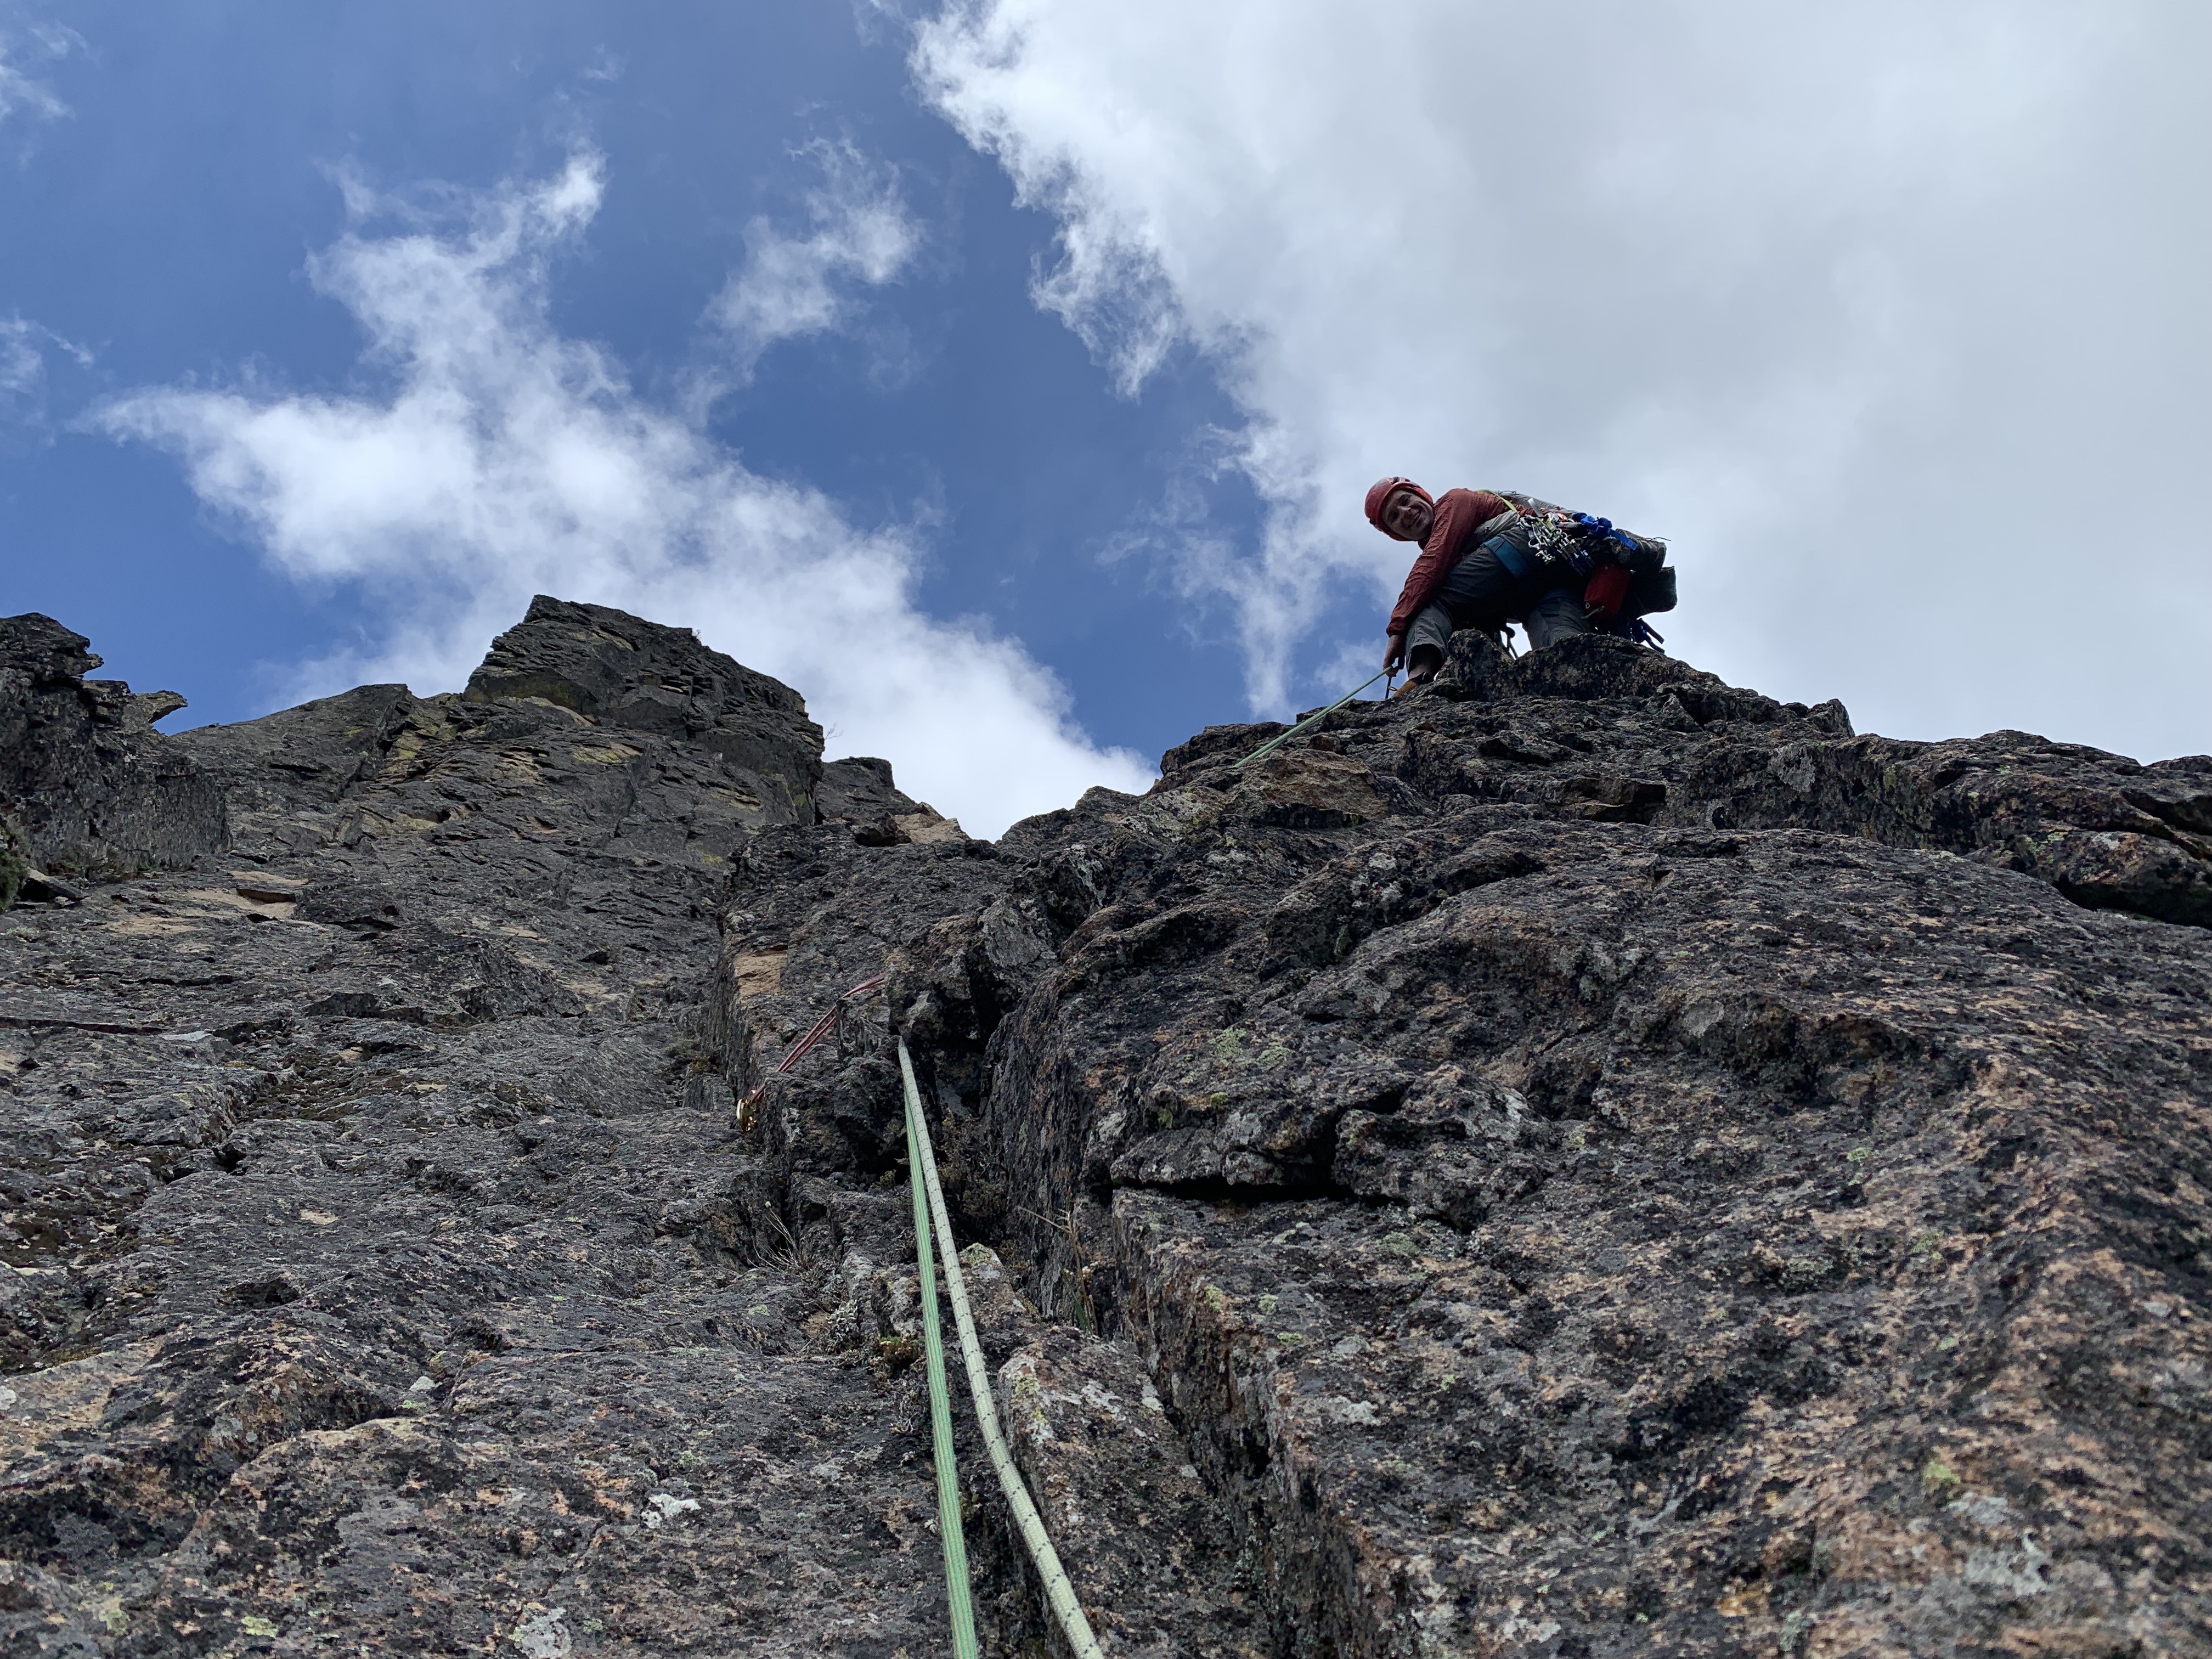
Pitch 6: 5.8+, ~40 feet. Ends at a pair of bolts just before going over the top.
Suddenly we’re on a short and relatively-stiff sport-climbing problem. I was glad to have my belayer up close in the P5 notch, where line of sight and communication were all very clear. If you want, leave the heavier pieces of the trad-rack with the follower, the pro is those 4 bolts, and optionally I did find a small nut or microcam placement or two, so that I could get the reassurance of pro even more regularly than what the bolts already provided.

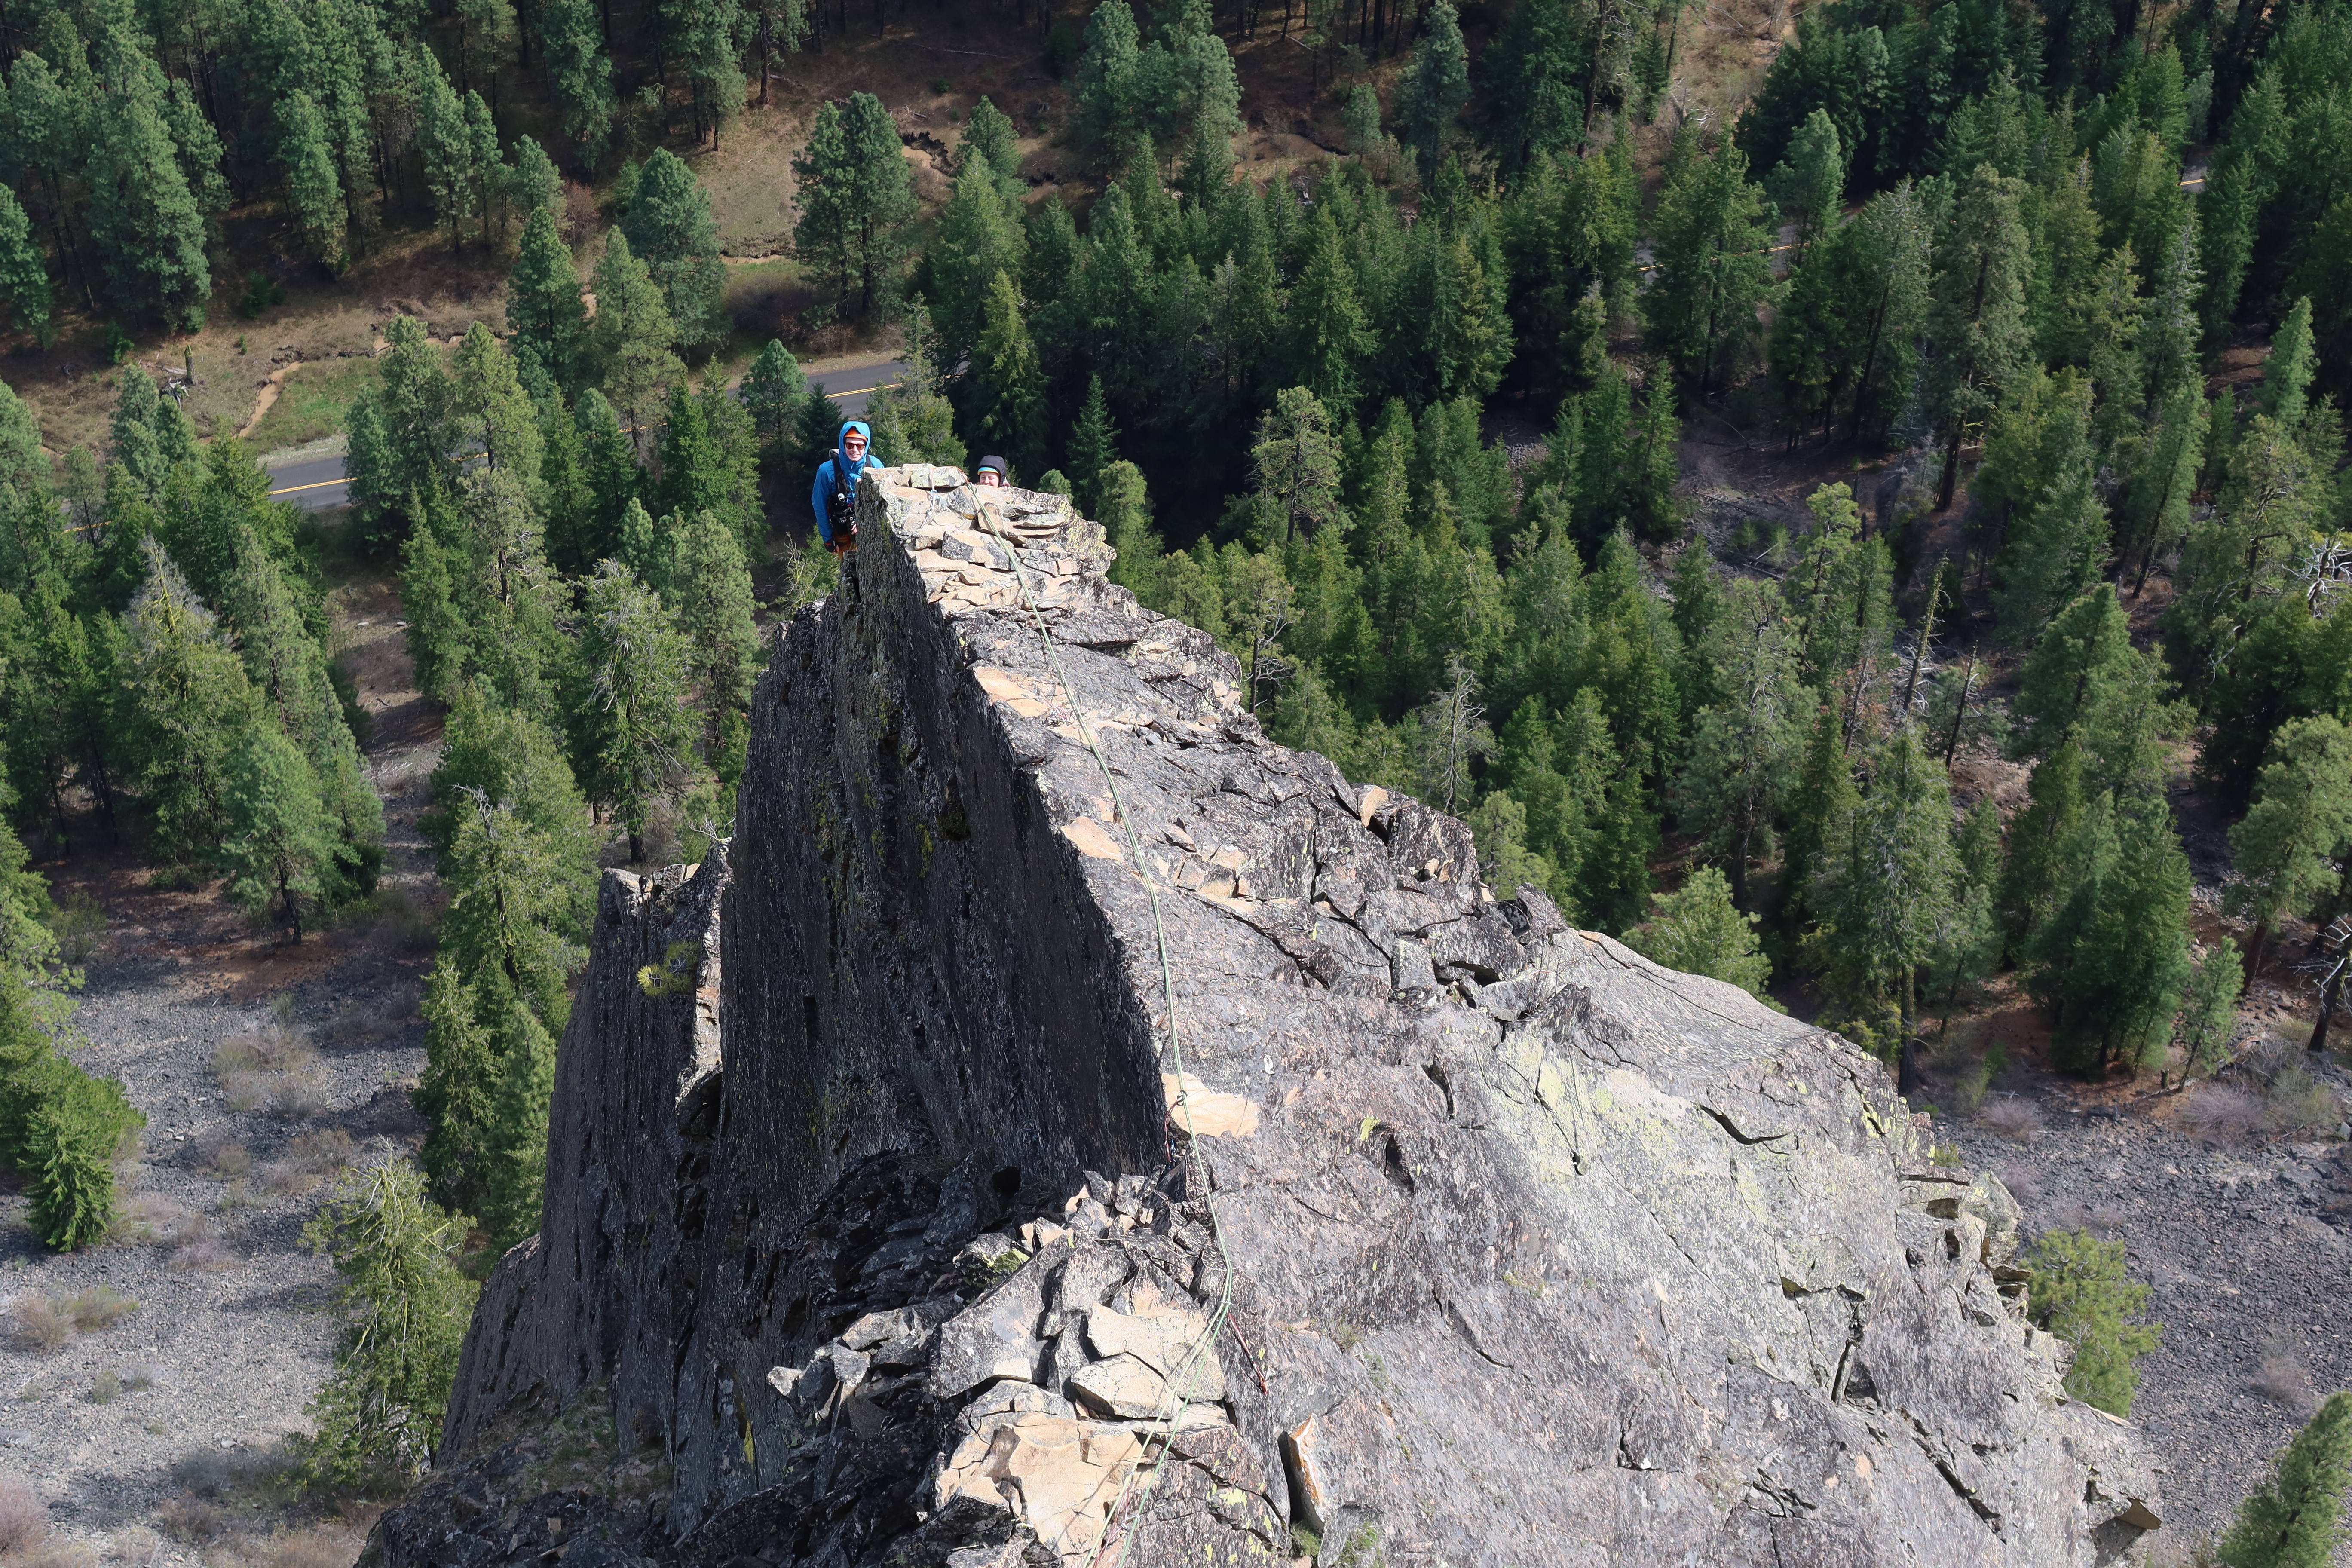
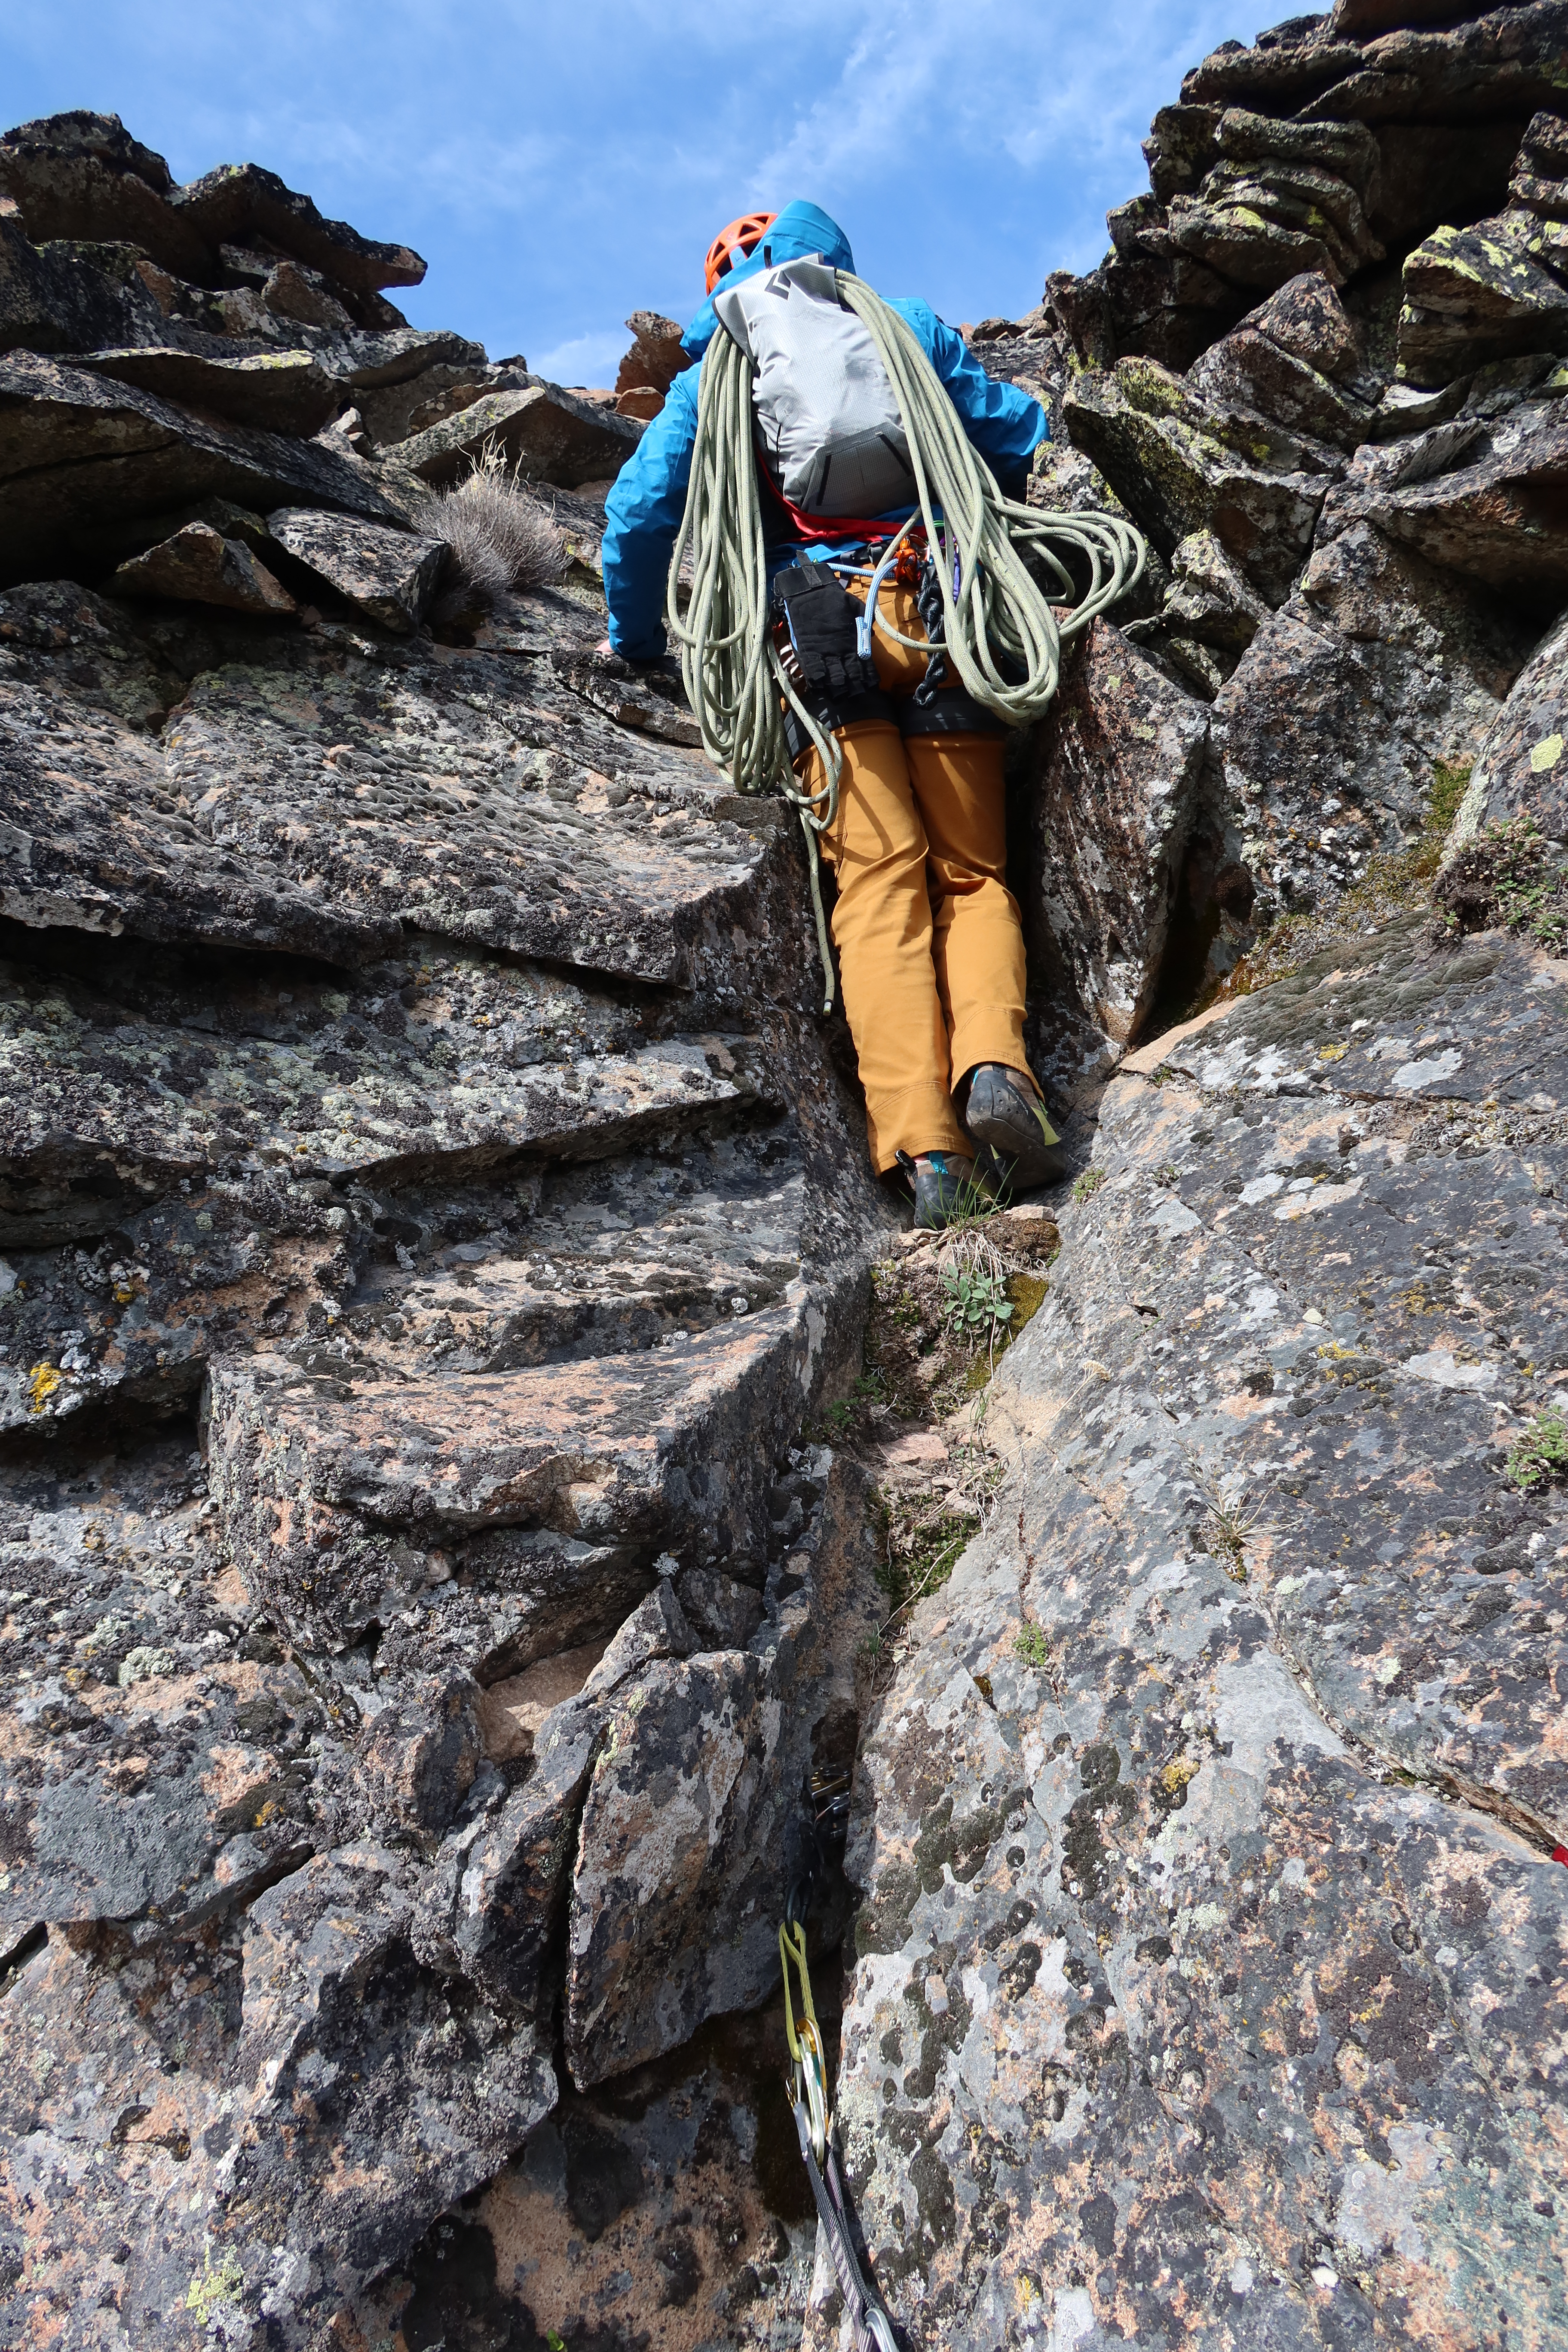
Pitch 7: 5.5, most of the rope length. Ends at a single bolt, that can be supplemented with trad gear.
Ah, the “Jenga Traverse” pitch! I actually got plenty of pro in on this pitch, I disagree with rumors of “sparse or no protection”. Many photos make it look like a flat and narrow sidewalk due to a visual quirk of the angle, but it really is a knife-edge ridge traverse, vertically sheer on the right, and reasonably downsloping on the left, at maybe a 45° angle. I see where the Jenga name comes from though, it is kind of a creaking pile of precariously balanced pieces, enough to get your attention, but really not that bad if you move carefully. Since it is a traverse, do make sure you leave plenty of pro to also protect your follower (if bringing up two followers, clip both ropes, each with independent carabiners, so they’re both protected without rope-on-rope friction within a single carabiner.) Once you cross the traverse and reach the main wall, you’ve still got quite some distance to climb, just keep going up, and climbing the direction that feels natural. Eventually you’ll discover a single bolt, which is where you should end the pitch. I did incorporate the bolt into a three-piece anchor, with a yellow #2 cam, and a red #7 BD offset-nut.


After Pitch 7:
Once all climbers are up, backpack-coil the ropes, then carefully make a few exposed 3rd class scramble-moves up into the big field of broken rock dinner-plates that is the top of Goose Egg’s wall. If you want a little extra security through those first few moves, leave rock-shoes on, you’ll reach a less-exposed place were you can change shoes and take a more comfortable break in just a couple minutes.
Descent – Walk Off
There’s two options for getting off the top of Goose Egg Mountain: either the walk-off, or the rappel route know as “Gangsta Rap”. This was actually my very first time fully topping out on any of the Goose Egg multipitches, so both options were unknown to me personally, and both had some reason to be concerned about. The walk-off has been described as “loose 4th class with an optional rappel in the middle”, (but fortunately now that I’ve done it, I can say it’s more like loose 2nd class with an easy rappel in the middle: so fortunately just-unpleasant, not as truly hazardous as I feared it might be.) Versus the “Gangsta Rap” rappel route, which involved committing to descending a gigantic vertical face with some ~700′ of rappelling, where I did not already know where all the rappel anchors would be, nor could I find a report of anyone using it that wasn’t over 10 years old. I had a very real fear of getting somewhere halfway down and neither finding the intended next anchor, nor finding a good enough crack to leave trad gear and make my own next anchor, and instead just getting stuck mid-wall. So, as you already know, I opted to explore the walk-off option.
Turns out the walk-off is not nearly as bad as I thought it would be. It is loose, and scrambly, but mostly just 2nd class. And compared to some alpine gullies in Washington, it’s only moderately loose, it’s quite reasonable. Here’s a GPS track for that walkoff. From the top of any route on Goose Egg, walk up and leftward until you see a really tall cairn first, and then a cairn on a dead log second.

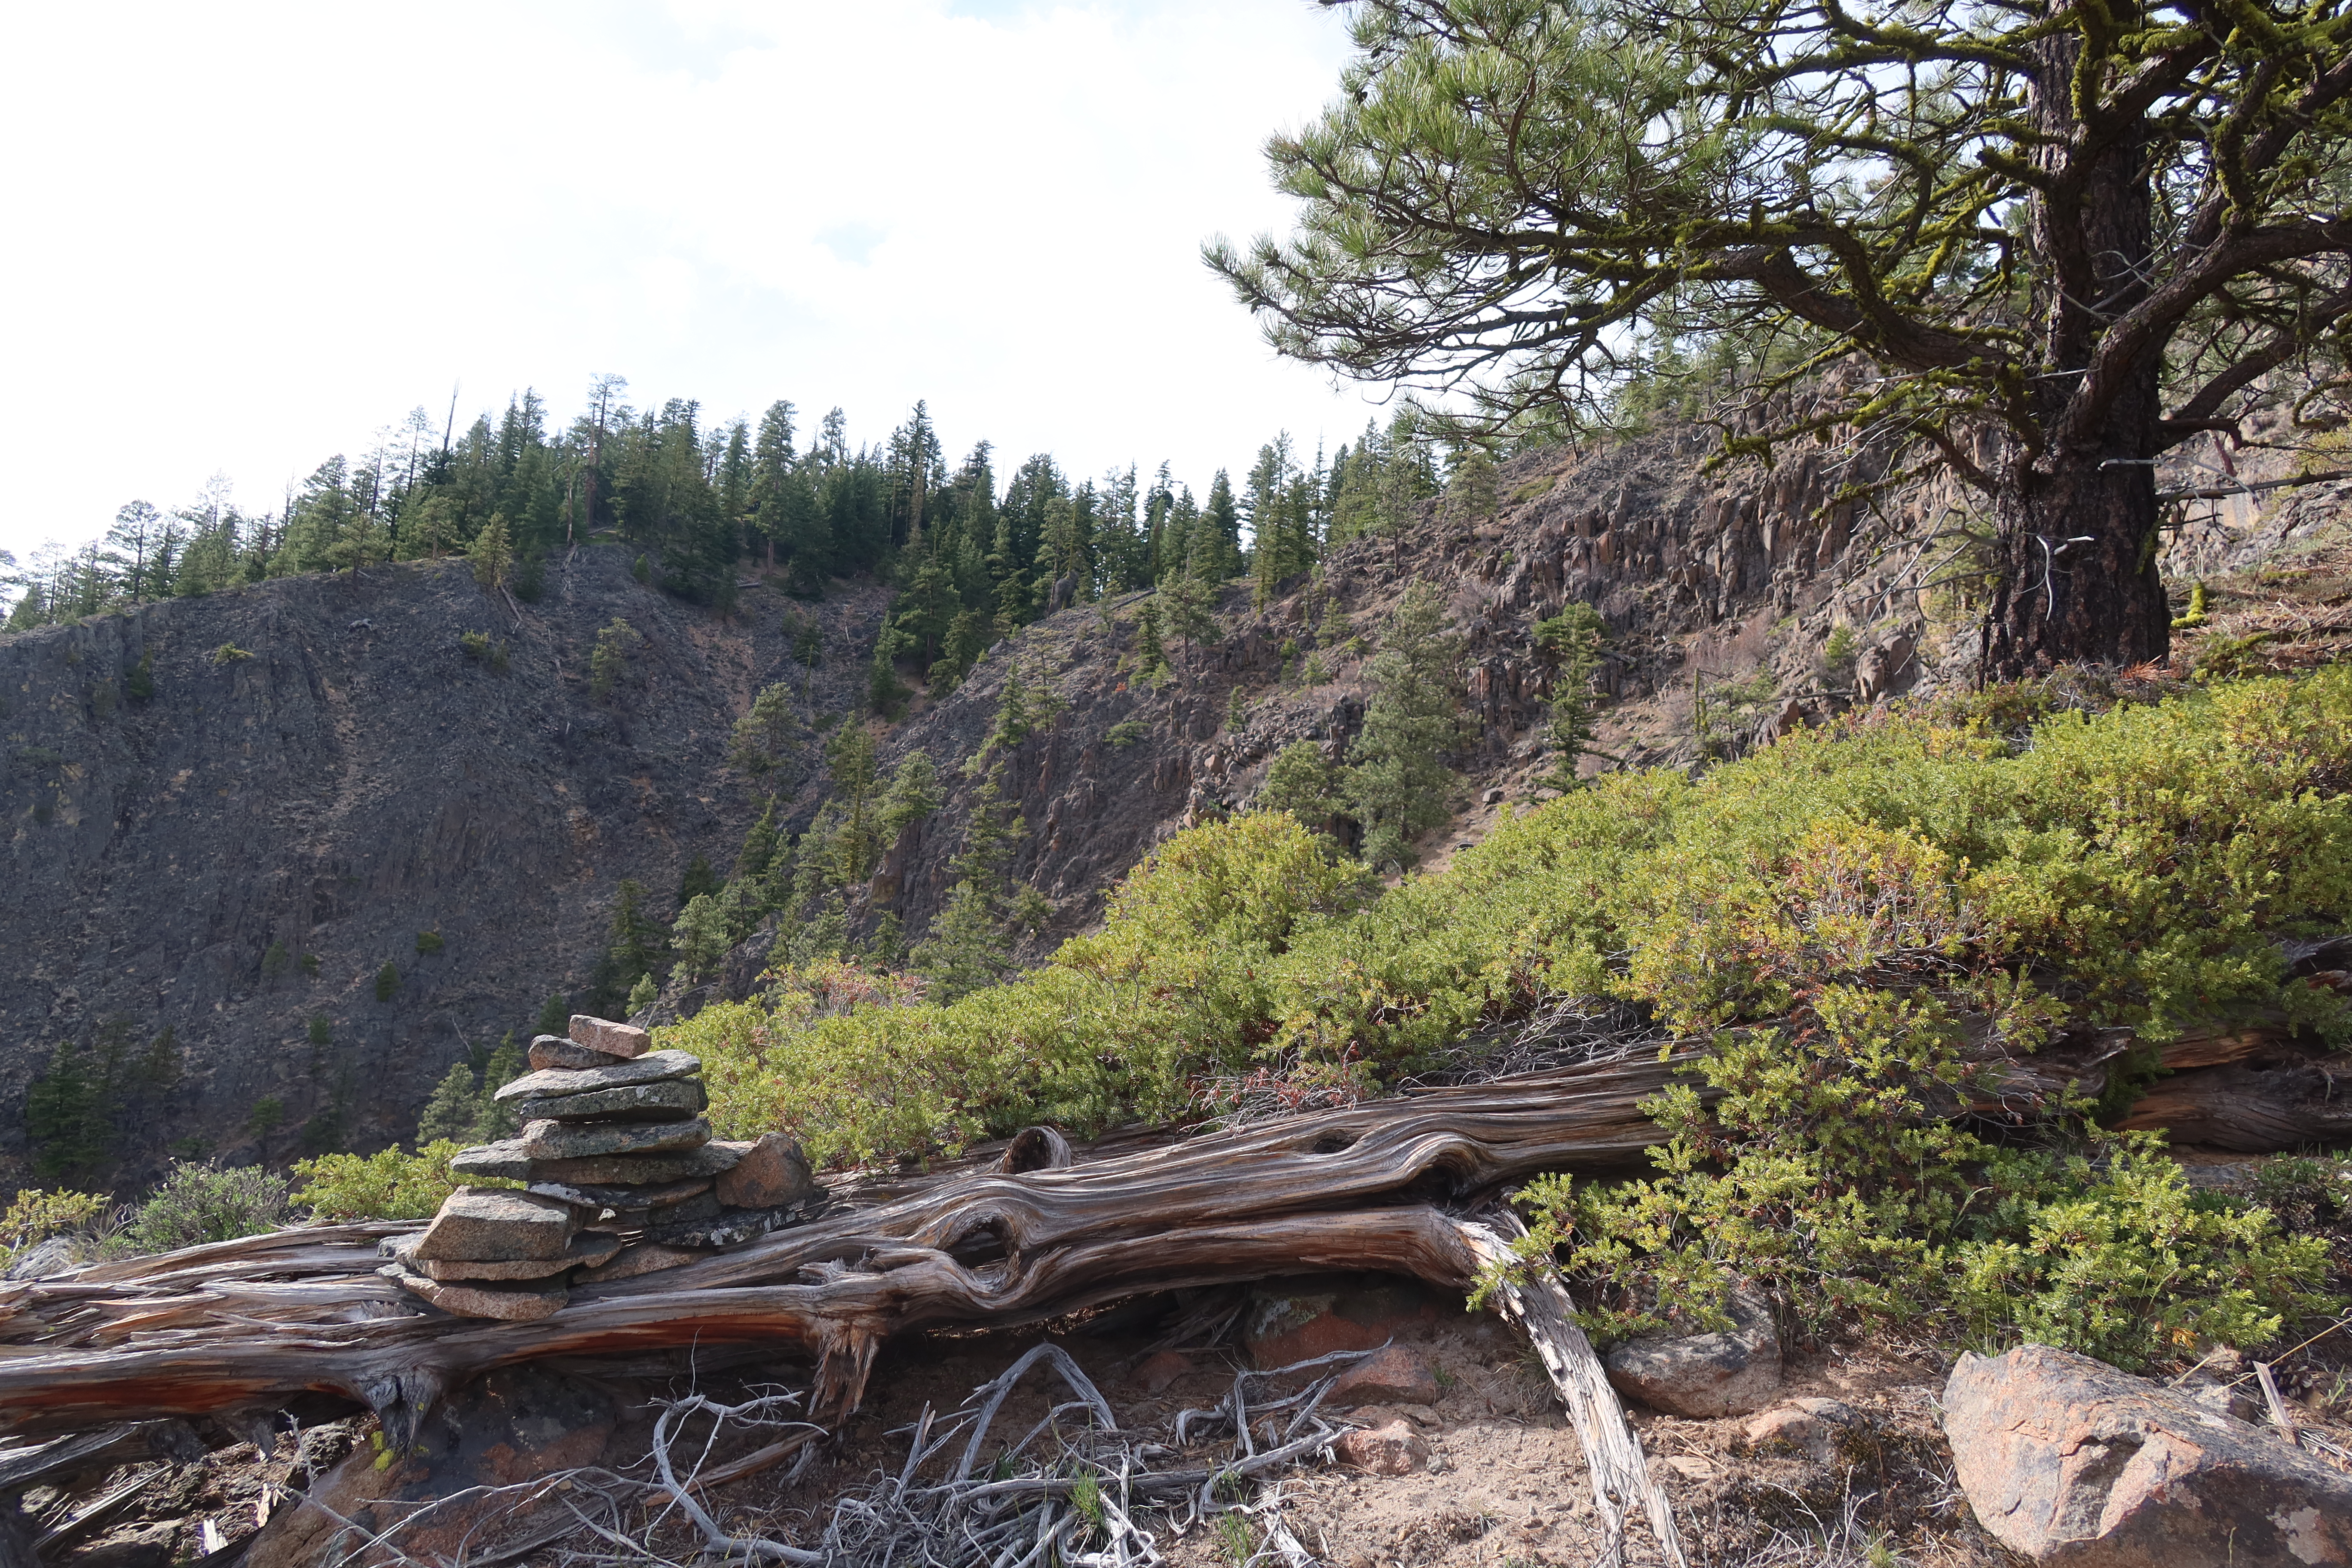
Step over the log, and work your way down the path of least resistance, the route-finding from there on out is all intuitive and obvious. In the distance where it looks like a steep drop-off, walk all the way up to the edge, and you’ll find a tree on the skier’s-left of the route with some rappel-slings around it. From that tree, it’s exactly a 30-meter rappel down into the gulley below, so one 60-meter rope will get you there perfectly. After rappelling. do step up-gulley and out of the fall-line when you go to the pull the rope, since it’ll knock some loose rocks with it as it comes down. After that, just keep working your way straight down from there, and eventually you’ll pop out on the road right were you parked your car. (It took us 2 hours to do the walk-off to the road.)


Alternate Descent Option – Rappel “Gangsta Rap”
The rumored other way off the top of Goose Egg Mountain. Though I don’t know anyone who has done it, and I can’t find any details about it on the internet that aren’t from more than a decade ago. While climbing “The Dirty”, I did my best to get some pictures of this potential rappel route, and see if I could figure out where some of the rap-stations are for future reference. Perhaps I’ll try this as a descent option next time I’m out here. I’m not 100% sure, but it appears that the “obvious tree” that Joe Puryear describes as the top of the 4th pitch on Gangsta Rap is now a dead snag. At least, there is a stark white dead snag visible from the ground that seems to be where the original route description described that tree.


Please don’t rename my route without asking.
Stoney Richards
Oh wow, Stoney Richards!! I’m flattered you even found / looked at my little blog here.
I agree, I don’t want to rename a route that you established without asking you. My problem was that I didn’t know how to ask you, how to find your contact info. Joe Puryear left a bit more of a digital trail that I could follow, but I am very sorry about to hear that he was lost so young, and sadly it looks like his old website, cascadeimages.com is down now too. I made some effort to look for you too. I read through quite a few old threads CascadeClimbers.com, but couldn’t tell if any of the usernames were you. I tried just googling you, but most of what I found was about a radio host in Pennsylvania who happens to have the same name, but I assume is not you. I ran out of leads to go on, and I wasn’t sure how to get un-stuck there, so I’m glad you reached out here!!
I really appreciate the work that route-developers put in, I can only begin to imagine the hours that go into scouting, all the effort of cleaning the moss & choss, and the cost of bolting where appropriate. Thank you for all that you’ve done to make Goose Egg routes approachable for the larger climbing community in the first place, it’s a huge service to the community.
Personally: I think your routes deserve to get climbed more, and appreciated more. I want to recommend this route to other people, I want to tell them they should go climb it. I had a ton of fun climbing it, and I think a lot of other people would too. But I balk at saying the original name in the same breath as a positive recommendation, so I often just don’t mention it at all.
I’d love some other name by which I could refer to this route, so that I could recommend it to people. So I would like to ask you, as the first ascensionist: What are your thoughts on picking a different name for this route? Would you be willing to come up with a different name?
Thanks for talking about this! If you’d like to talk further, feel free to email me at: rob.busack (at) gmail dot com