
Mount Stuart is my favorite mountain, and has been for a long time. Way back when I was just a hiker & backpacker, I loved the look of it, it was so imposing. Unknowingly influenced by the way things appear steeper than they really are when viewed face-on from far away, I never imagined it was something I’d ever actually be able to go up. Then, early in my mountaineering career, on the first weekend of June 2012, my mentor Karl took me up the Cascadian Couloir to the summit, blowing my mind about what was possible as a “scramble”. A heavy snowpack back then even made the Cascadian Couloir oddly delightful: solid kick-stepping the whole way up, and it was the second-best long glissade of my life going back down, second only to the south side of Adams the year prior. (Though the climate has changed noticeably since then, and it would be much more difficult to see enough lasting snow for glissade conditions like that on Stuart ever again.) Since then, I’ve now been to the summit of Stuart five different times, all of which are very memorable to me, and three of which have been via the West Ridge. Given the complicated route-finding of the West Ridge, I wanted to put some notes out there for the benefit of friends who have yet to climb it.
Worth noting: My advice in this post (well, true for any post!) is one way of doing the West Ridge. It’s not the only way, there are countless other right answers out there. This just happens to be the way I typically do it.

Overview
- I recommend a 2-day climb, in addition to driving out the evening before.
- Best time of year: August. Or late July or early September. (No doubt the route is possible year-round, but more snow = more difficulty.)
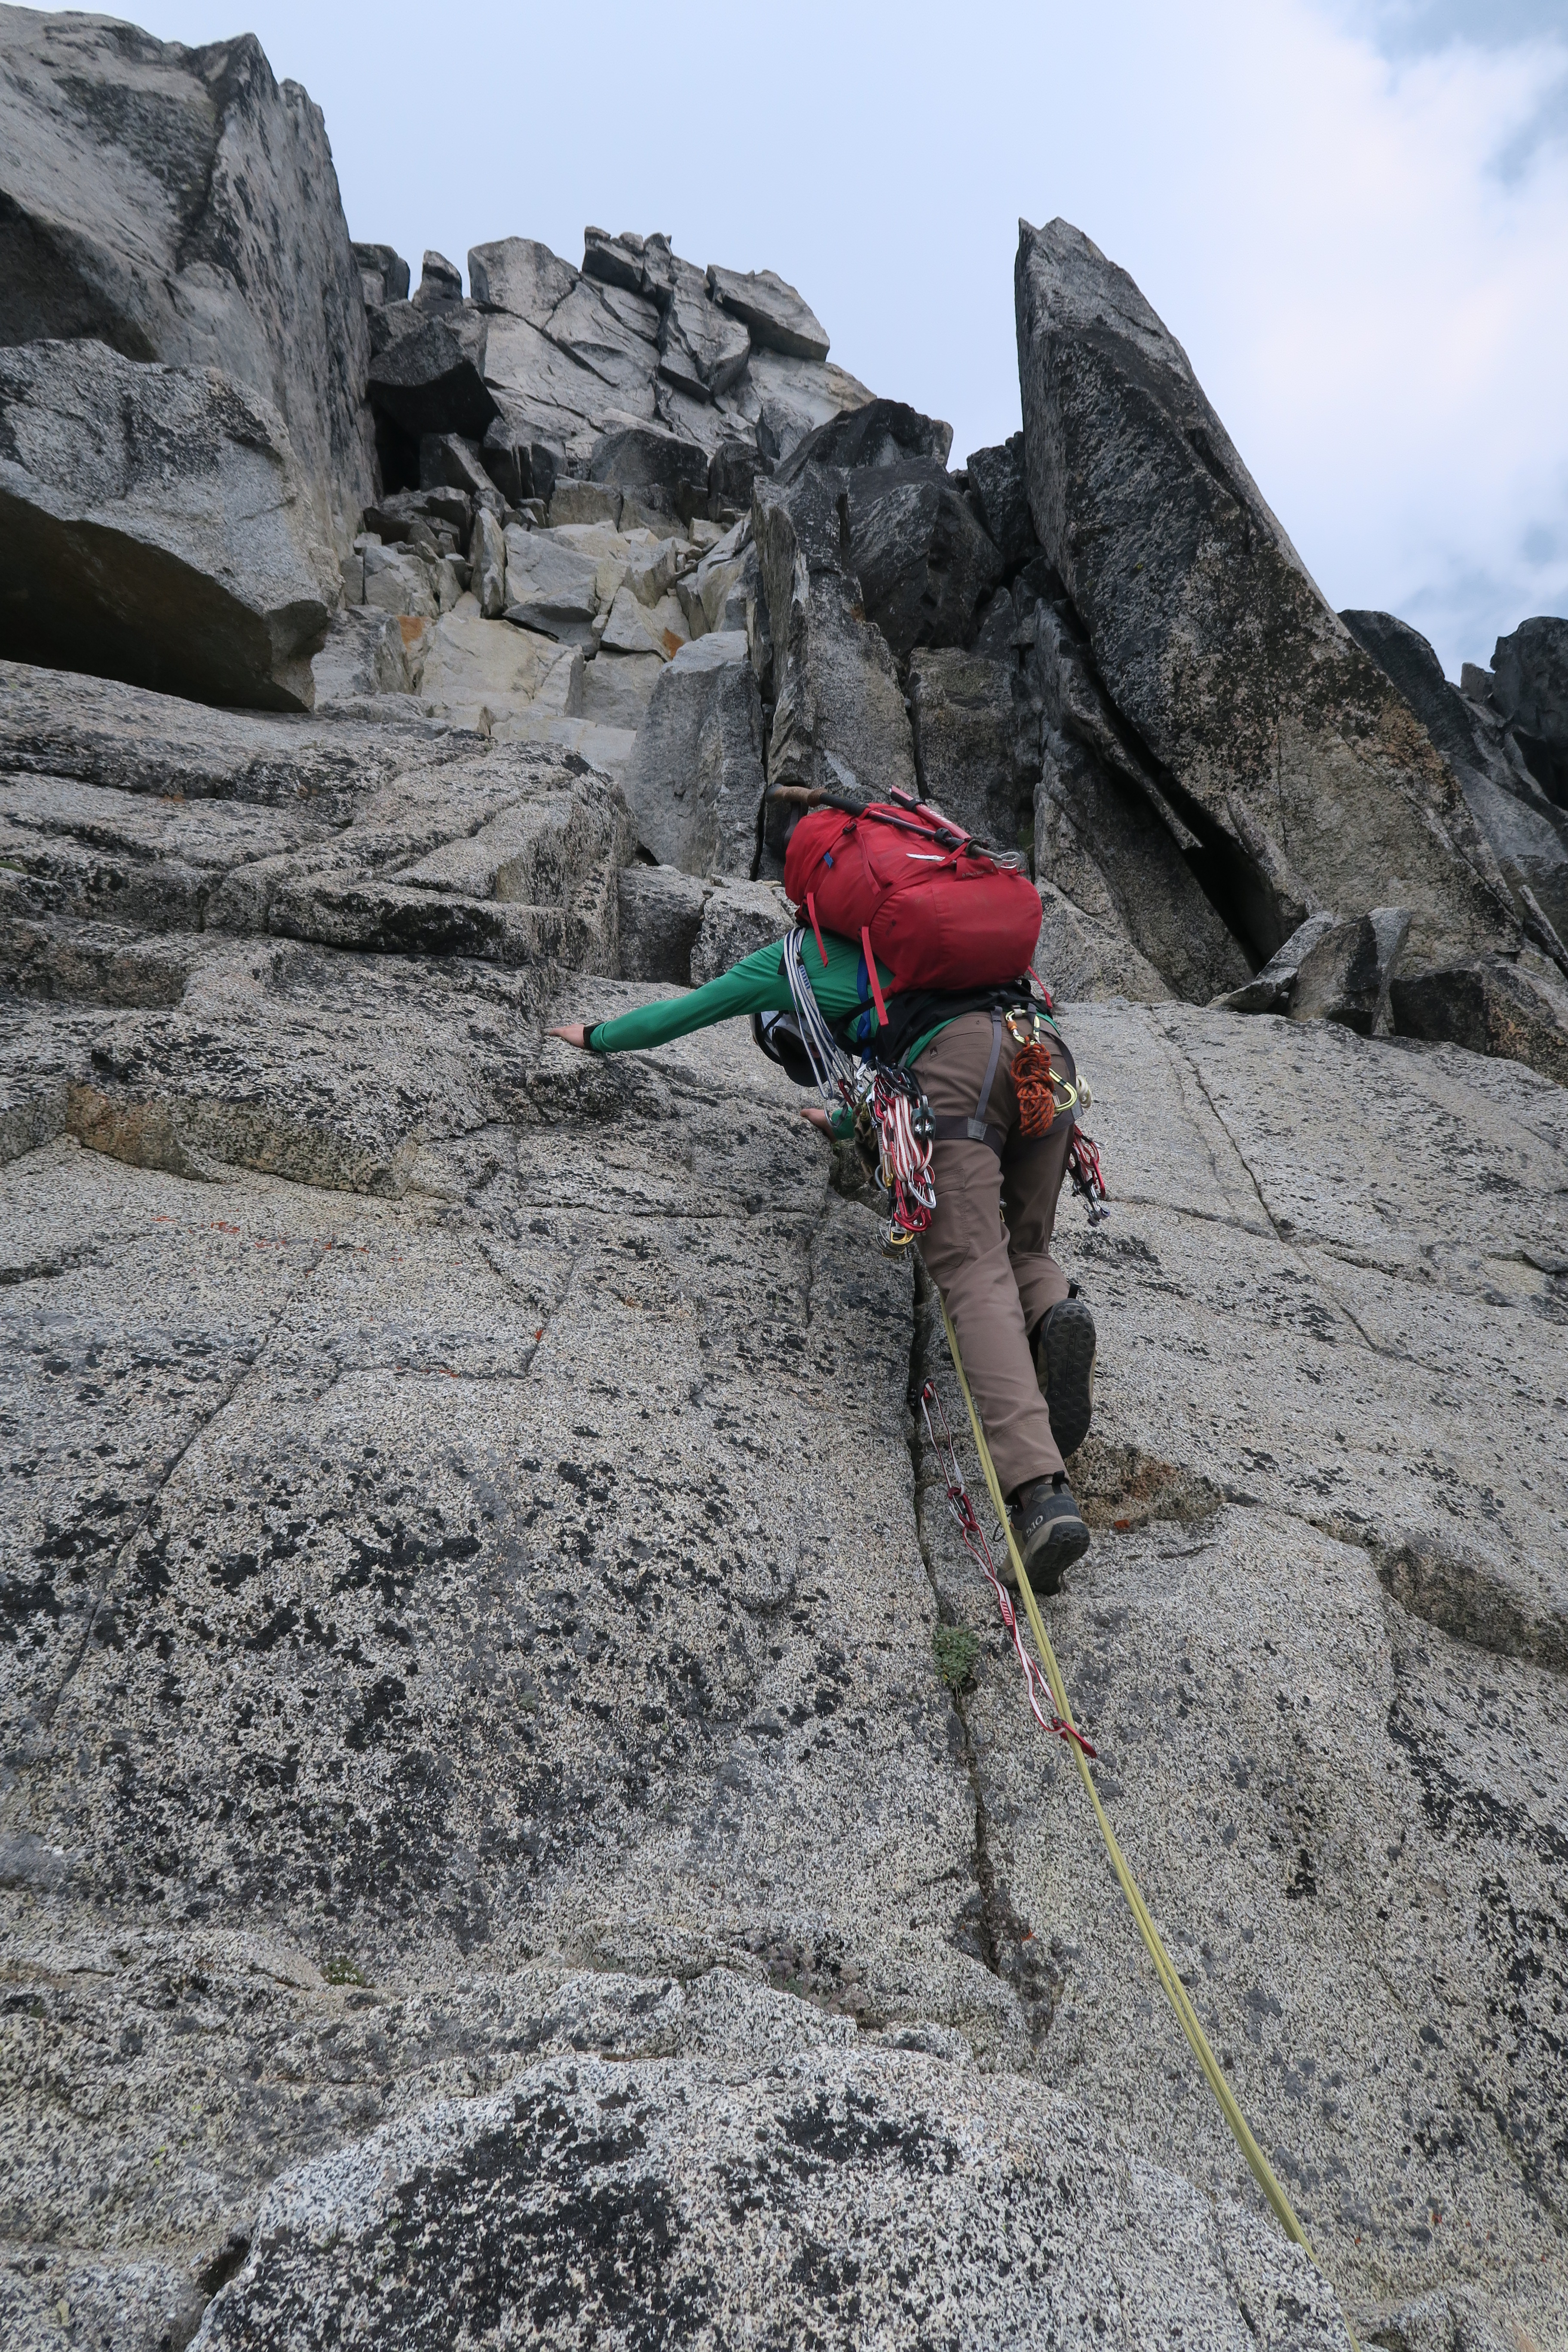
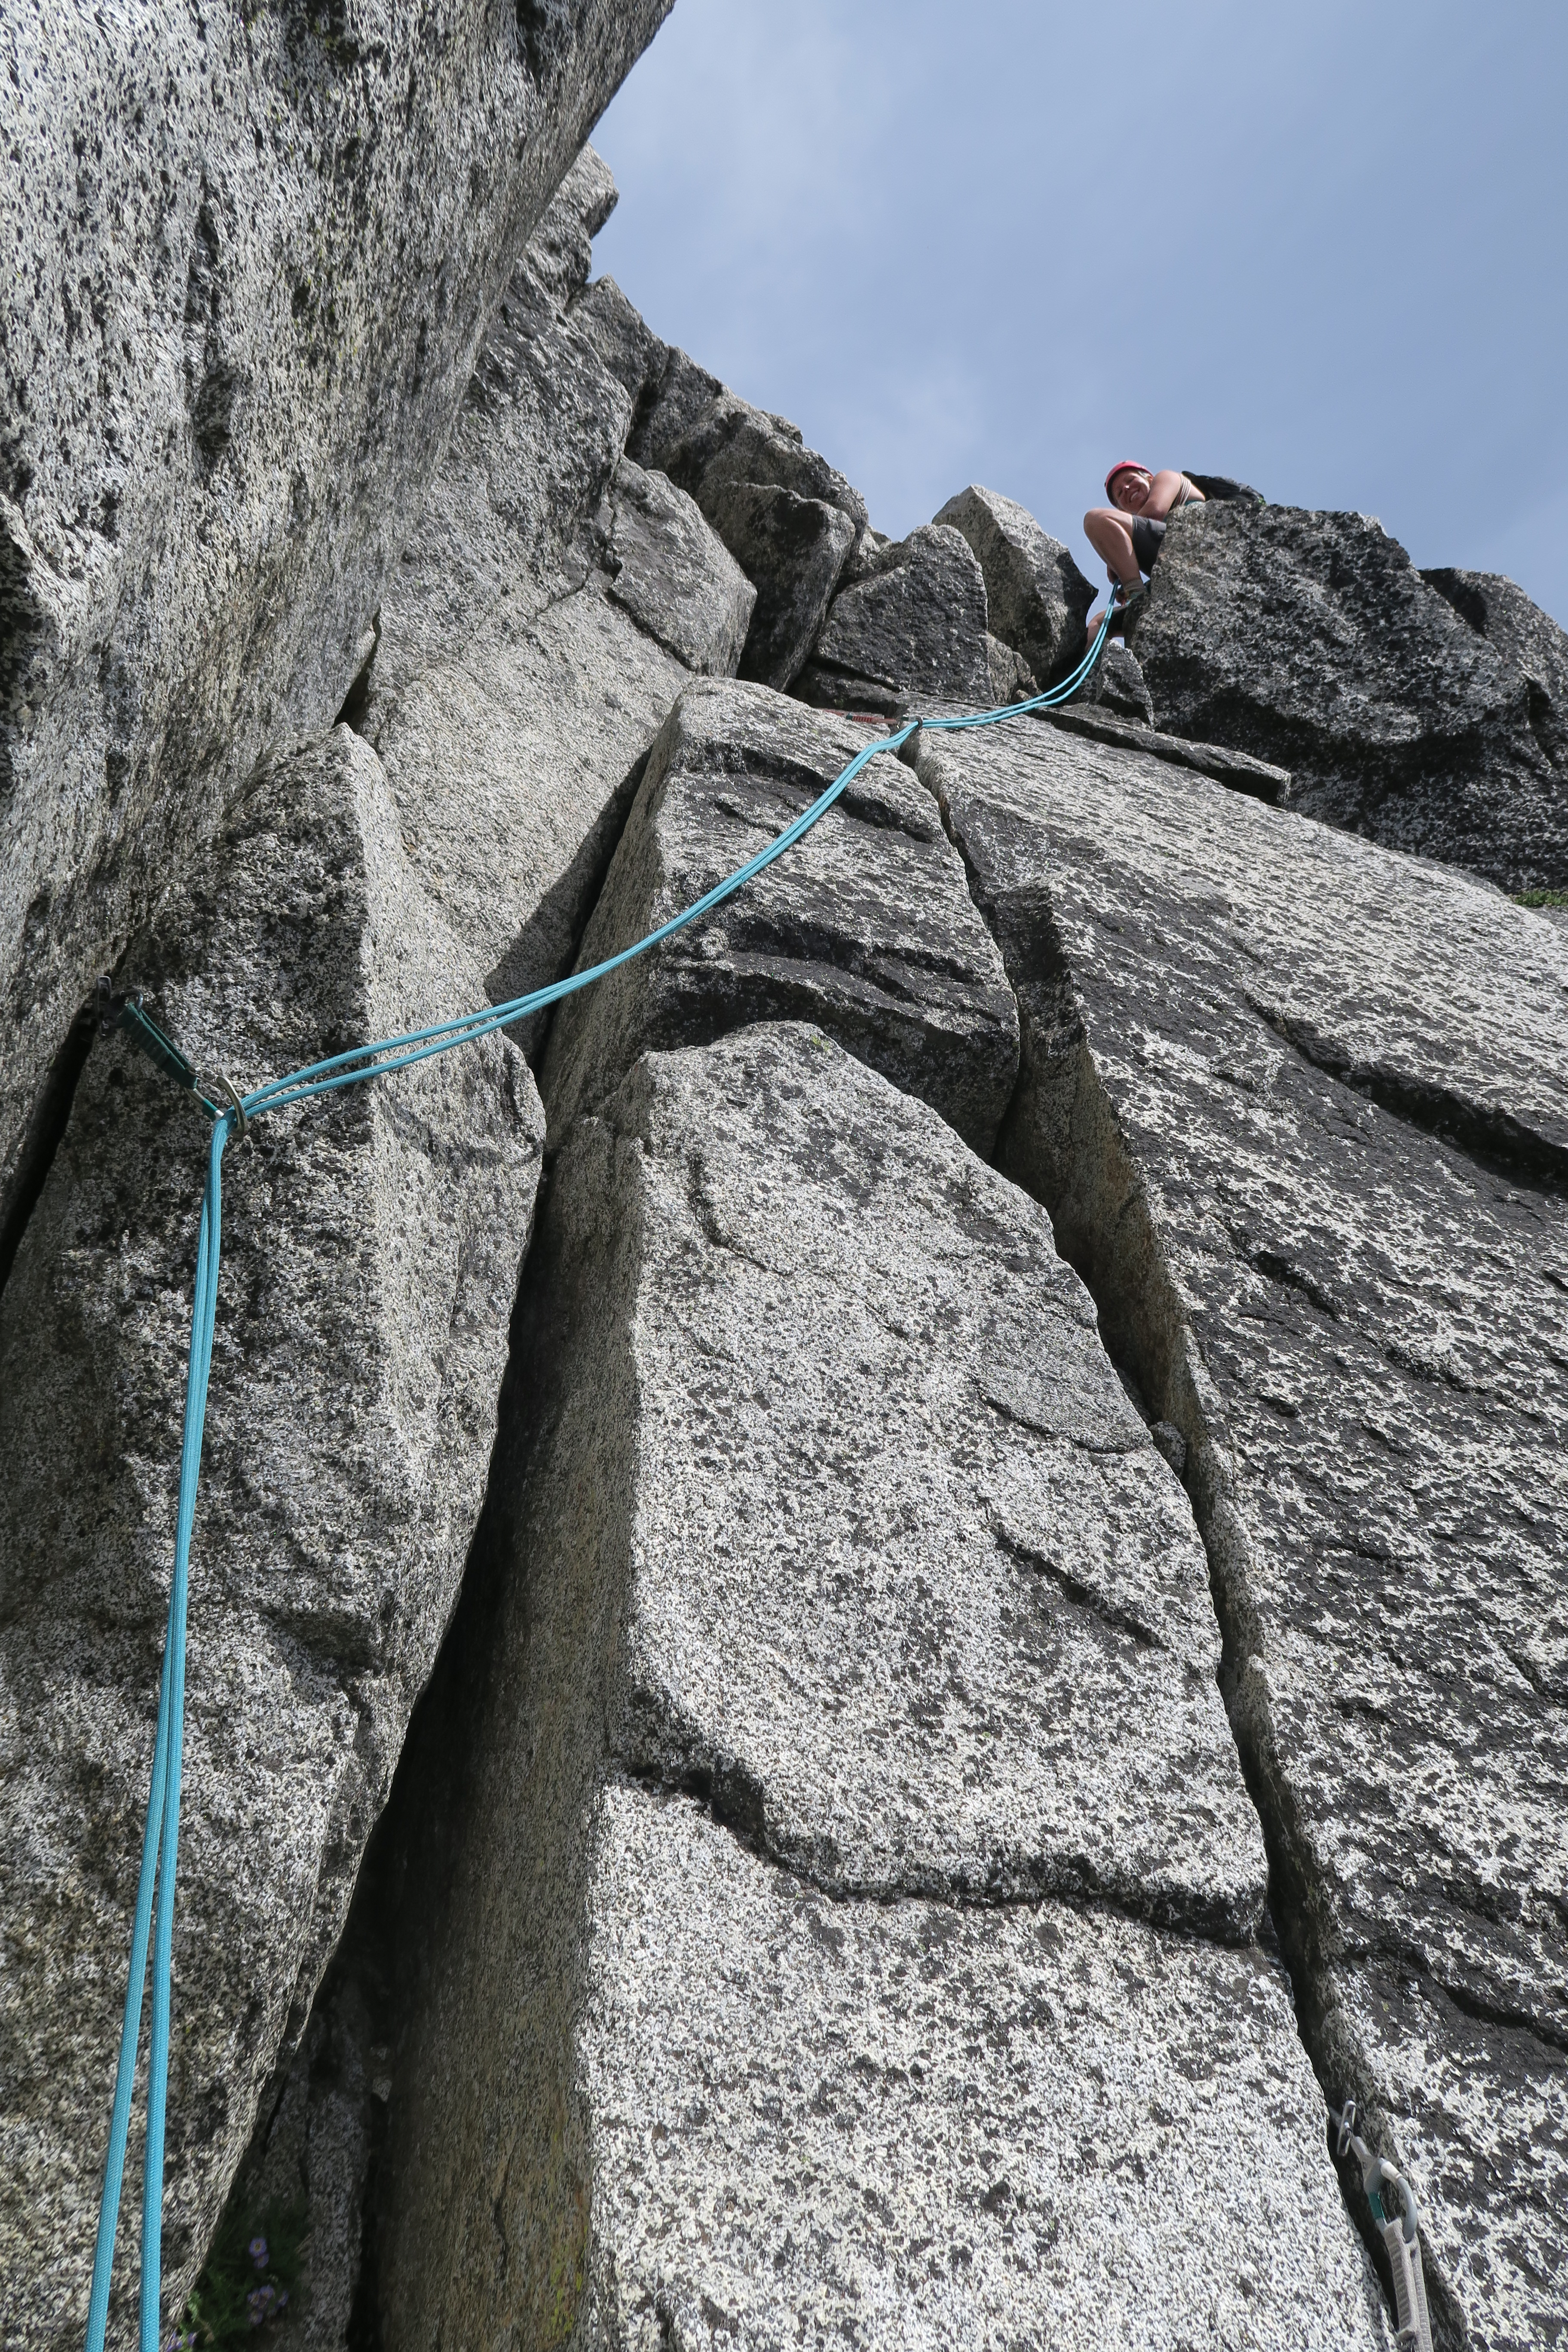
- Rock climbing portion is 5.6, 6 short pitches (sub-100-foot pitches) First 4 of those are kinda 4th class, last 2 pitches have some 5.6, perhaps 5.6+ 🙂
- Typically 2.5 hour drive from Seattle to trailhead.
- trailhead at 4300′ (The Esmeralda Trailhead, aka the Ingalls Lake TH)
- summit is at 9415′
- getting to the summit: gain cumulative 3800′ on trail, gain ~2000′ on some epic scrambling, then 6 short pitches of rock climbing to top out
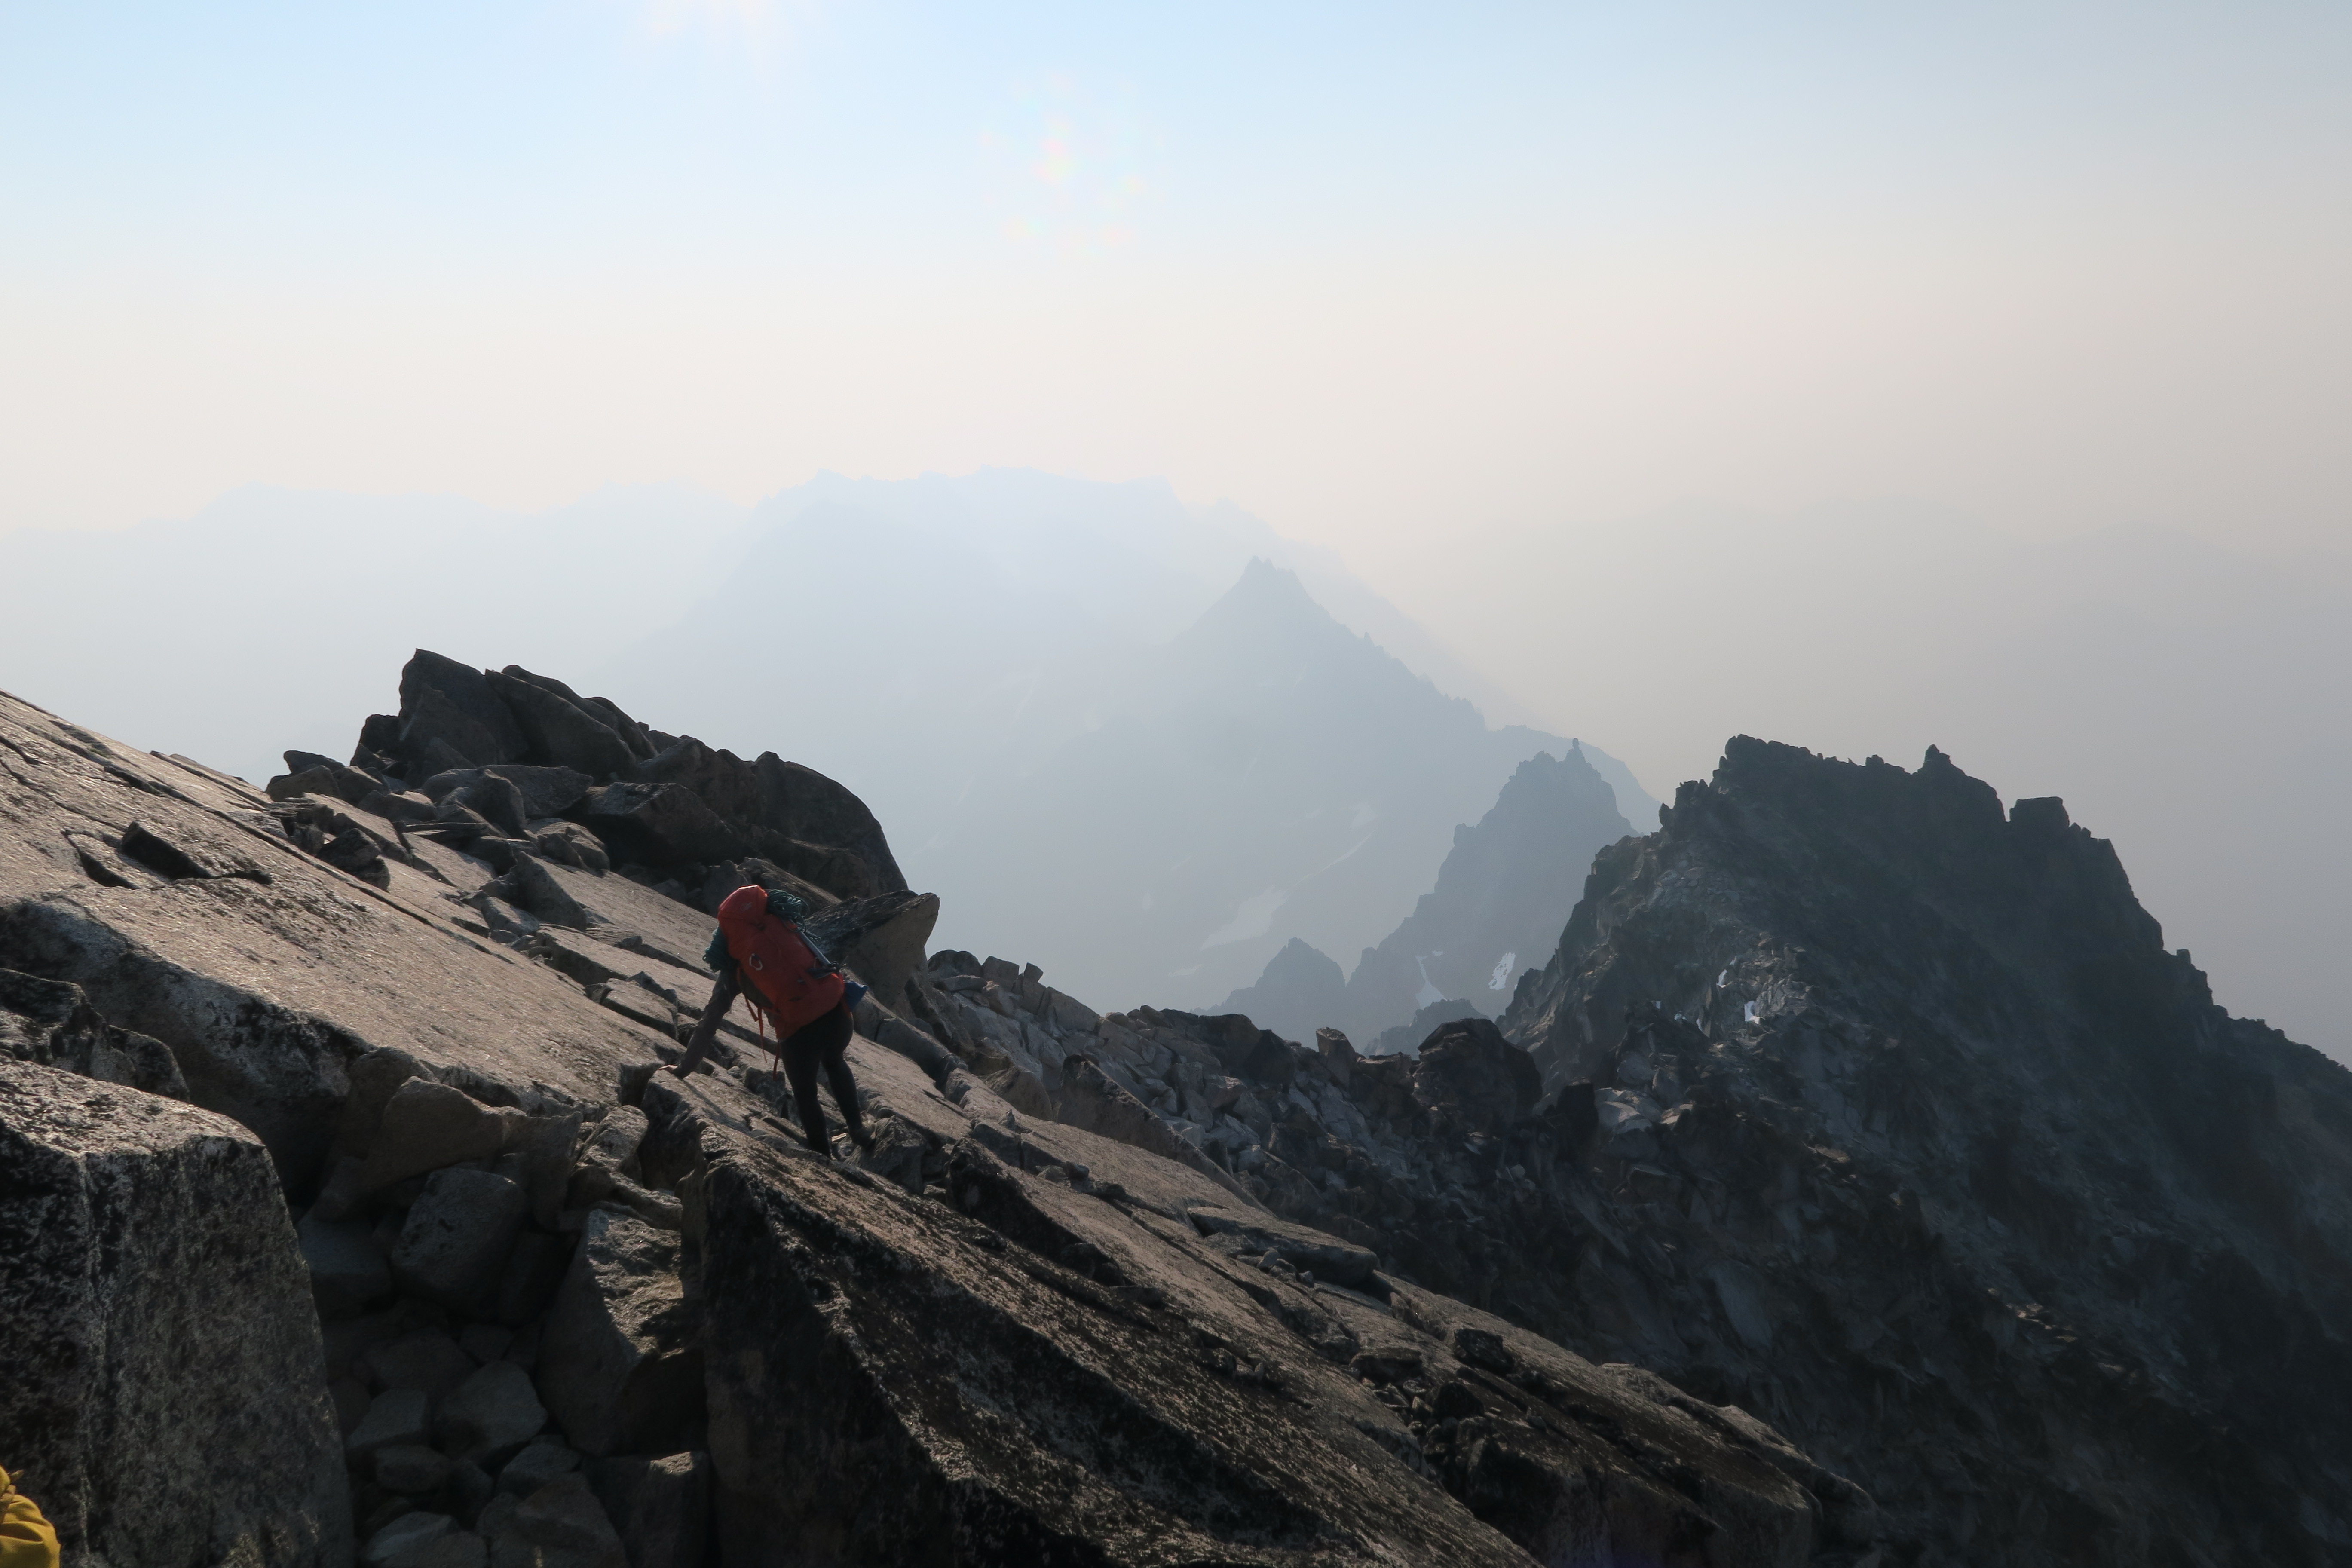
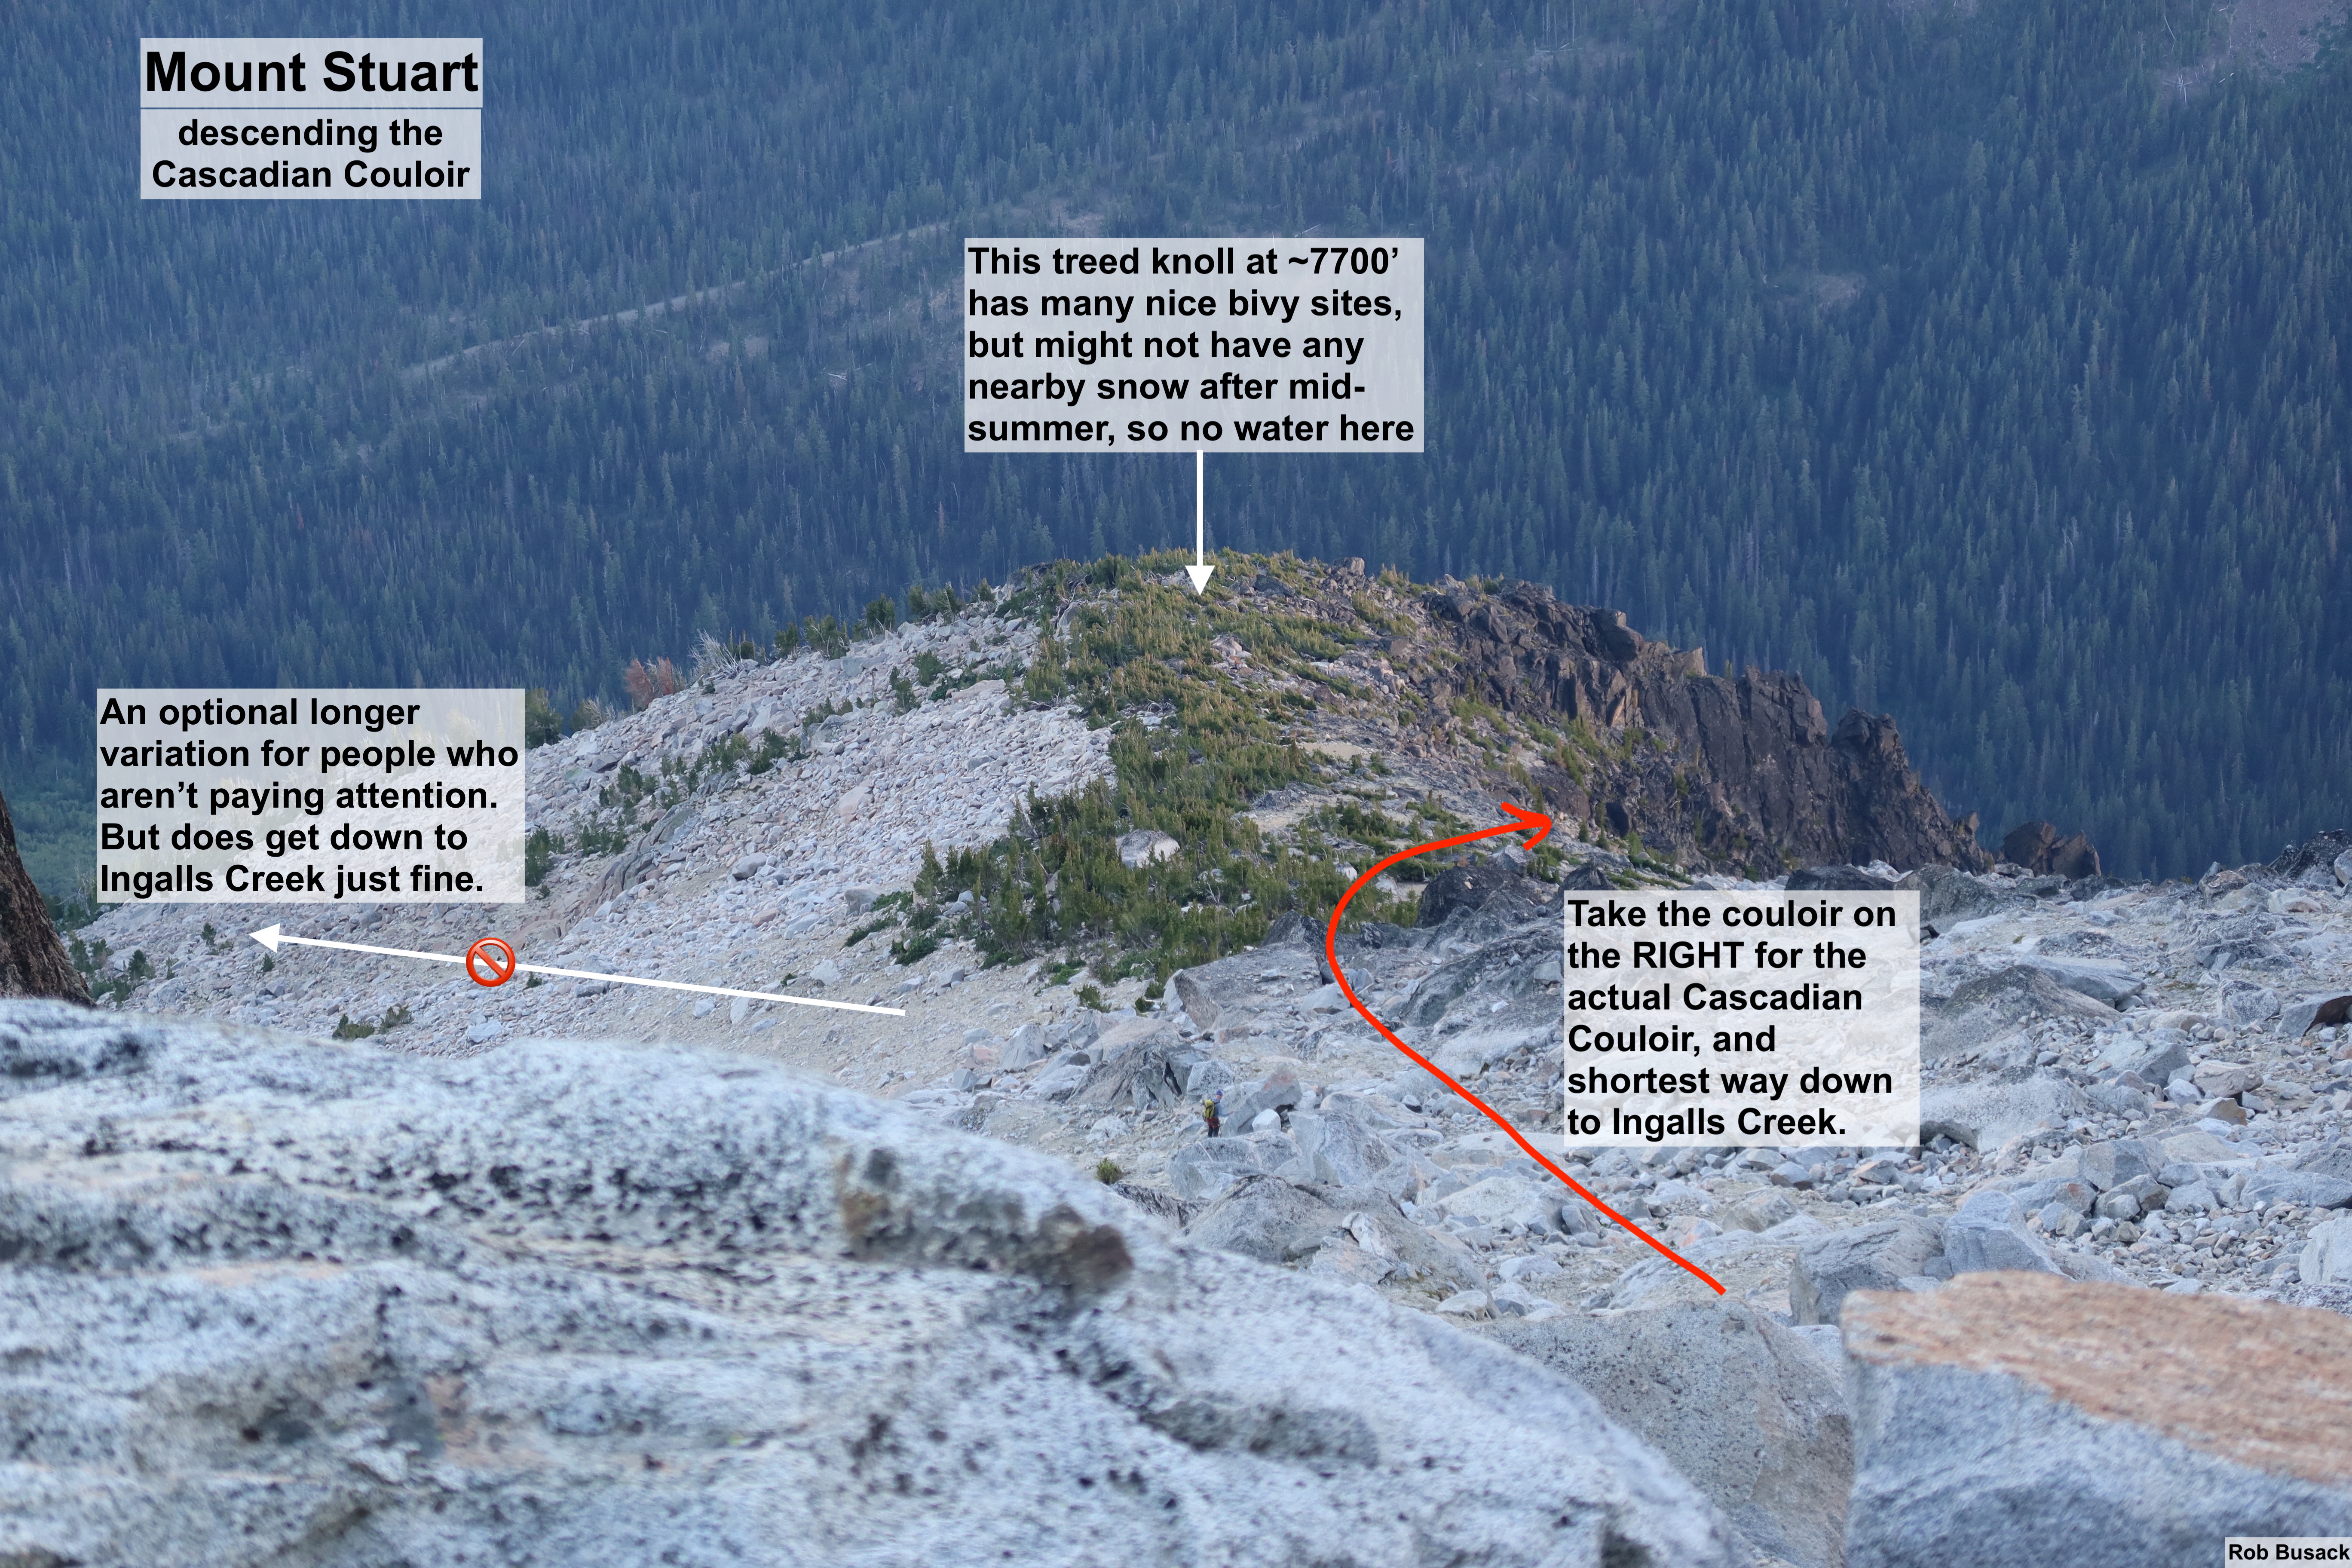
- From the summit back to the trailhead: The descent is a scramble-off, traversing scramble (3rd & 2nd class) from true-summit to false-summit, then descend ~4000′ down the Cascadian Couloir (yes, it’s rocky & sandy, but the CC is not as bad as many people say it is.) Back on trail, regain 1400′, then descend 2000′. (GPX track for Cascadian Couloir)
- Party size: I love doing this route as a party of 4 (two independent rope-teams of two, but can share a single stove, etc, and do a lot to support each other.) Any larger than 4 would be too many. Going as just a party of 2 is fine too. A party of 3 could work, but as parties of 3 typically do, it would require a little extra shenanigans during the roped rock climbing portion.
Gear
- Pack light for this one. I recommend keeping your pack weight of everything except water to <30lbs. (And for a rough pack size guideline: I find my Osprey Mutant 38-liter is the perfect size for this.)
- I suggest wearing approach shoes for the entire thing, car-to-car. Don’t bother with the weight of carrying separate rock climbing shoes. (Optionally, adding some small gaiters can help reduce the amount of sand and pebbles that get into your shoes while descending the Cascadian Couloir.)
- Only a 30-meter rope is needed. (If you need ideas, see the later section titled “Some options for a 30-meter rope”.)
- my typical rock climbing rack: single cams #0.3 to #2, a set of nuts, 6 single-slings, and 4 double-slings
- ice axe & crampons?? Typically, I time when I go for this to be around August, when enough snow has melted that I don’t have to carry either. Sometimes in early-August late-July, a little snow still exists, and I find a trekking pole is enough to give me confidence crossing it. If there’s more snow than that, bring your smallest/shortest aluminum ice axe. If there’s even more snow than that, well, then you’re going earlier season than I’ve ever gone on the West Ridge. Here’s some options for finding out how much snow is there:
- Check out recent trip reports on WTA for Ingalls Lake, or maybe Longs Pass. Hikers like to take pictures of Stuart, so you can probably get a pretty recent picture of the route to see how much snow is still there.
- Consider getting a CalTopo “Pro” subscription, which gives you access to the “Sentinel Weekly Satellite” map layer, which I find is a great way to see how much snow exists somewhere before I go.
- Or just ask around somewhere where you can get beta from other climbers, like a Facebook group.
- water: Have the capacity to carry 3 or 4 liters, since you’ll want to fill up and carry a lot from Ingalls Lake, as you might not have access to water again until Ingalls Creek. You’ll need a way to filter or treat what you’re getting from both those places. A luxury could be a single shared water filter for your group. If you really want to save time & weight, going with only a chemical treatment option (like iodine tablets) has two big advantages: less weight, and the length of break-time required to fill water for everyone in your group is shorter.
- stove: I recommend just one lightweight shared stove, even if you have a group of 4. Maybe the stove will see some use melting snow to refill your water supply somewhere while high up on the route, but often the stove’s only use is to boil a little water for dinner’s dehydrated meal packs. (Or if you’re brutally spartan, you could pack all no-cook, ready-to-eat food items for dinner as well so that you don’t even have to pack a stove. Just make sure you’re really carrying (and consuming!) enough calories. And even then, I’m not sure the net weight savings is all that much.)
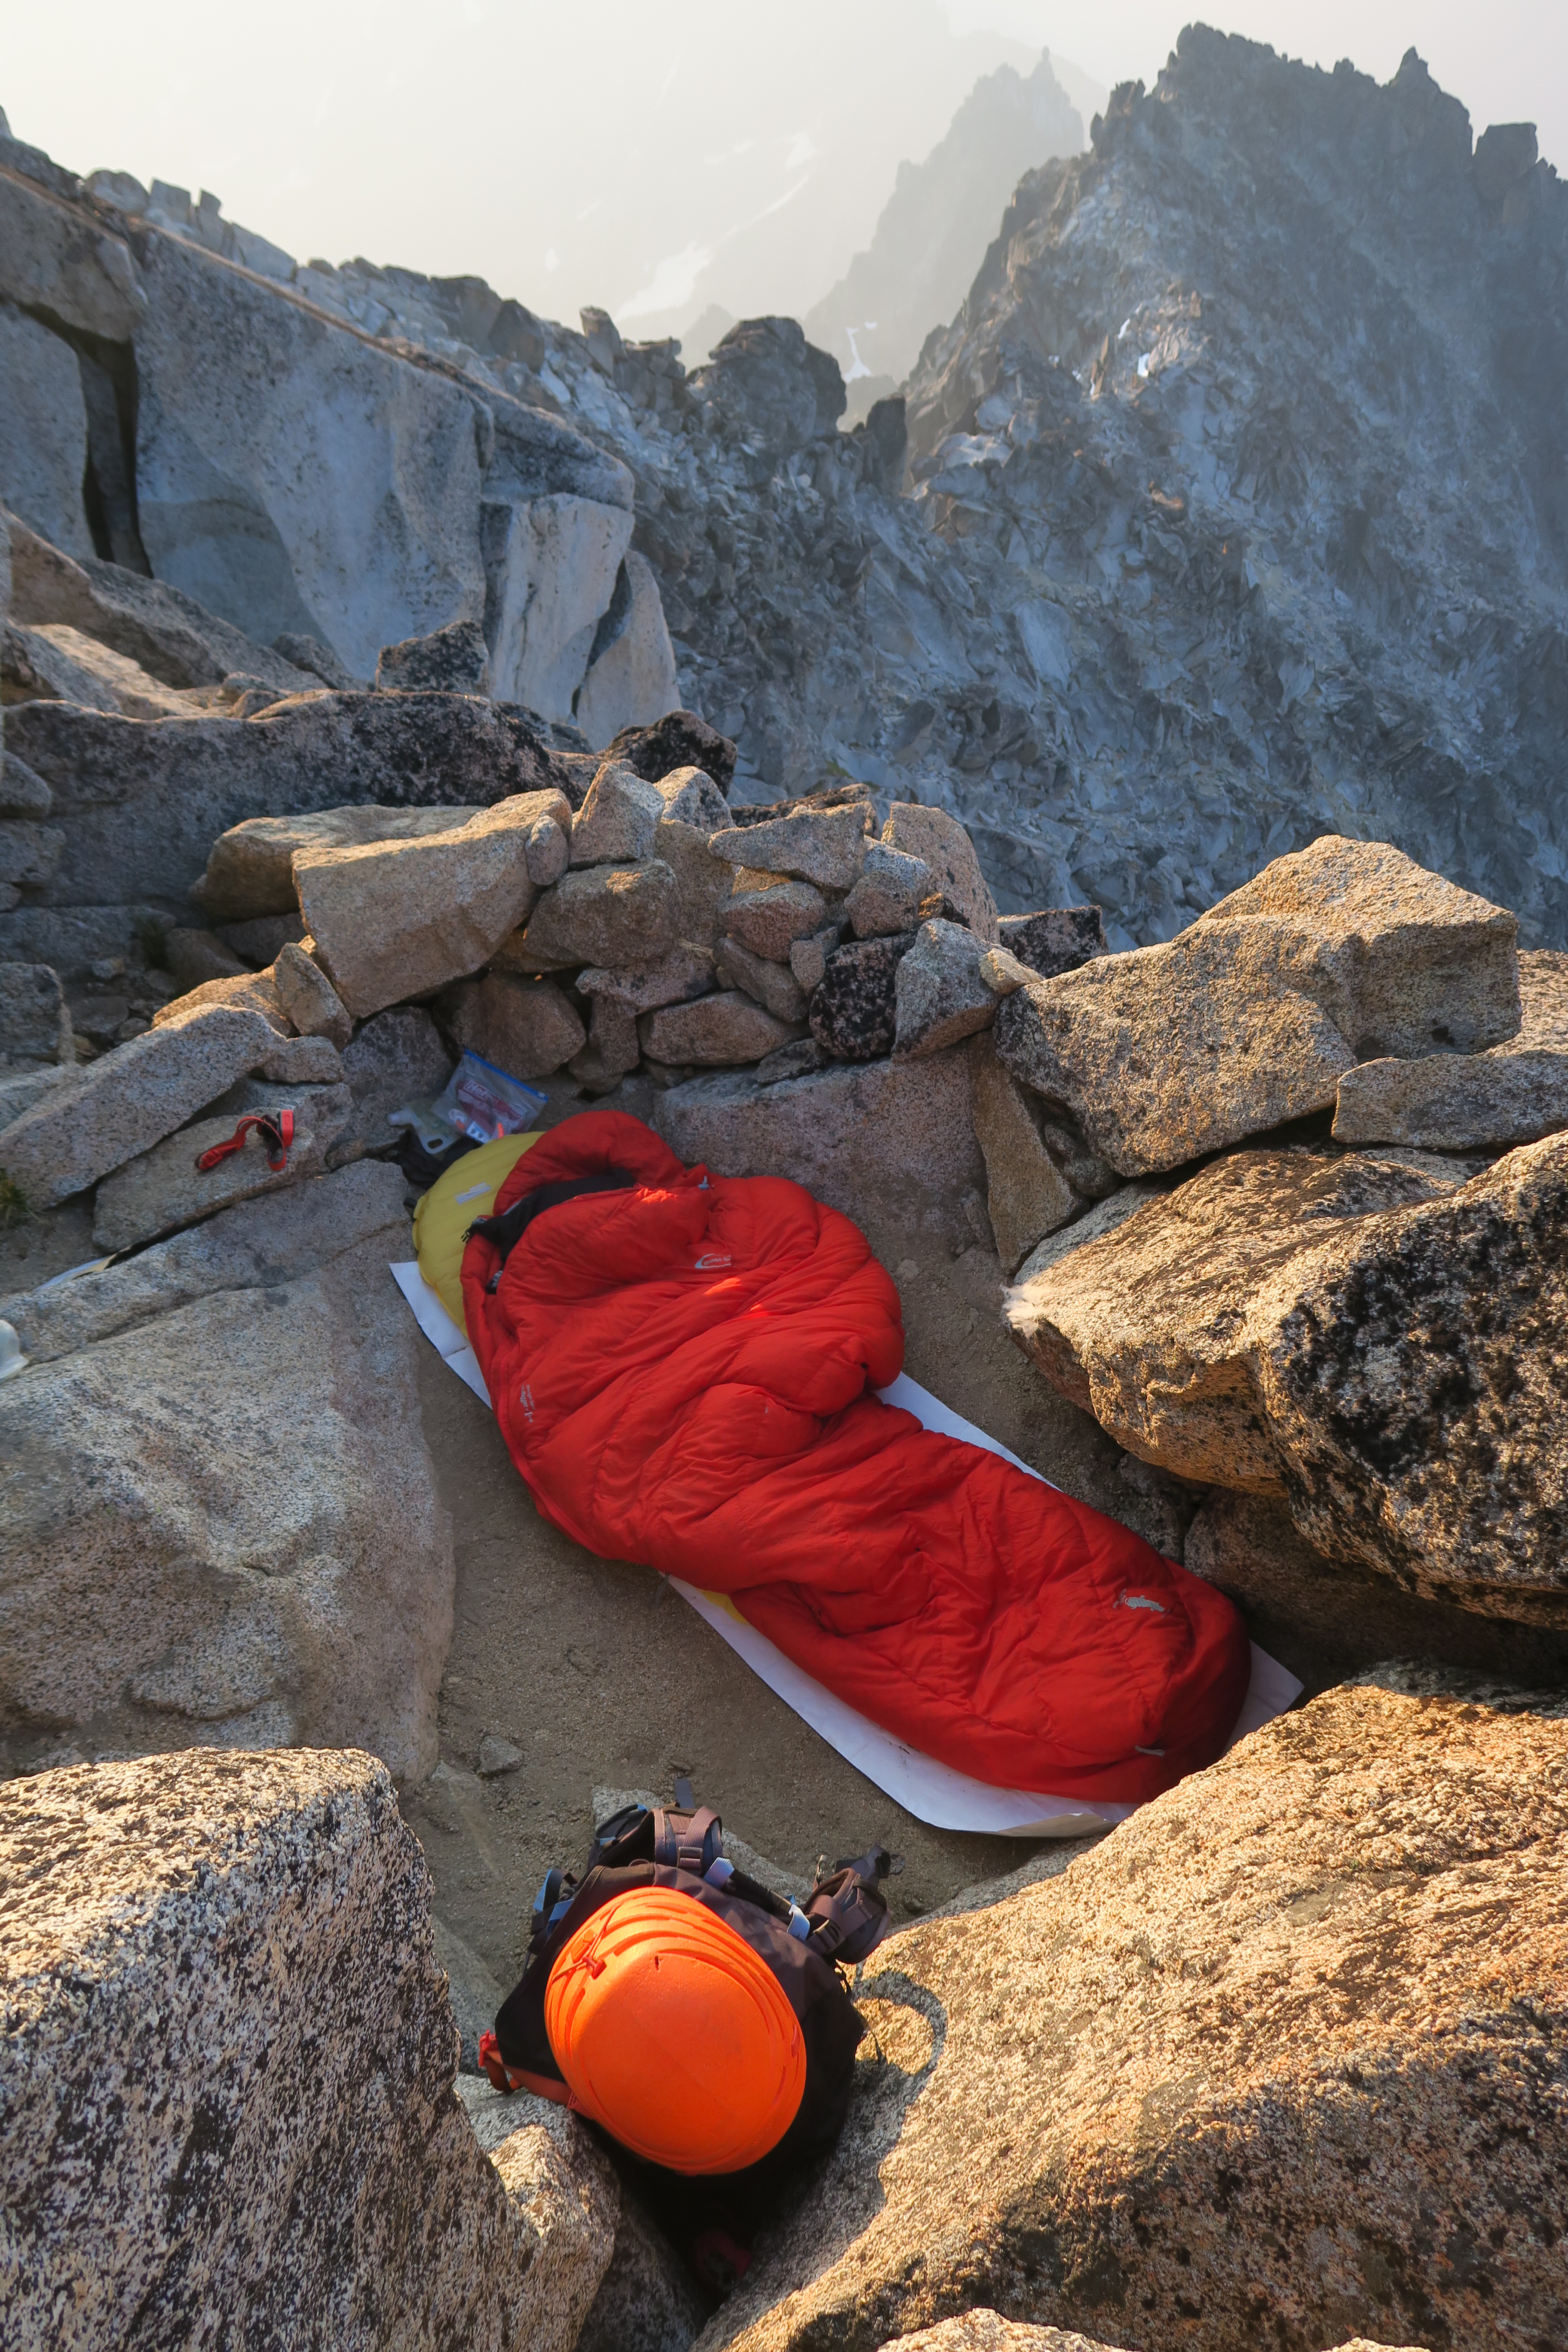
- Gear for sleeping: I try to go as minimal as possible. I’ve been happy with a 40°F quilt (14oz), a three-quarter-length pad (47″ long, supports my head to my butt, but there’s nothing under my legs or feet. Weighs 8oz) and a 6’x2′ rectangle of tyvek (weighs <3oz) that I use as a ground-cloth to prevent my bag & pad from being directly on dusty ground or sharply-edged small rocks. Obviously, slightly heavier gear is normal and totally fine, you don’t need to go out and buy new specialty ultralight stuff for this. This just gives you an idea of how light you could go.
- Shelter: Consider forgoing a tent completely. I often chose to go on an August weekend where there’s a zero-percent chance of rain both days. So far I’ve always been fine without any shelter: just out in the open with my sleeping bag & pad, on a rectangle of tyvek for a ground cloth. But check the weather carefully: the chance of precip, the overnight-low temperatures, the possible wind speeds. If there’s a non-zero chance of rain, or you think you might spend the night on the summit in any wind over 10mph, then you might want at least a little more shelter than just an exposed sleeping bag on a ground cloth. An ultralight sil-nylon tarp is one option. An ultralight bivy bag is another option, perhaps a better one for the scattered small 1-person bivy spaces. Ideally a bivy bag in the ballpark of 7 ounces. I find that I prefer bivies with a width of 36″ in order to fit my sleeping-pad inside of it, both to protect it and so my quilt-attachment works. And of course with any bivy: keep your face outside, so you’re not breathing inside of it, otherwise you’ll create tons of condensation. Here’s some ideas:
- a 7oz tyvek one on Amazon
- I’ve had success taking a SOL Escape Lite Bivvy and modifying it with some tyvek to add width, similar to this guy’s video. I attached my tyvek using double-sided carpet tape, and the resulting bivy is 7.5oz (so my modification added 2oz beyond the originally advertised 5.5oz)
- the Katabatic Gear Bristlecone bivy is spacious, great on weight (7.3oz), a bit pricy ($135), and although it’s definitely not a waterproof shelter, it would fend off wind or a light sprinkle.
- although I haven’t tried this one, this MSR E-Bivy looks really good on paper: 7oz, 36 inches wide at shoulders, 88 inches long.
- food storage: If you make it down to Ingalls Creek to camp, you should definitely hang a bear bag, so it’s worth bringing 50′ of cord for that possibility. If you camp higher where a proper hang isn’t possible, a small Ursack is probably a good idea. Just the critter-resistant Ursack would be fine. I can’t imagine any bears going high up on Stuart, but there definitely have been plenty of reports of rodents chewing on things in the night at all elevations, including the summit.
- blue bags: If you’re up high in rocky terrain and you have to go #2, you should definitely bag it and pack out all of your waste. Lower, down in the vegetation of Ingalls Creek valley, it is okay to bury human waste, but it is still a fairly high-use area, so be sure you go really far (200+ ft) away from both the creek and any trails before digging your cat-hole. And even then, consider packing out just the used toilet paper in your blue bag, as toilet paper doesn’t decompose as quickly.
Some options for a 30-meter rope
Here’s a few different ropes I’ve used on this route over the years, all of which worked very well:
- a 35-meter “gym length” single-rated rope. (It could have been 30-meters and worked fine, 35-meters is just what I already had.) I have a 35-meter 8.7mm Mammut Serenity, which weighs 4.5lbs
- a 60-meter twin rope, folded in half, so you’re leading on a 30-meter twin rope system. To set this up for climbing, have one climber take both of the ends of the rope, and tie into both of them, each with its own re-woven figure-8 knot. The other climber takes the middle of the rope, ties a figure-8 on-a-bight, and uses two opposite-and-opposed lockers to attach that bight to their belay loops. The resulting setup looks like this, and you now have 30-meters of two strands between you, a 30-meter twin rope system. With a twin-rope system, you simply treat the two strands as if they were one: always clip both strands into the same carabiner on pro. The belayer can use any two-slot belay device, but otherwise treat both strands as if they were one when giving or taking slack. For example, one 60m 7.9mm Black Diamond twin/half rope weighs 5.5lbs. Don’t forget to pack 2 extra lockers for the rope connection.
- You could get away with breaking some “rules” a bit, taking a single-strand of a skinny rope rated as a “half-rope”, and pretending it’s rated as a “single-rope,” just using it as a single-strand. For example, I have a 40-meter 8.4mm Sterling Evolution Duetto, which weighs 4.0lbs, and I’ve historically used it as a glacier or scramble rope. It also worked perfectly as a rope for the climbing portion of the West Ridge for me, but it depends on your personal comfort-level here, you should understand exactly what “rules” are being broken. It’s not a “single-rated” rope, it is not designed to take the kind of big whippers that could happen in more vertical rock climbing. Single-rated ropes pass a certification that guarantees that they’ll survive 5+ near-worst-case-scenario vertical falls in a row with the same spot in the rope being loaded over a carabiner every time, with an 80-kilogram falling test mass. Half-rope certification is a similar test, still testing one-strand, but with a 55-kilogram test mass. Twin-rope certification is a similar test, but uses two strands together to catch the 80-kilogram test mass. So half-ropes do get tested with a single strand, but aren’t expected to hold as much. On mostly scrambly less-than-vertical alpine rock, like the West Ridge of Stuart, falls are more tumbly, less acceleration than a vertical free fall, so the half-rope’s lesser certification is probably enough. Just know that “probably” is pretty hand-wavy here. Also, looking at the forces in the falls is probably secondary here anyway. What’s far more important is: how likely is it your rope could be cut by a sharp rock? To mitigate rope-cutting-risk, be careful what diameter you choose, and don’t go too skinny. The skinnier the rope, the less material in there that would have to be damaged before a cut goes all the way through. I have no idea how skinny is “too skinny”, but FWIW, I felt good about the 8.4mm diameter that I had, but personally I wouldn’t go much skinnier when using a single strand at a time.
Big Picture Schedule
If this is your first technical route on Stuart (i.e. if you have not yet been to the top of Stuart, or if you have been up, but only via the Cascadian Couloir so far) then I say (half-joking, but also half-serious) that you only have two options for your schedule:
1) You can do it with a planned bivy. Or…
2) You can do it with an unplanned bivy. 🙃
The mountain is really big and time-consuming, in ways that people often don’t fully appreciate until they’ve done it at least once. Yes, there are many people out there who do it in a day, with light packs, without the burden of carrying overnight gear. If this is your first technical route on Stuart, then you are probably not one of those people (at least not yet.) I strongly recommend accepting that you are going to spend a night out there somewhere before you make it back to where you started, and then planning & packing appropriately for that from the beginning. Carry some light overnight gear up and over with you.
For a typical weekend, the high-level schedule I recommend is:
- Friday night after work, drive out somewhere close to the trailhead, and car-camp. The Esmeralda/Ingalls trailhead parking lot itself works if you plan on sleeping entirely within your car, but does not really have space if plan on setting up a tent. If you want to use a tent, there are quite a few pull-offs and campgrounds earlier on the Teanaway River Rd that would be better.
- Saturday: make an alpine start, in the ballpark of hiking by 3am, stop at the north end of Ingalls Lake to collect a ton of water to carry (e.g. 3 or 4 liters per person), then go all the way for the summit of Stuart by Saturday afternoon, perhaps start on the descent, and adjust where you intend to camp based on what time you summit. Here are some camp options, starting with making it the furtherest, then working backwards:
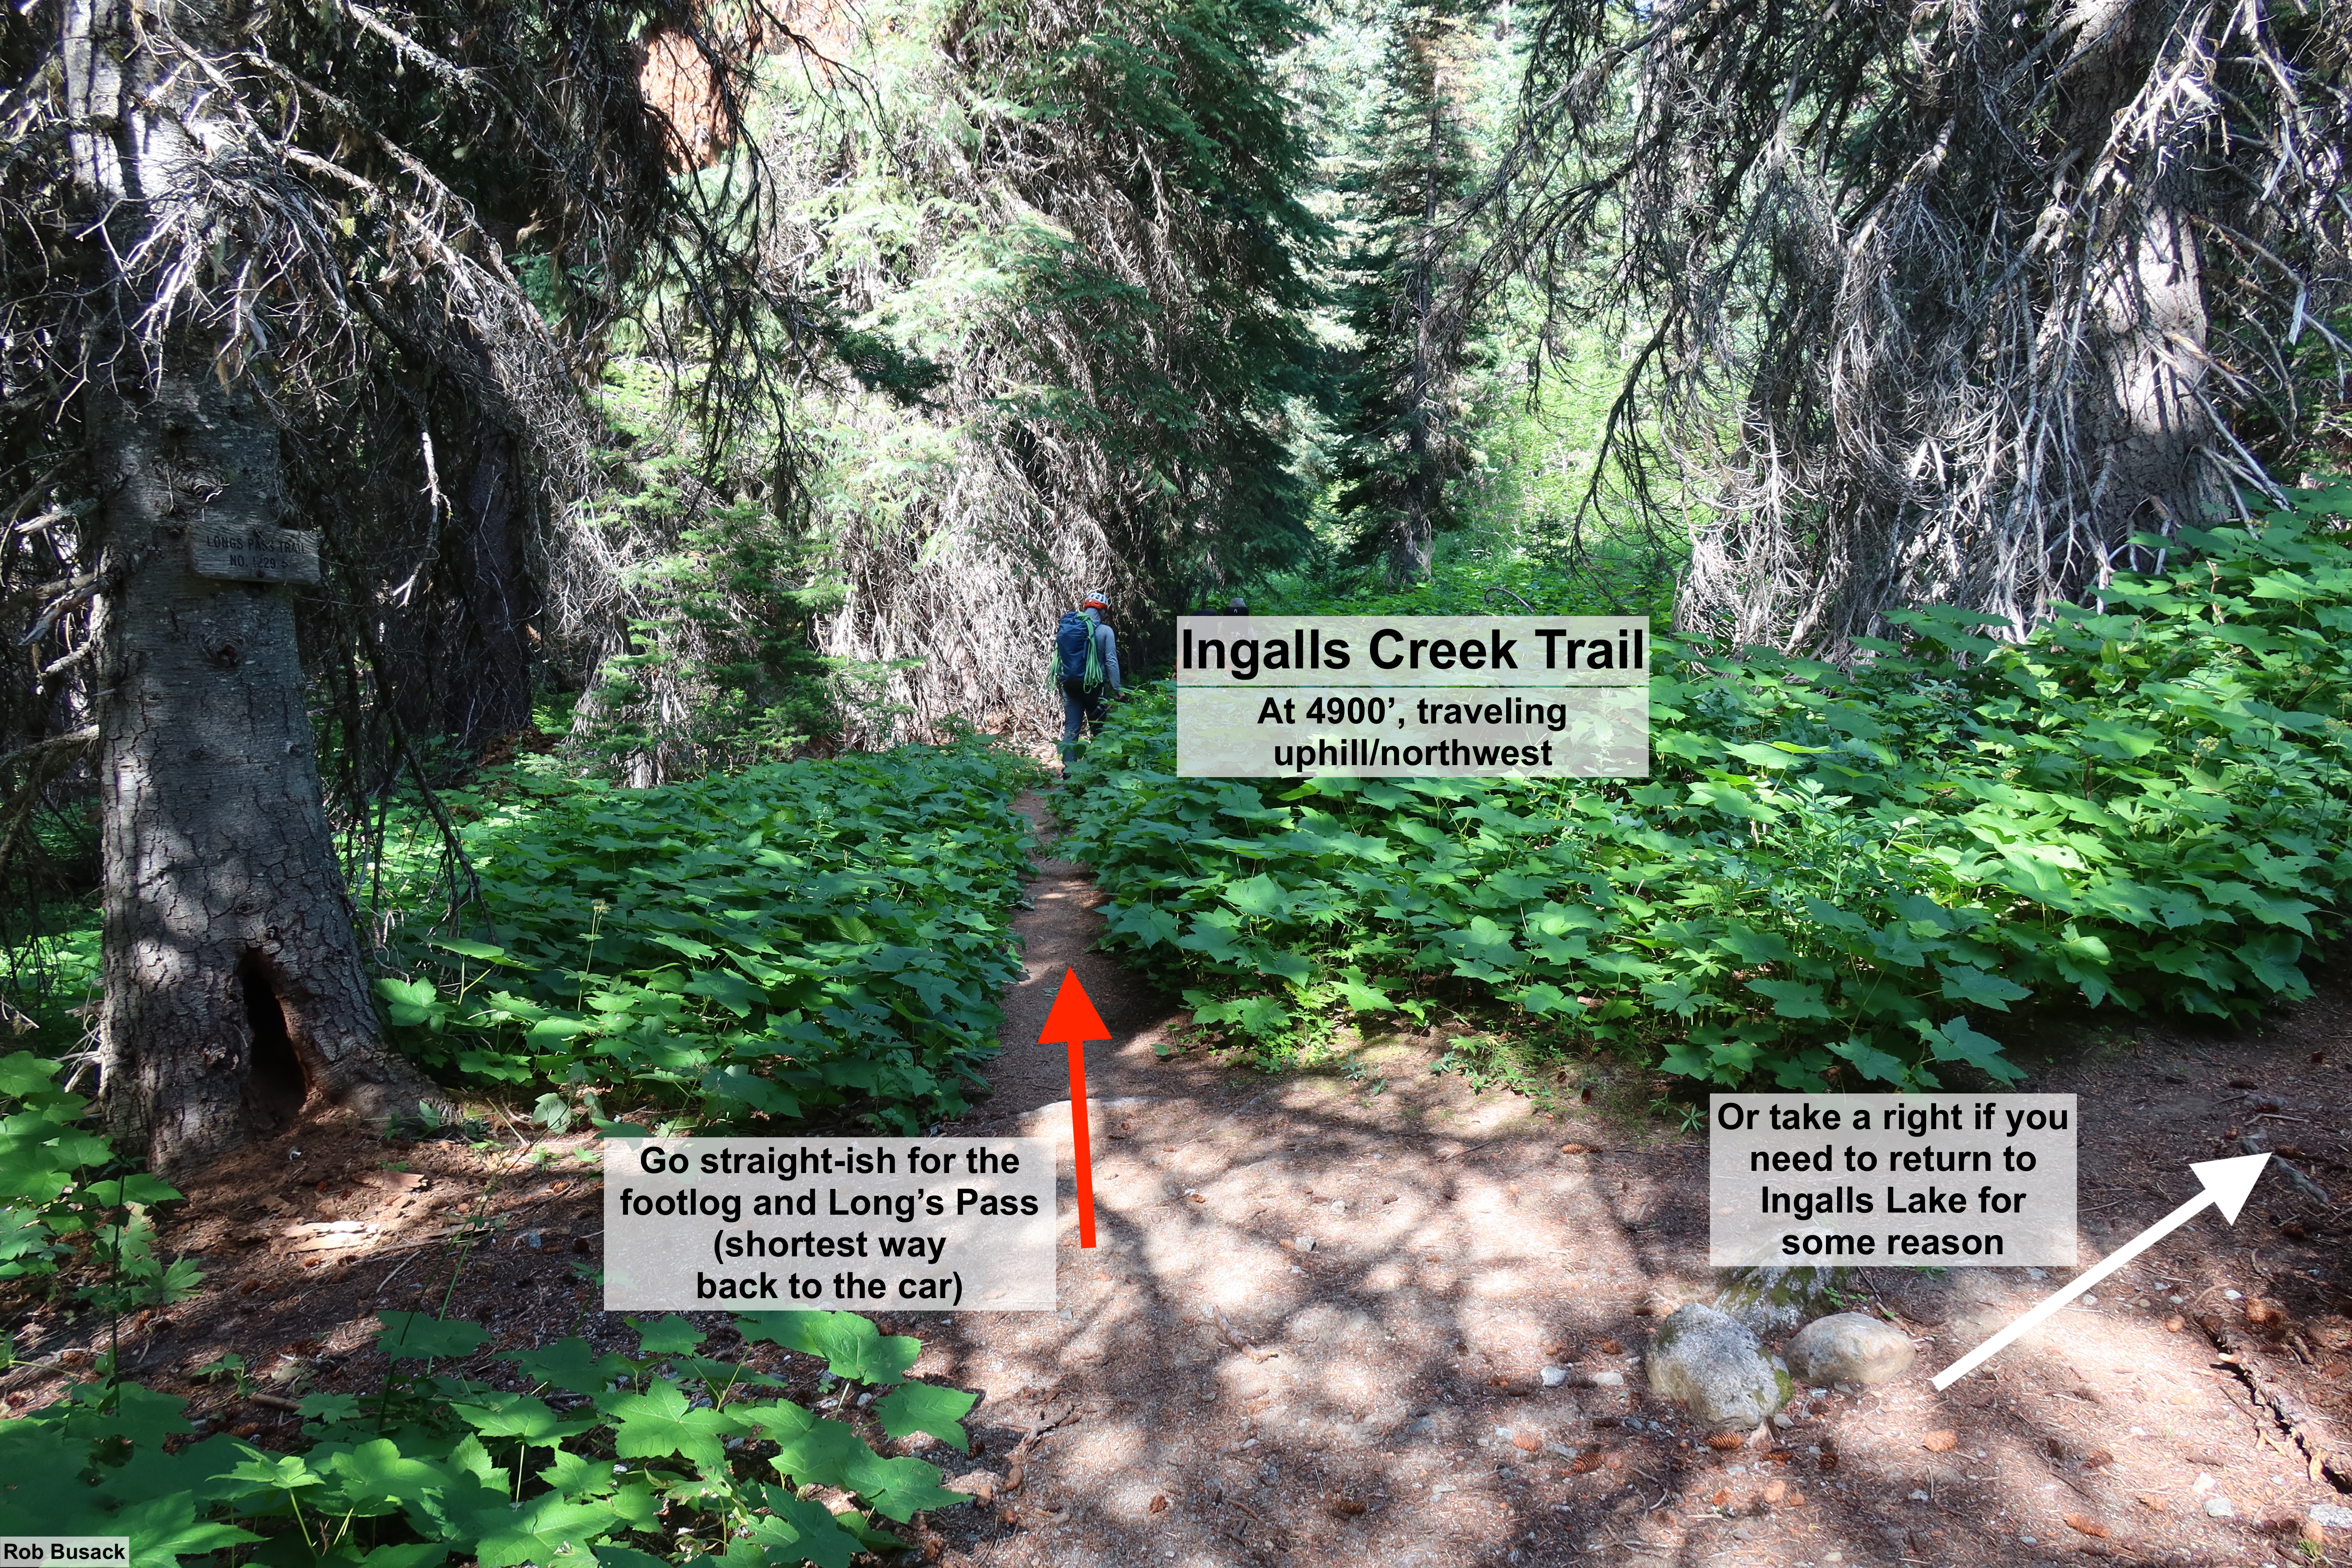
- Ingalls Creek campsites: If everything goes smoothly and you stay on-or ahead-of schedule all day, you can make it all the way down the Cascadian Couloir to Ingalls Creek, at 4800′, at a reasonable hour Saturday night and camp there. Large & plentiful campsites exist in the forest near the creek. It’s a comfortably sheltered place to be and the creek guarantees water. (Possibly your first water refill since Ingalls Lake before the climb.) Some sites are straight south of the Cascadian Couloir at 47.45486, -120.90529, and a few more are closer to the footlog a quarter mile upstream. (Footlog is at 47.45628, -120.91103)
- or Cascadian Couloir 7700′ bivy sites: If you’re not going to make it down all the way to the creek, your next best option is about half way down the Cascadian Couloir. Around 7700′, where the couloir splits, there’s a relatively flat knoll between the two couloir branches with a small forest of short (6′-15′) trees. Amongst those trees, plenty of bivy sites have been established, some even big enough for two-person tents (or for a tarp to cover 2 people.) However, there is no running water near here. There may be a snowpatch in the couloir to the east that you can collect from and melt, but it may disappear entirely by the end of July, leaving you with only whatever water you arrived with. (47.46761, -120.89824)
- or bivy on the summit itself! Or anywhere between the true summit and the false summit. Numerous ledges with rock rings have been established, but many of them are quite small. Most have space for just one person each, but it’s easy to find quite a few in the same general area so that partners are not far away, you just won’t be close enough to share a shelter. Snowpatches a few hundred feet south of the true-summit manage to hang on a bit longer through summer, likely until the end of August, and may even provide a trickle of liquid water running off their bottom end, likely a 10-minute scramble away from your bivy site.
- or prior to the West Ridge Notch. A few bivy sites exist near 47.47561, -120.90570, which is a bit before the rock climbing pitches you rope up for. However, if you made a 3am alpine start and only made it as far as these bivy sites, you’re gonna have a really rough day with how much is left to do tomorrow.
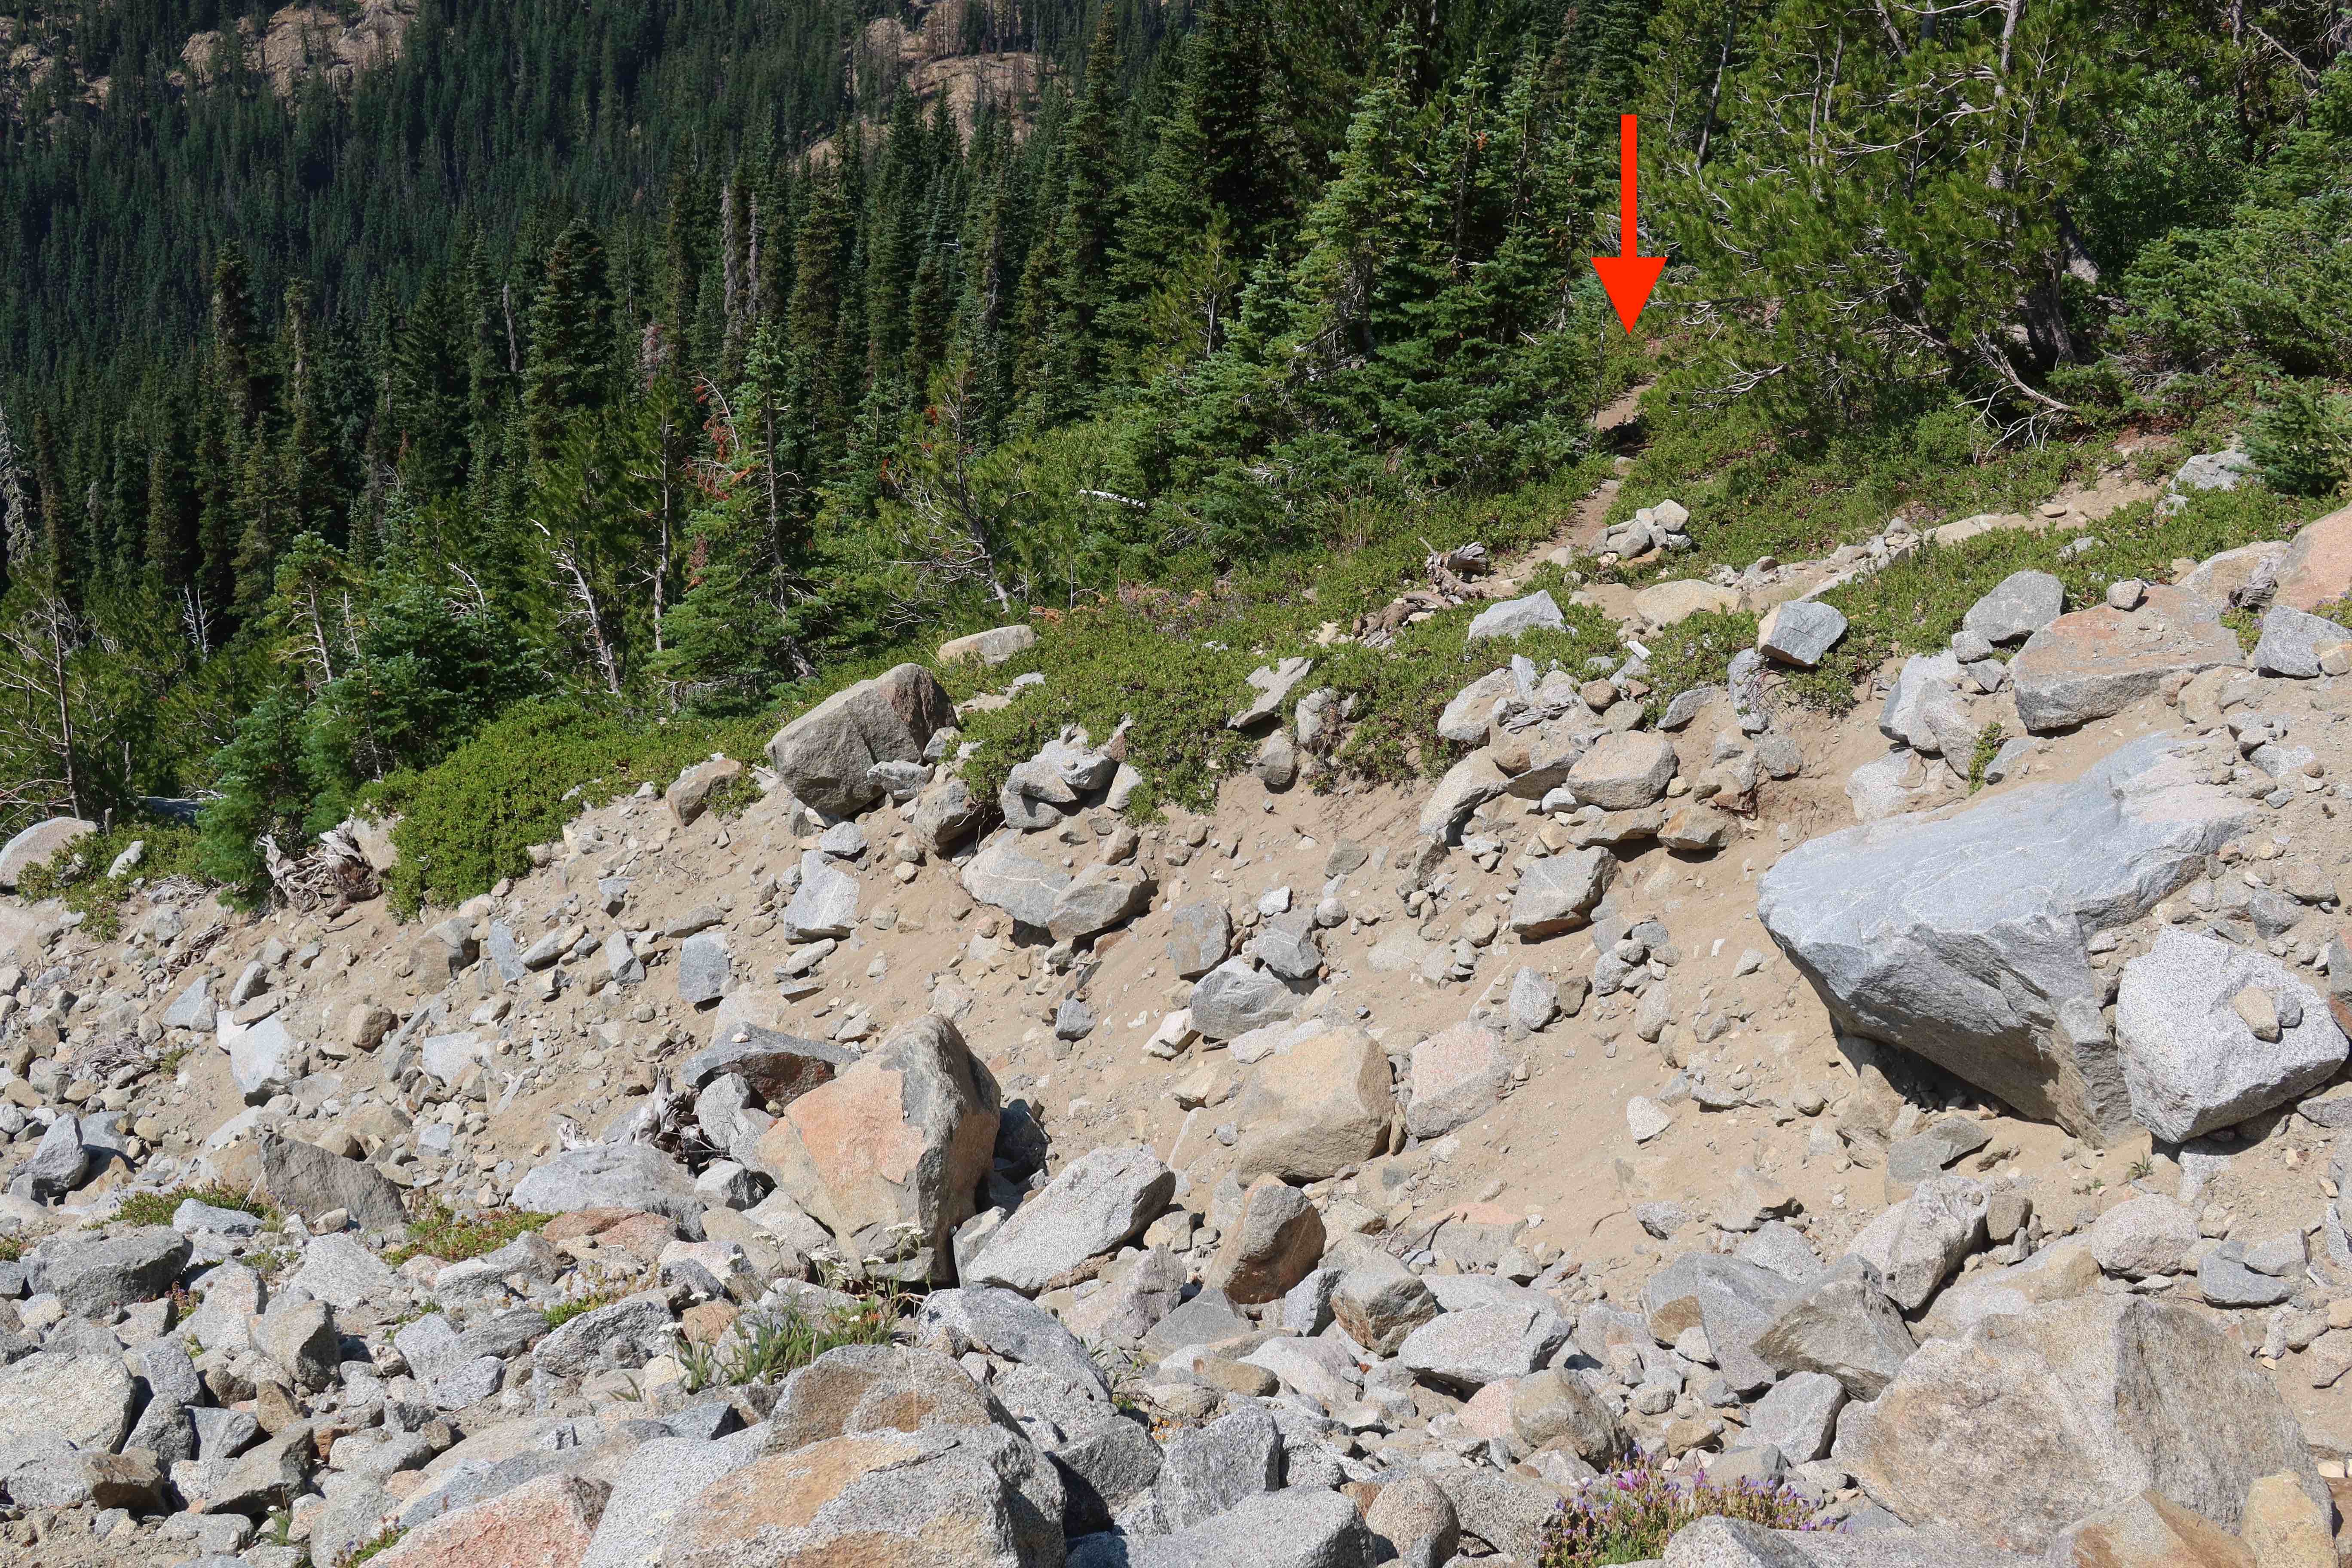
- Sunday: Complete however much is left, cross Ingalls Creek at the footlog at 47.45628, -120.91103, regain an annoying 1400′ of elevation to go up and over Long’s Pass, skedaddle down other hot & dusty trails back to the parking lot!
A More Detailed Schedule
This is just one example of a possible set of times to aim for. Feel free to modify it or ignore it however works best for you and your pace. These are just the times that happen to be typical for me, with my light-overnight-pack. FWIW, I would call this schedule “medium” in its pacing, it’s definitely not the fastest nor is it the slowest. (But if you are significantly slower than these times, consider turning around before you commit to scrambling up the first gulley.)
- 2:20am-ish alarms (or choose a different alarm time if you’d like)
- 3:00am – start hiking
- 4:45am – crest Ingalls Pass (usually around the time of dawn light)
- 5:30am – arrive at Ingalls Lake (pass the lake on its left, west-side, for a much easier trail, even though it seems less direct)
- 6:00am – reach the northern end of Ingalls Lake, the last water source for a very long & hot day ahead. Fill & carry as much water as you can. Ideally, drink a full liter, and leave carrying 3 or 4 more liters each in your packs.
- 6:30am – finish the water-fill-up break
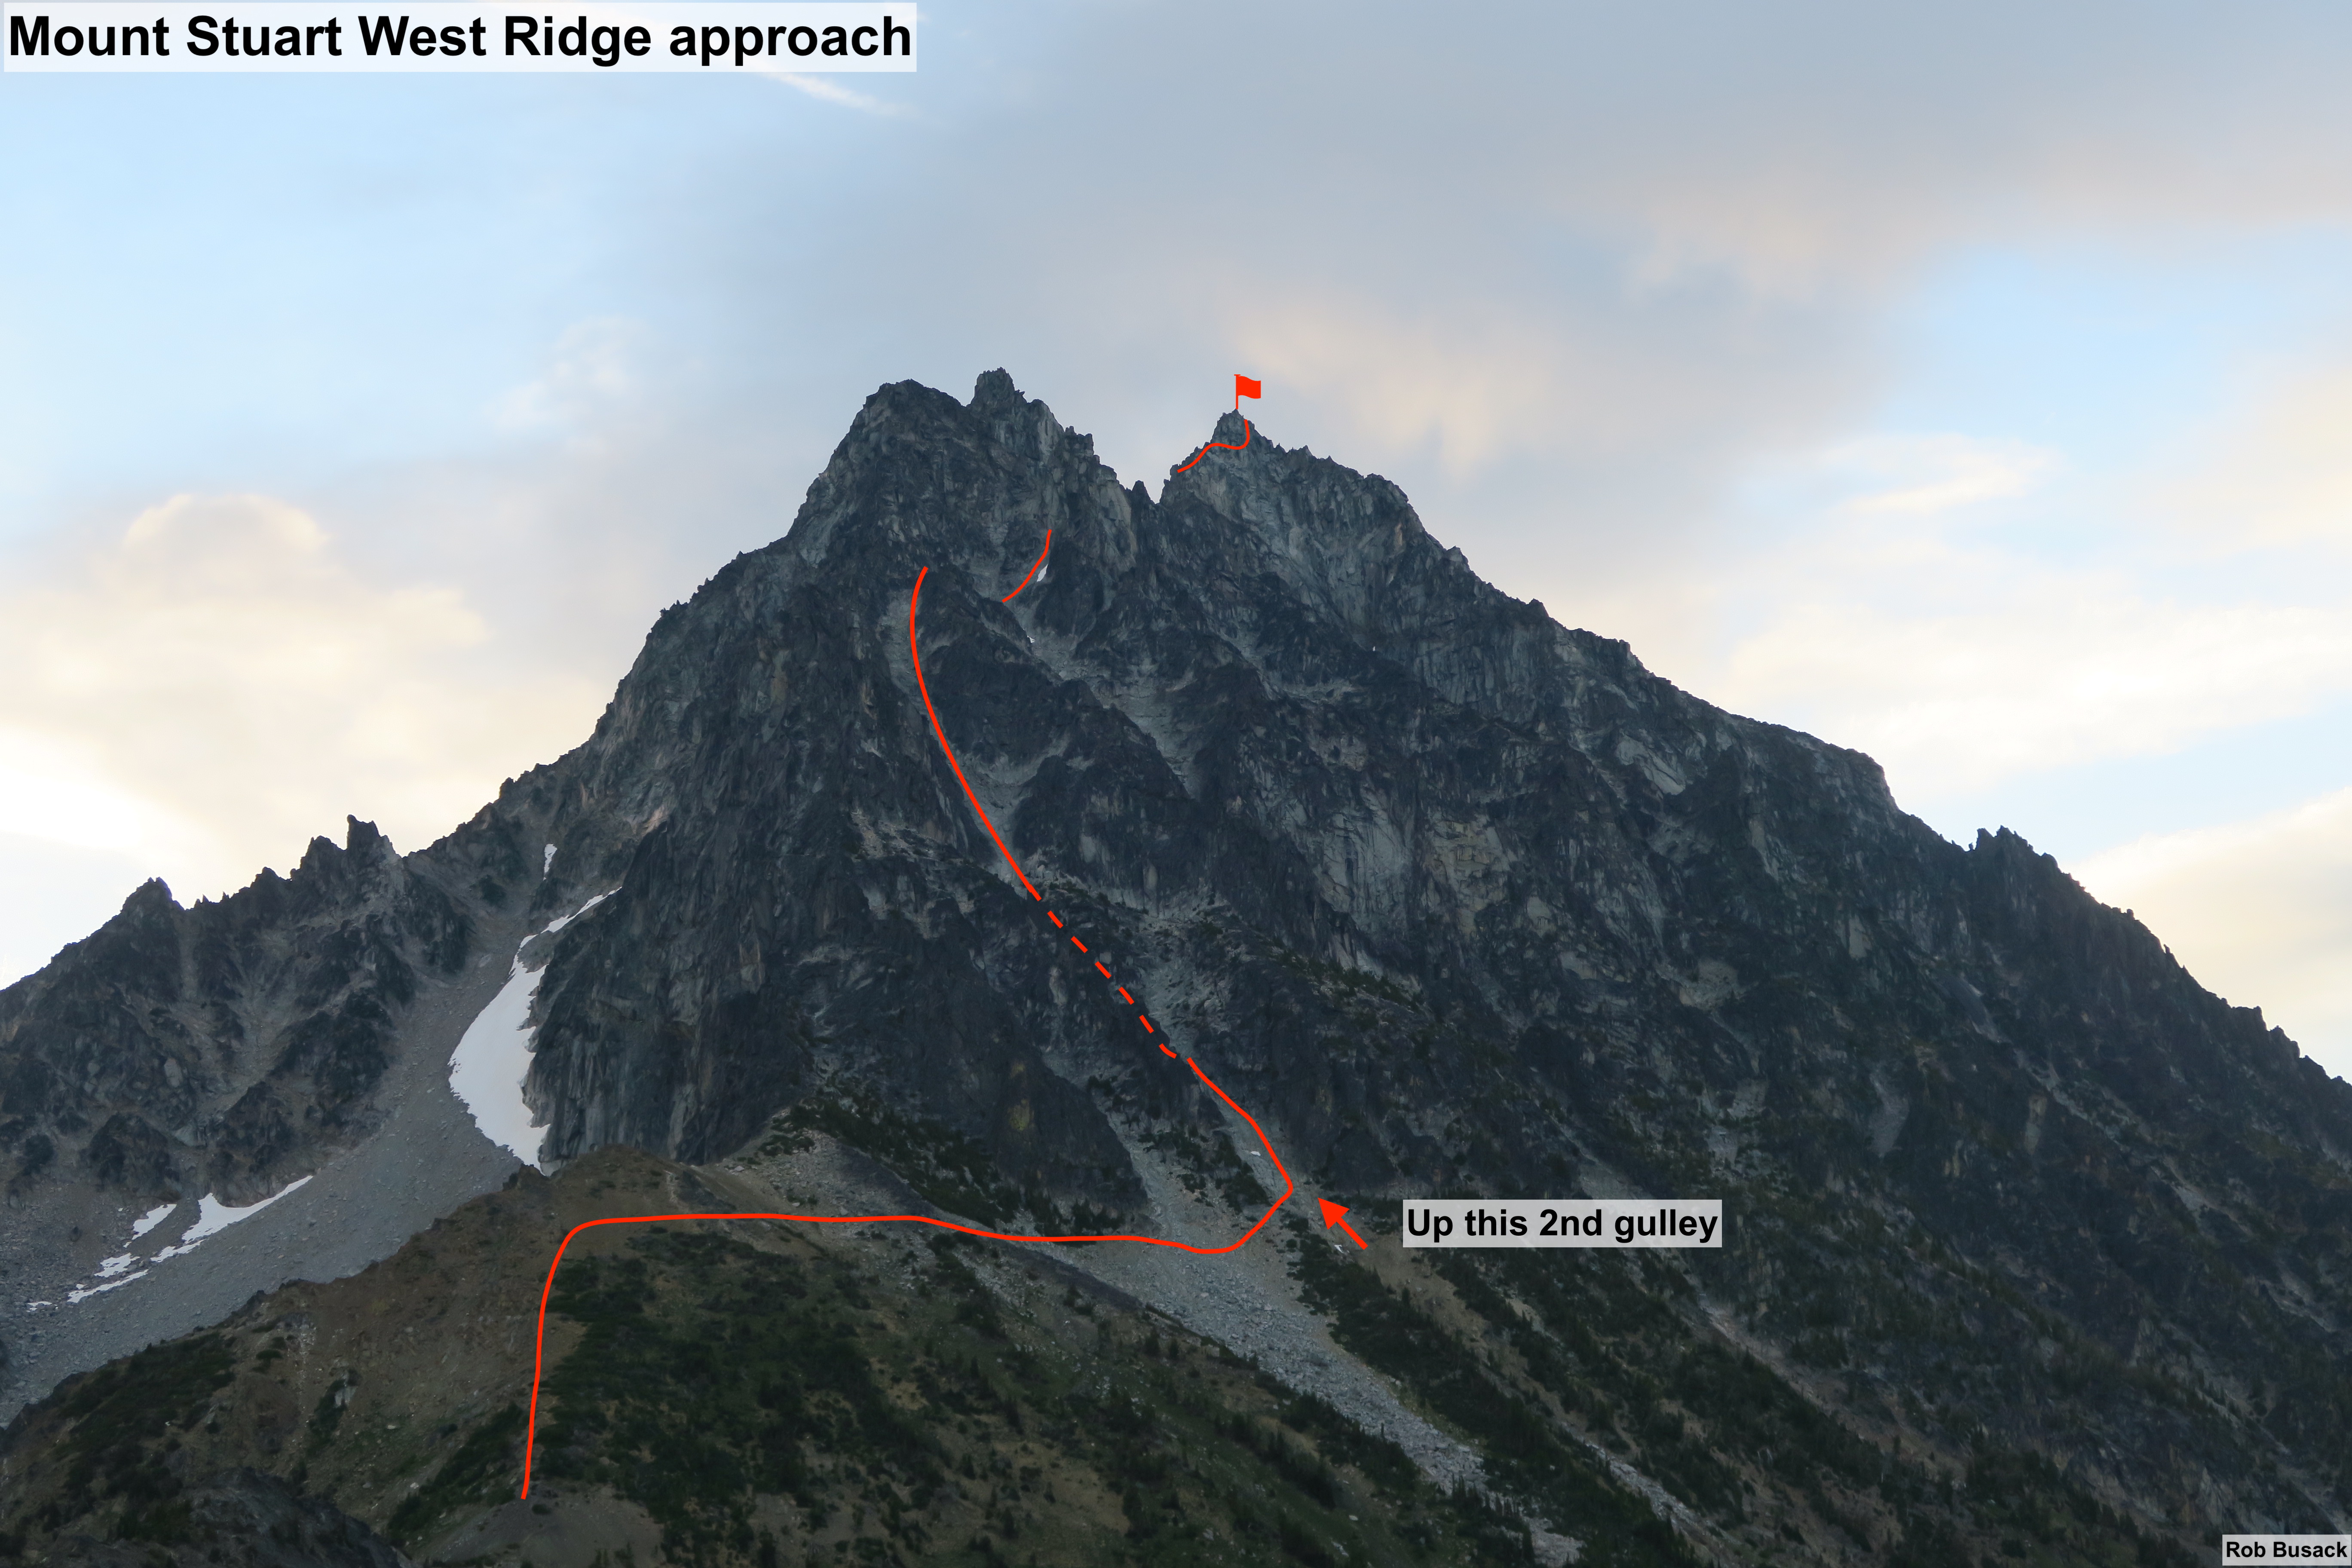
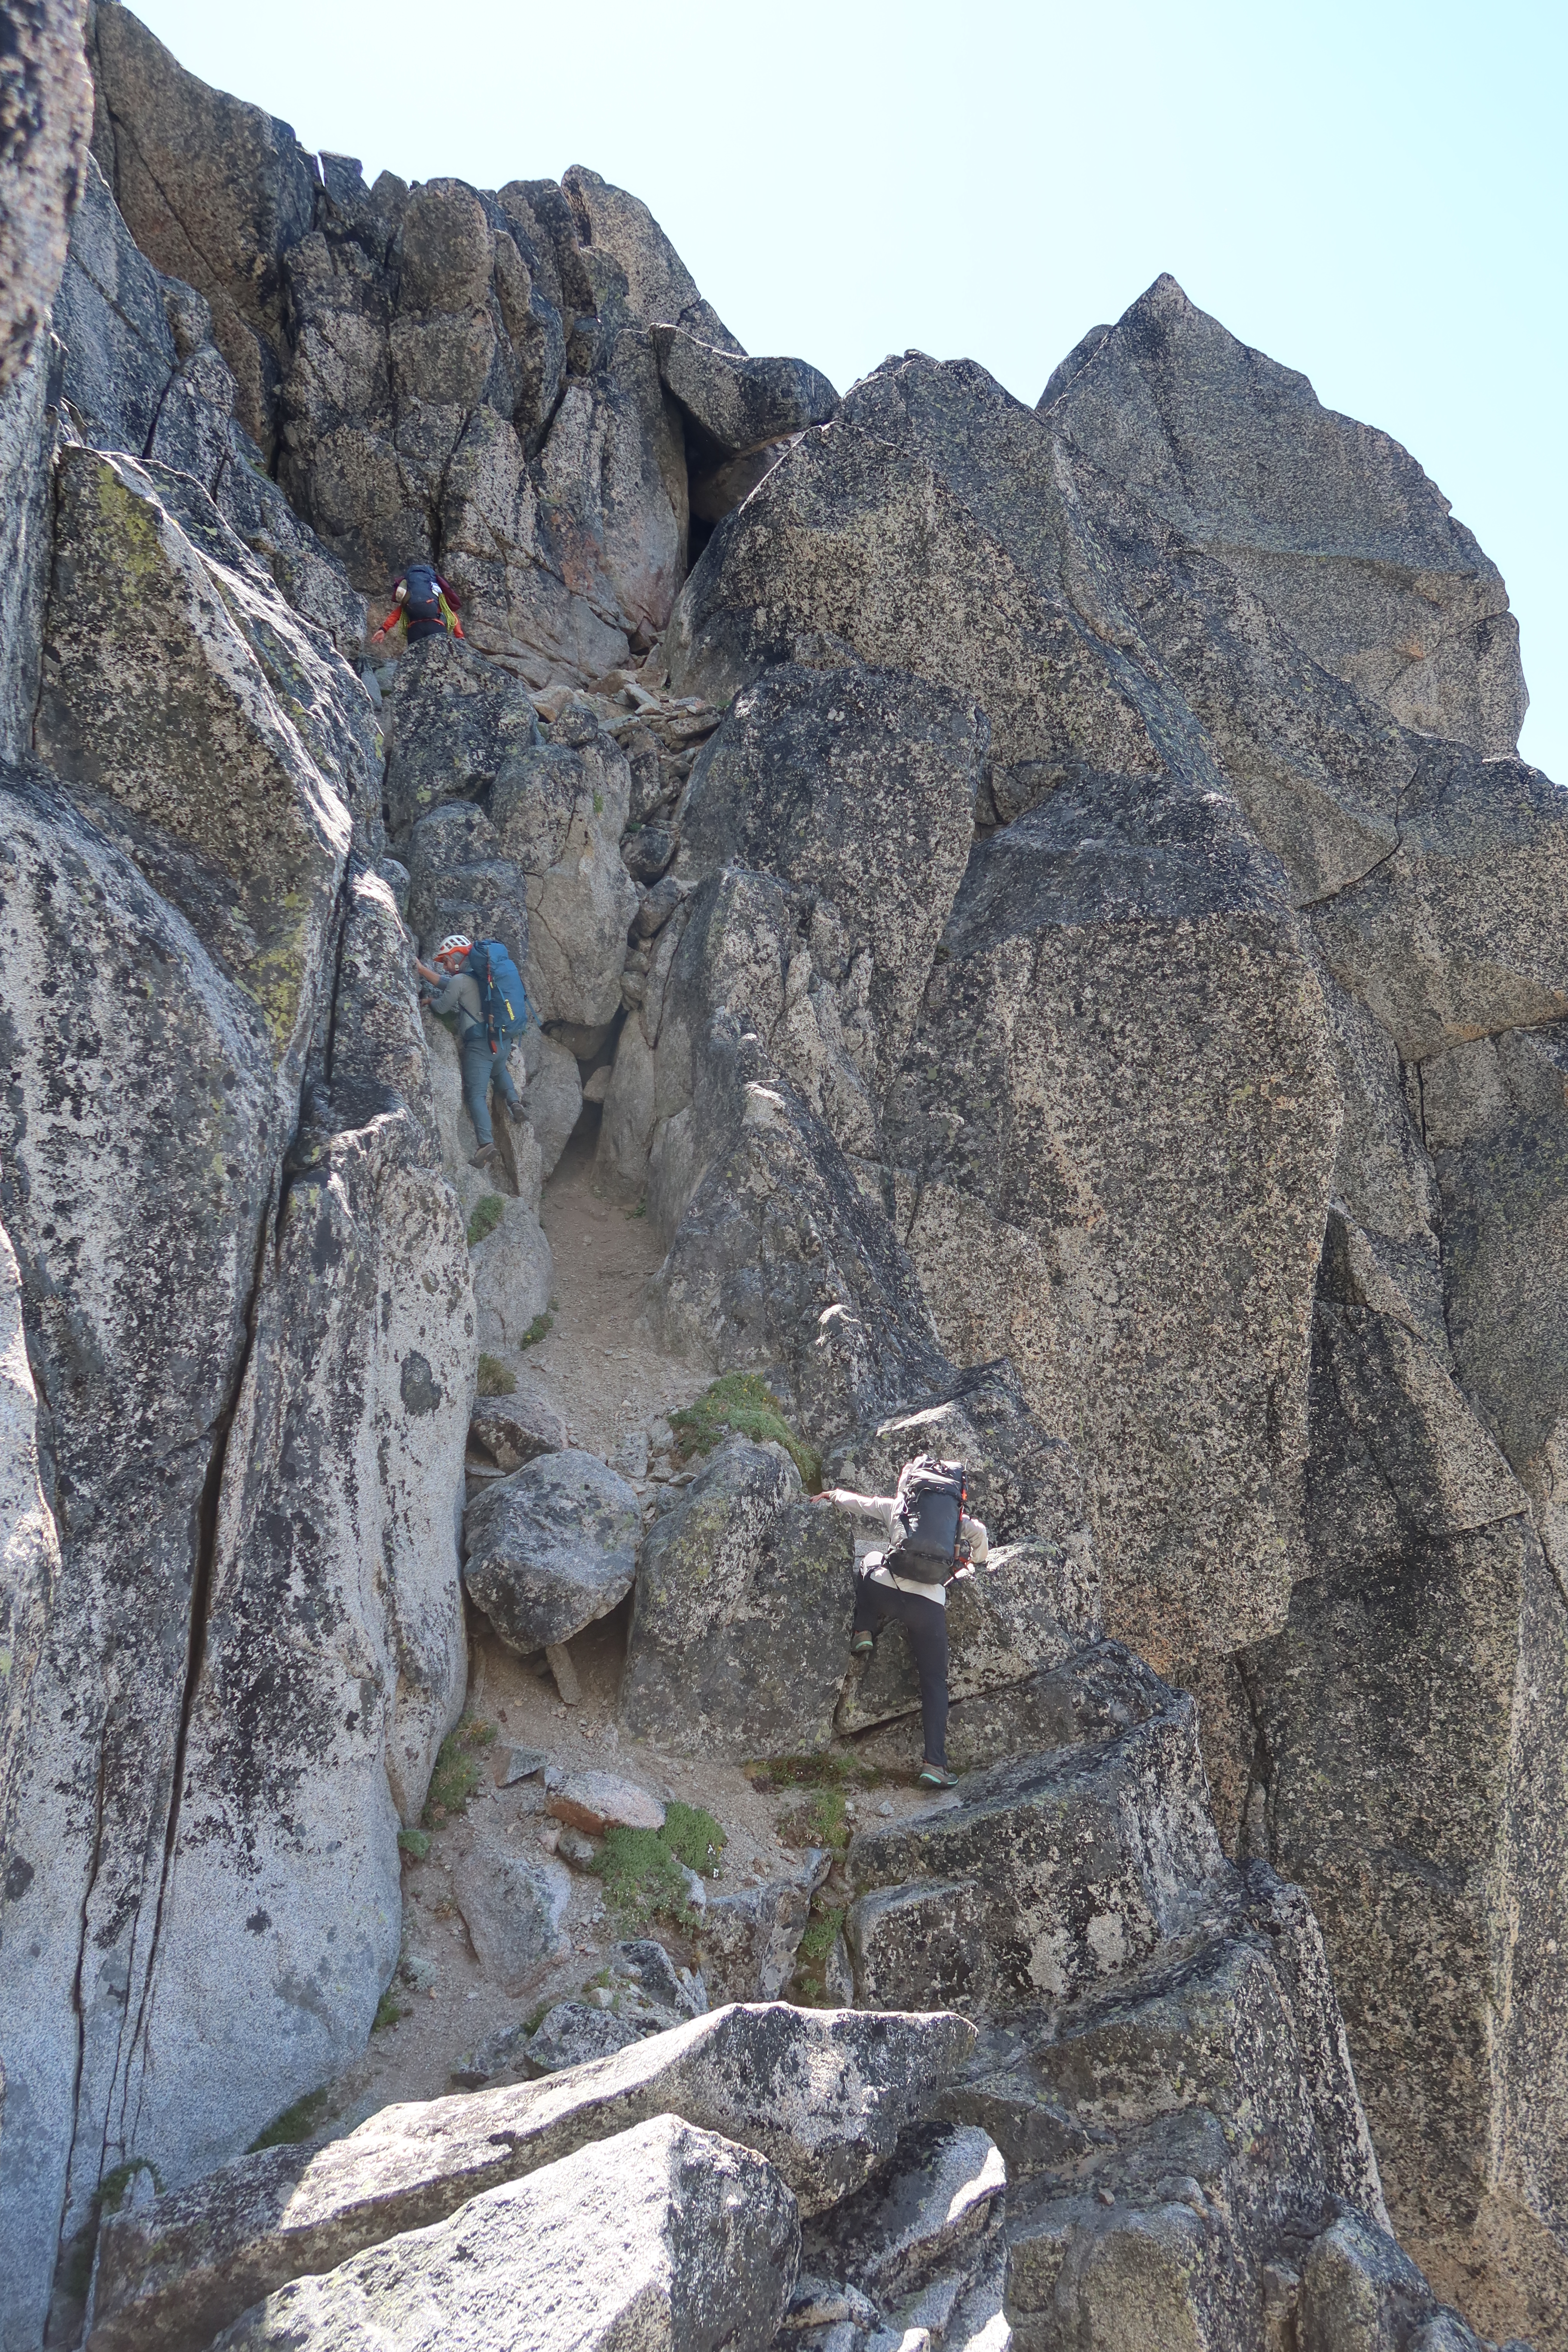
- 8:00am – reach the base of the white granite gulley, the 2nd gulley from the west. This is where the real scrambling starts. It’s 3rd/4th class, but on beautifully clean white granite that’s such good rock quality, it’s possibly the only place I’ve really enjoyed 4th class scrambling!
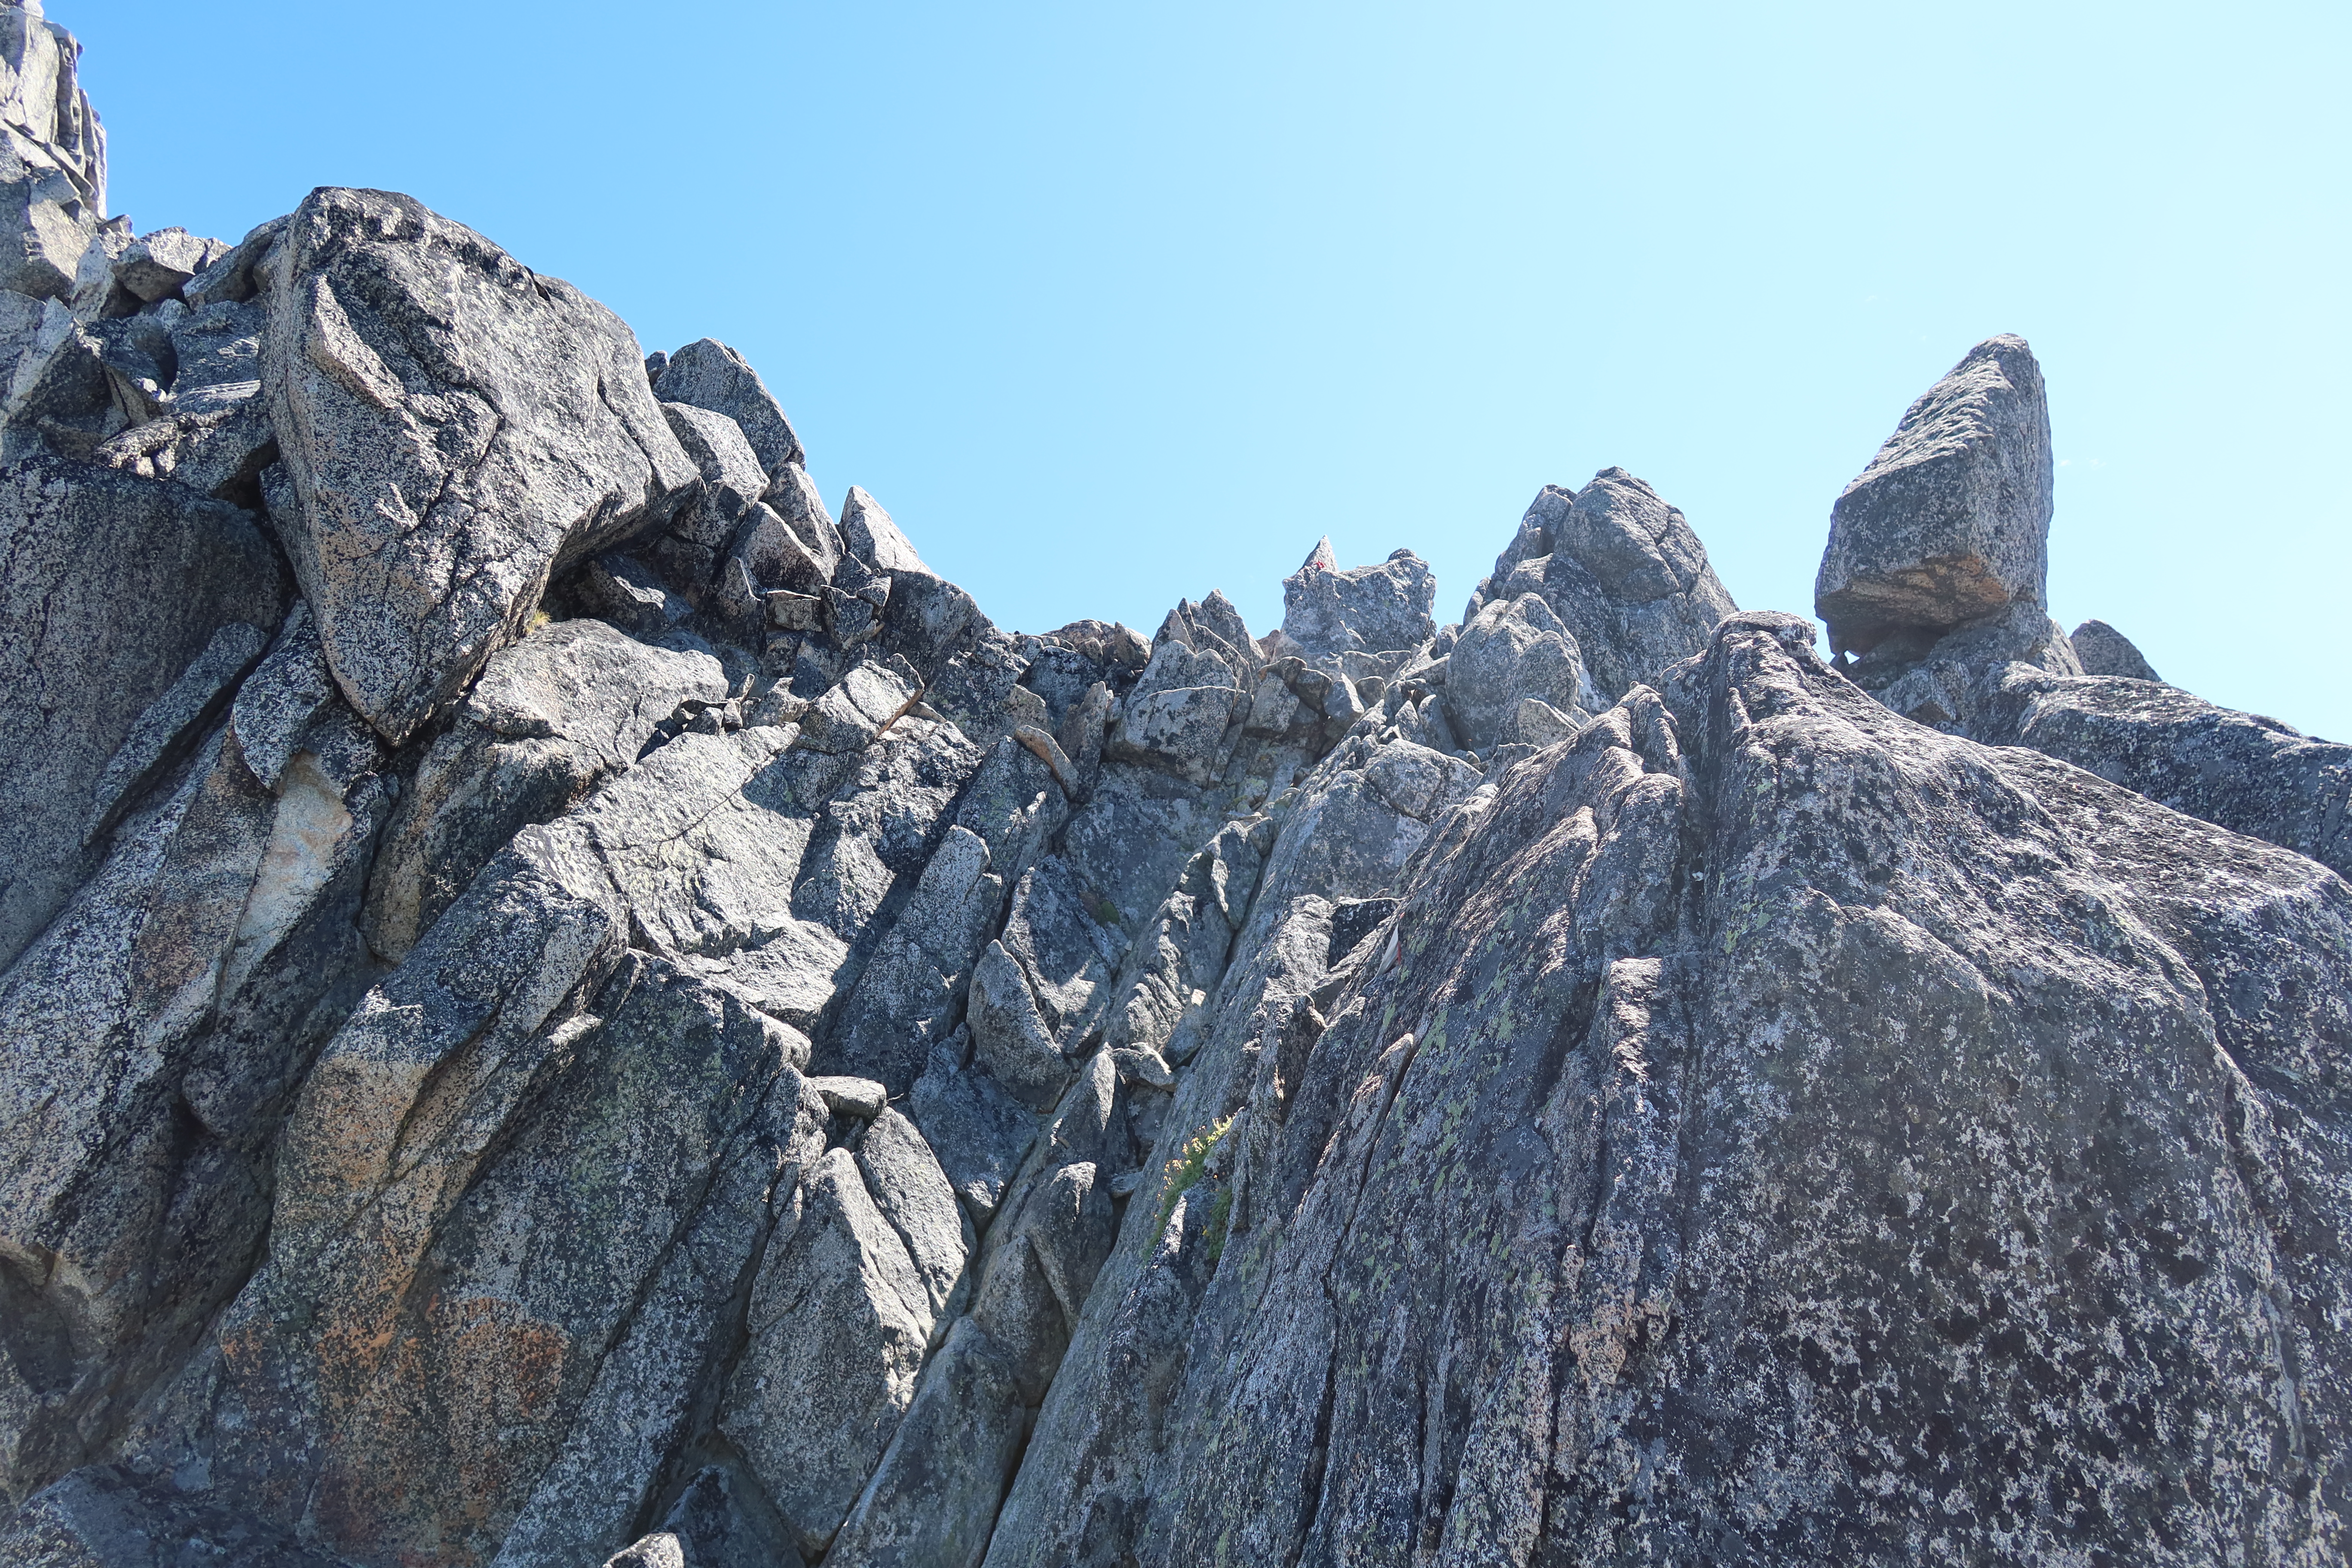
- 10:00am – find the certain 4th class chimney that allows you to exit this gully and move to the next one eastward, where we’ll see Long John Tower. IMHO, the scramble up to Long John Tower is the crux of the entire trip, there is one heady move I’d call 5.0 amongst the 4th class in there, but I always do it unroped. Take it slowly and carefully, and keep moving up, and it goes just fine. A lighter pack does help.
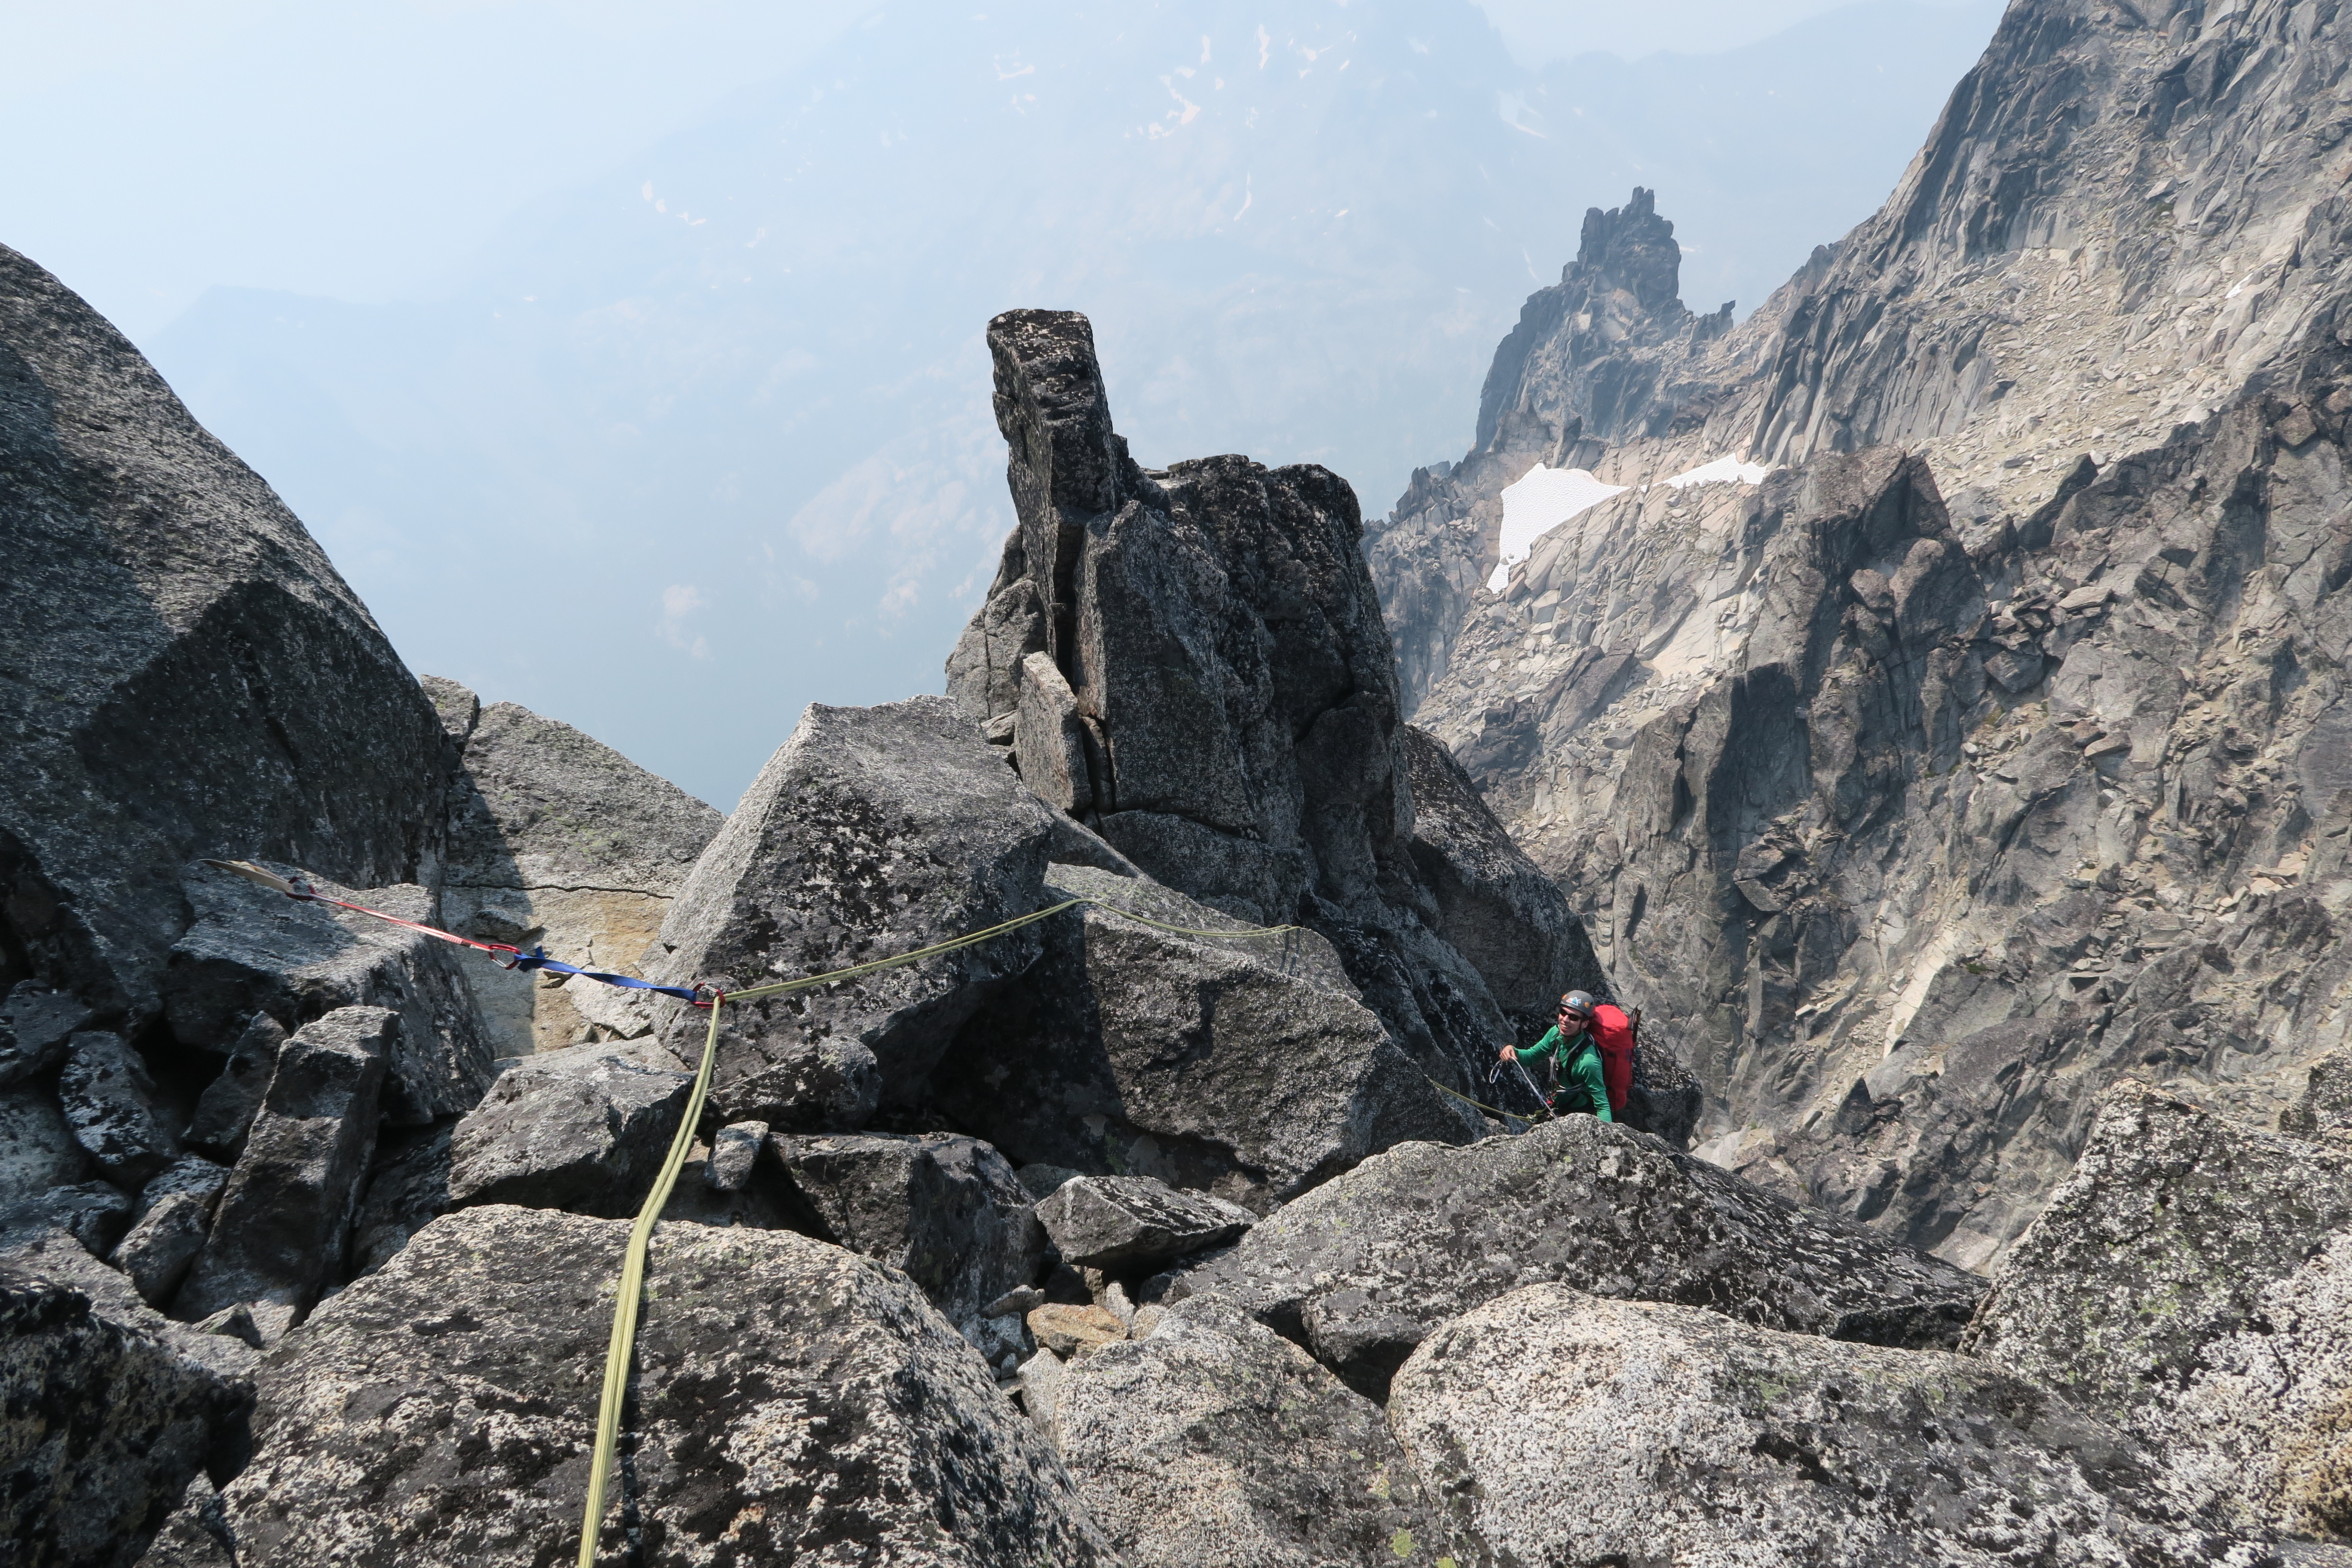
- 11:00am – top out in the notch next to Long John Tower, near the “The Dog” rock (a particular rock that kinda looks like a terrier with its nose up in the air)
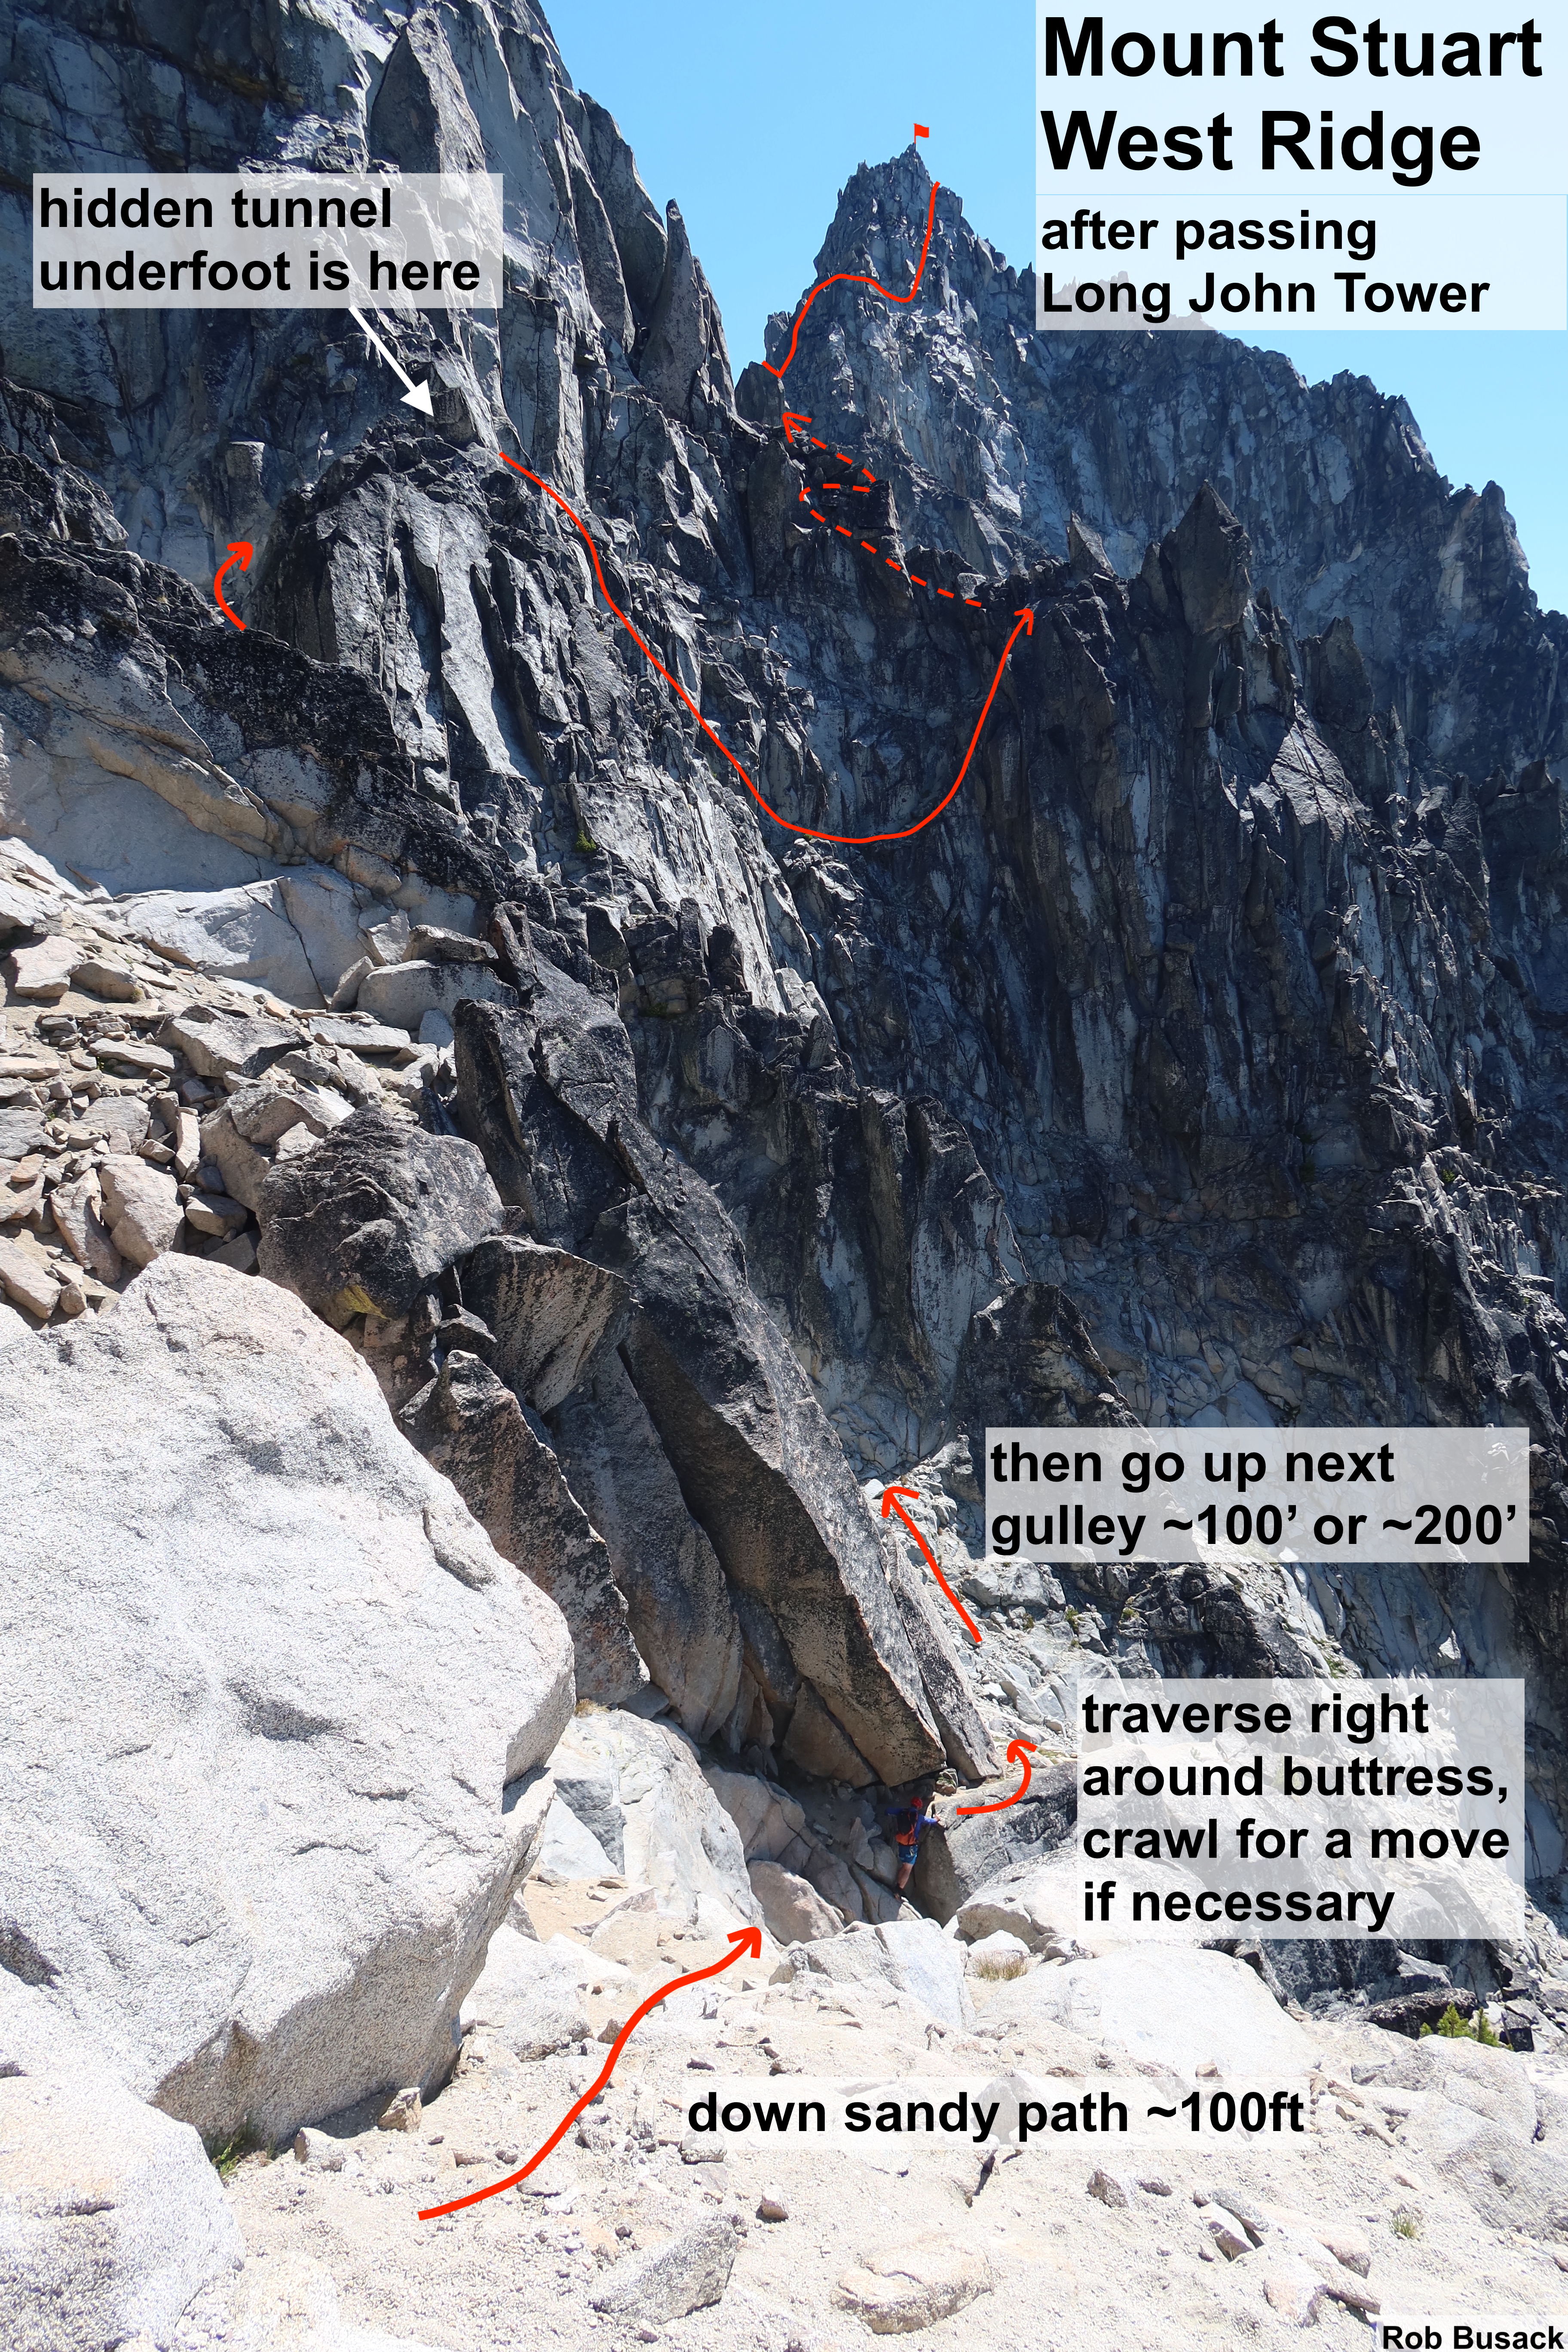
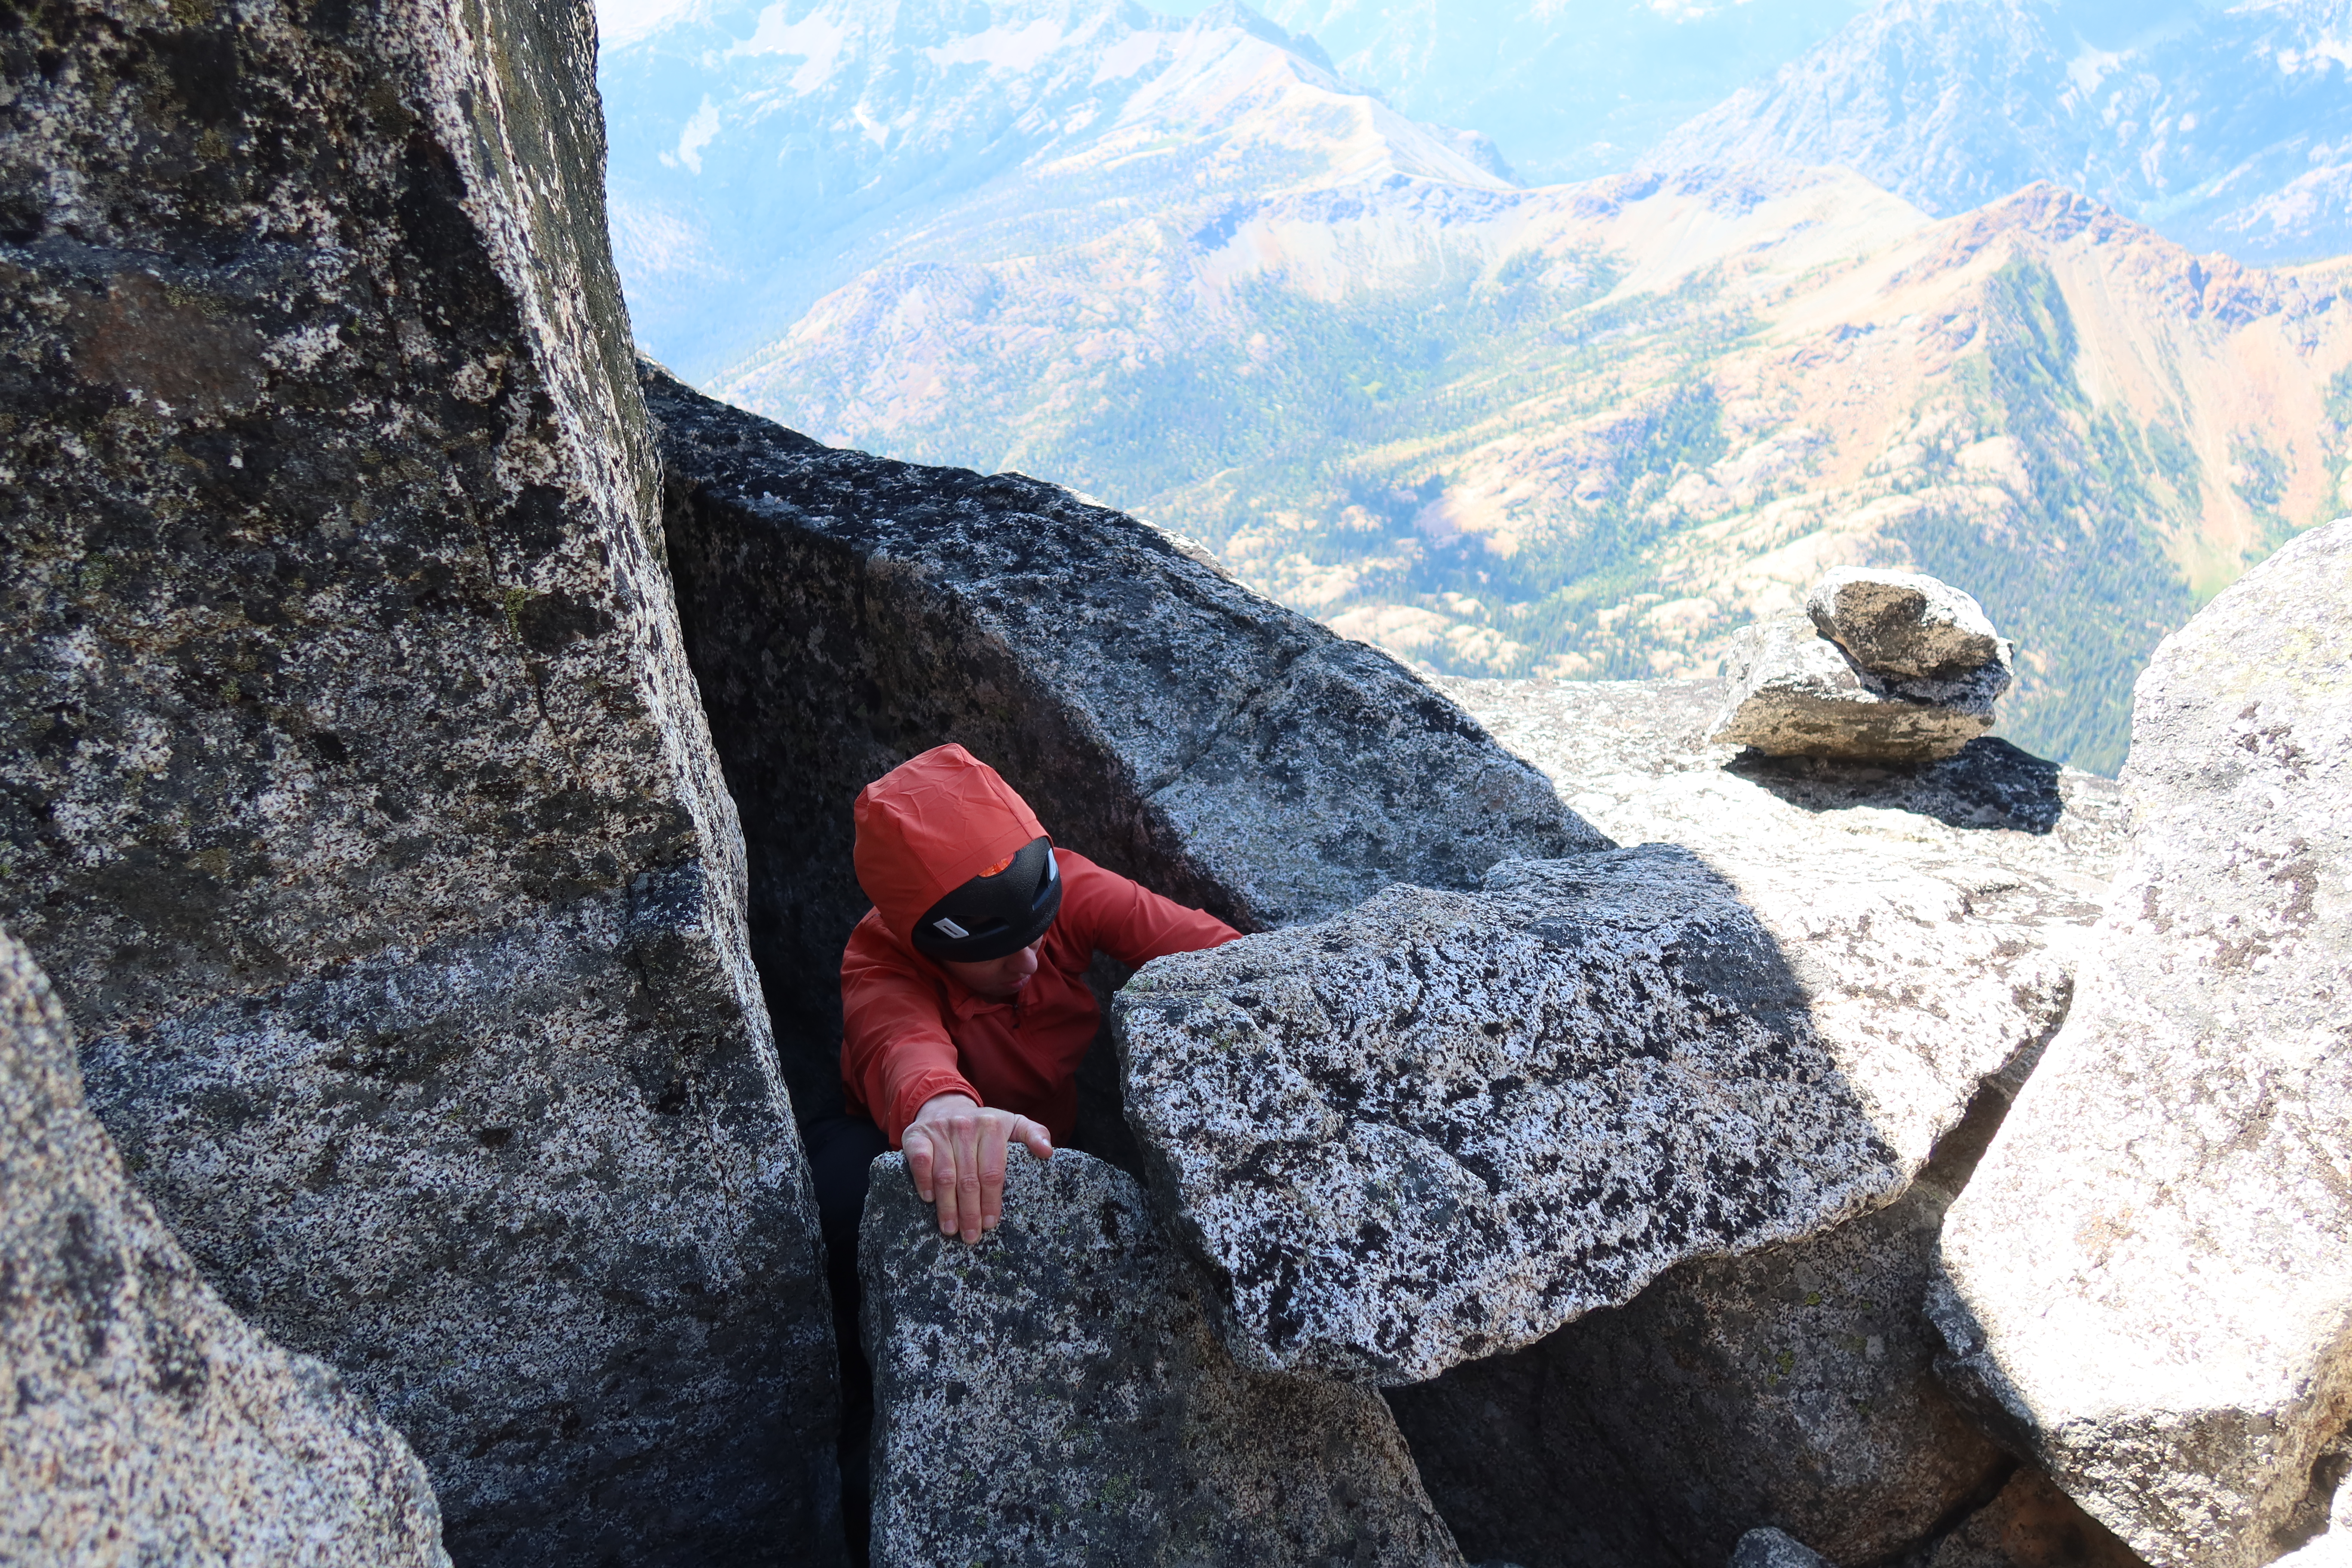
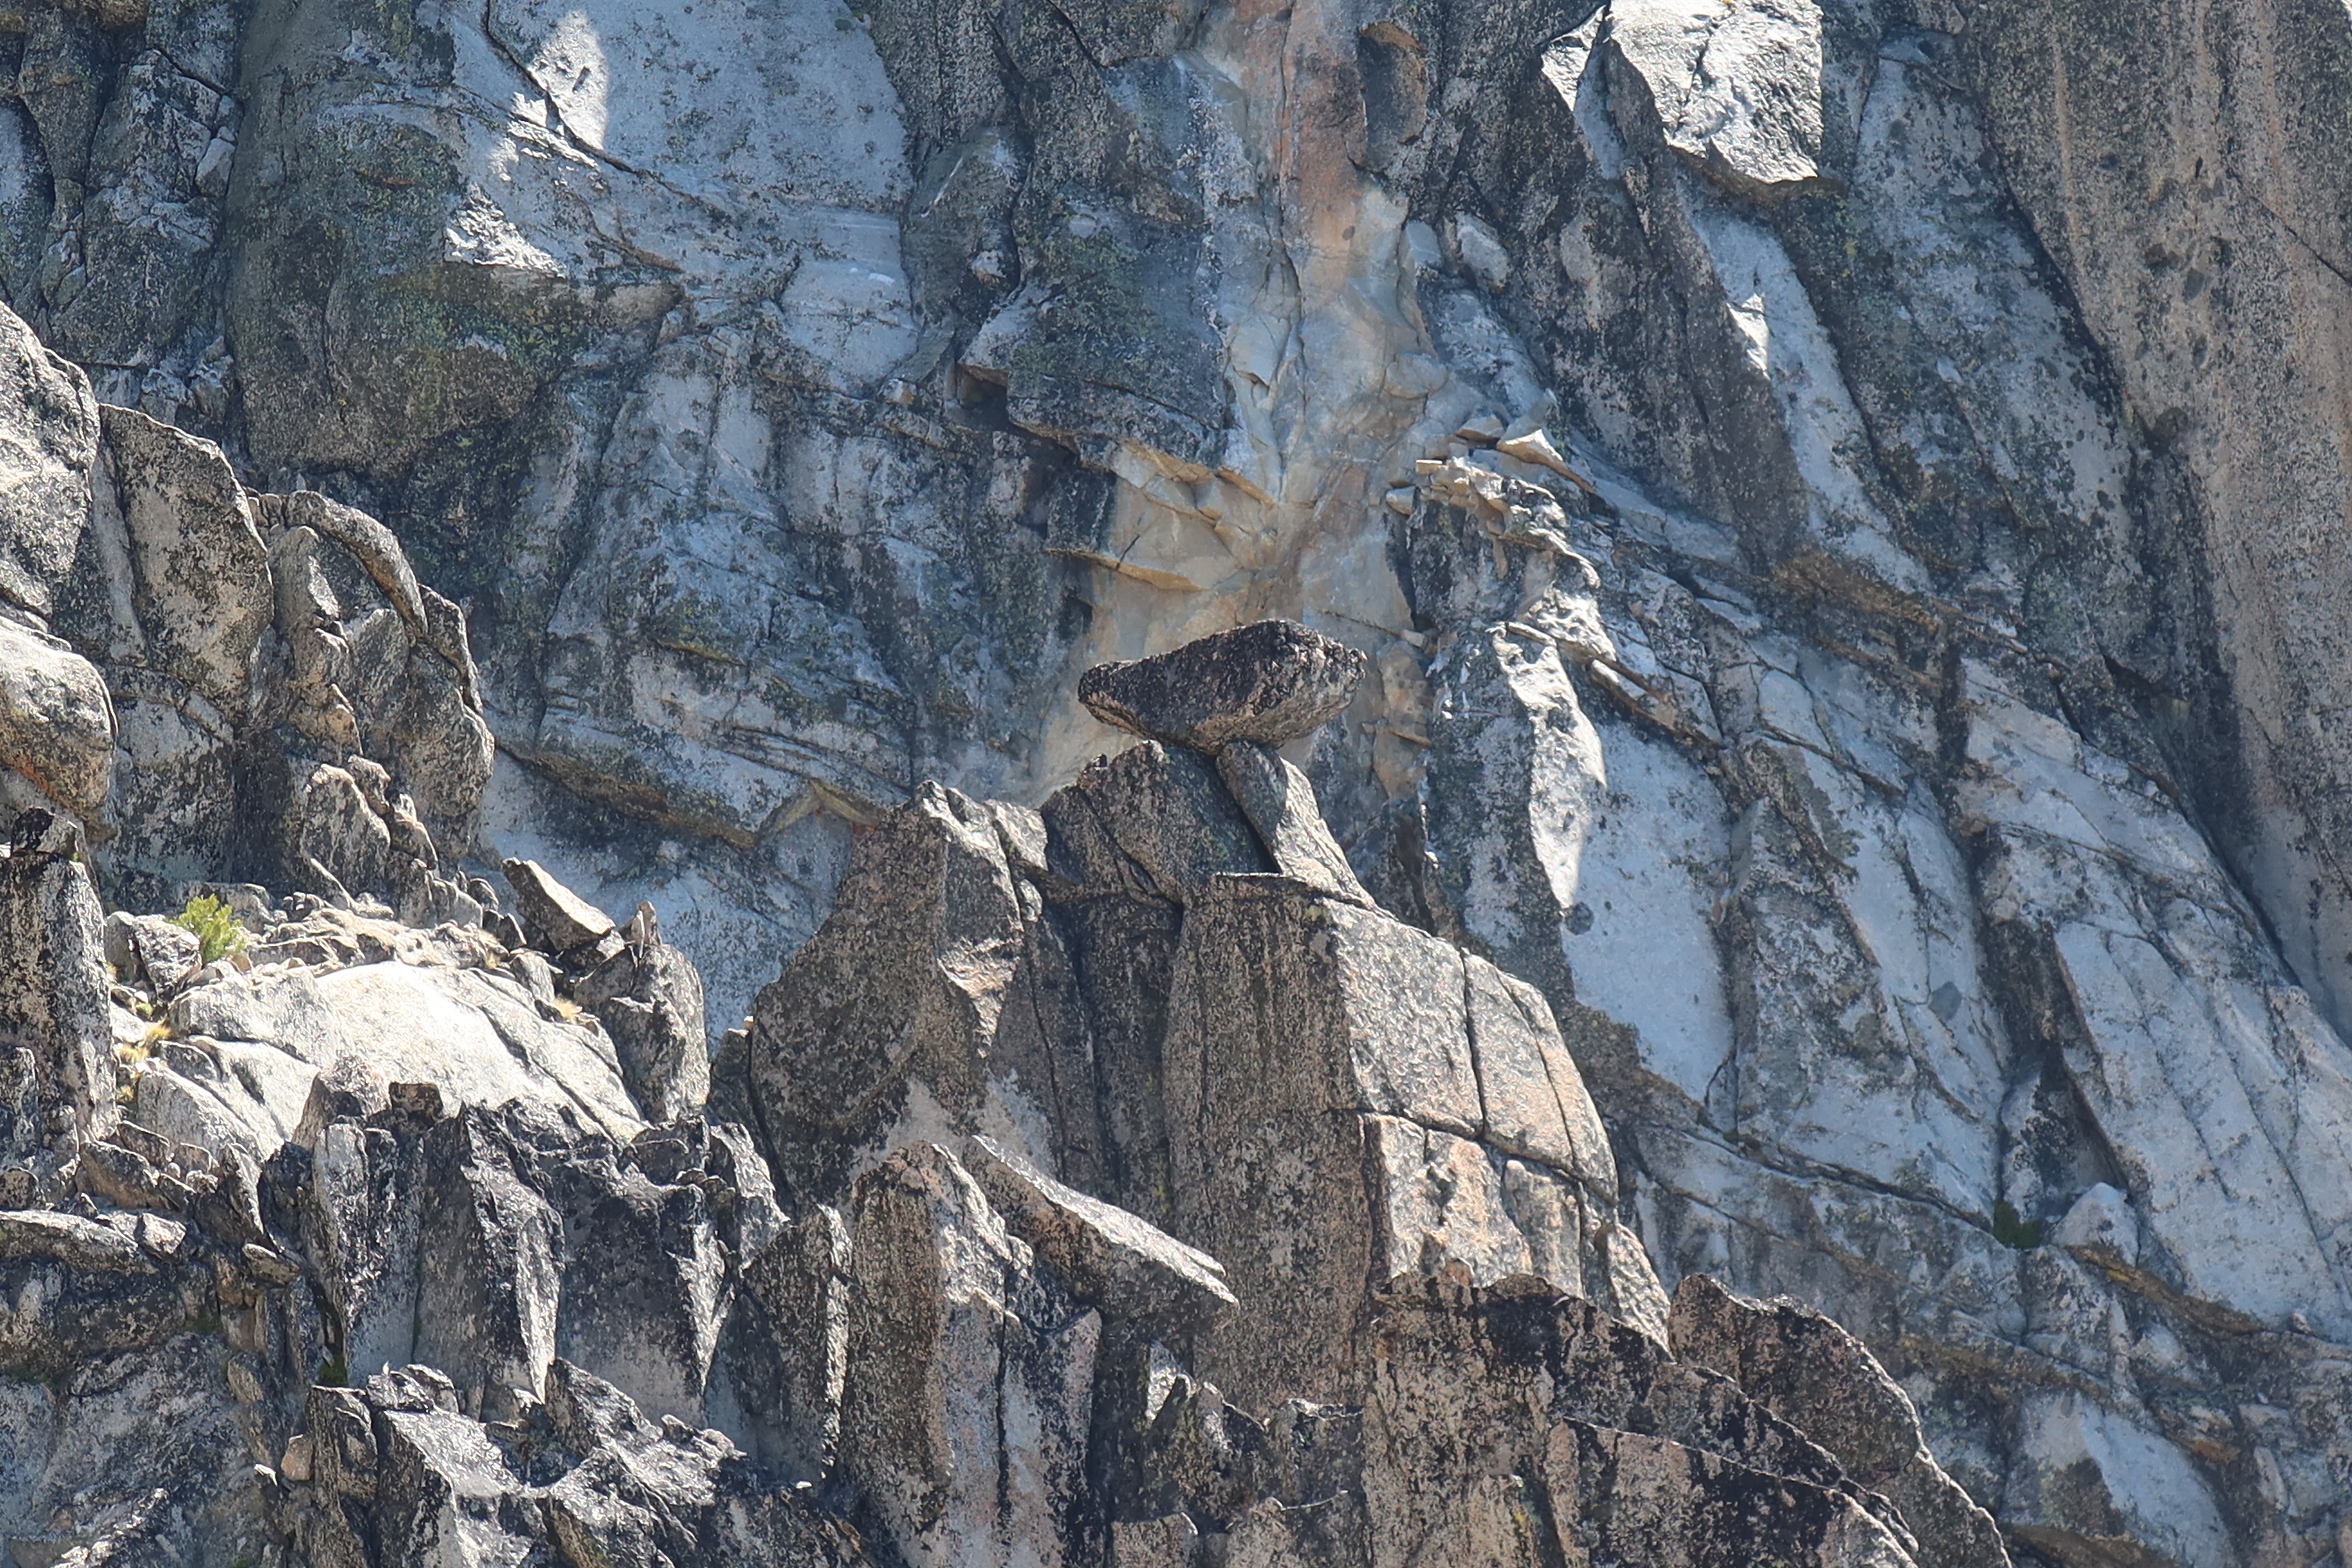
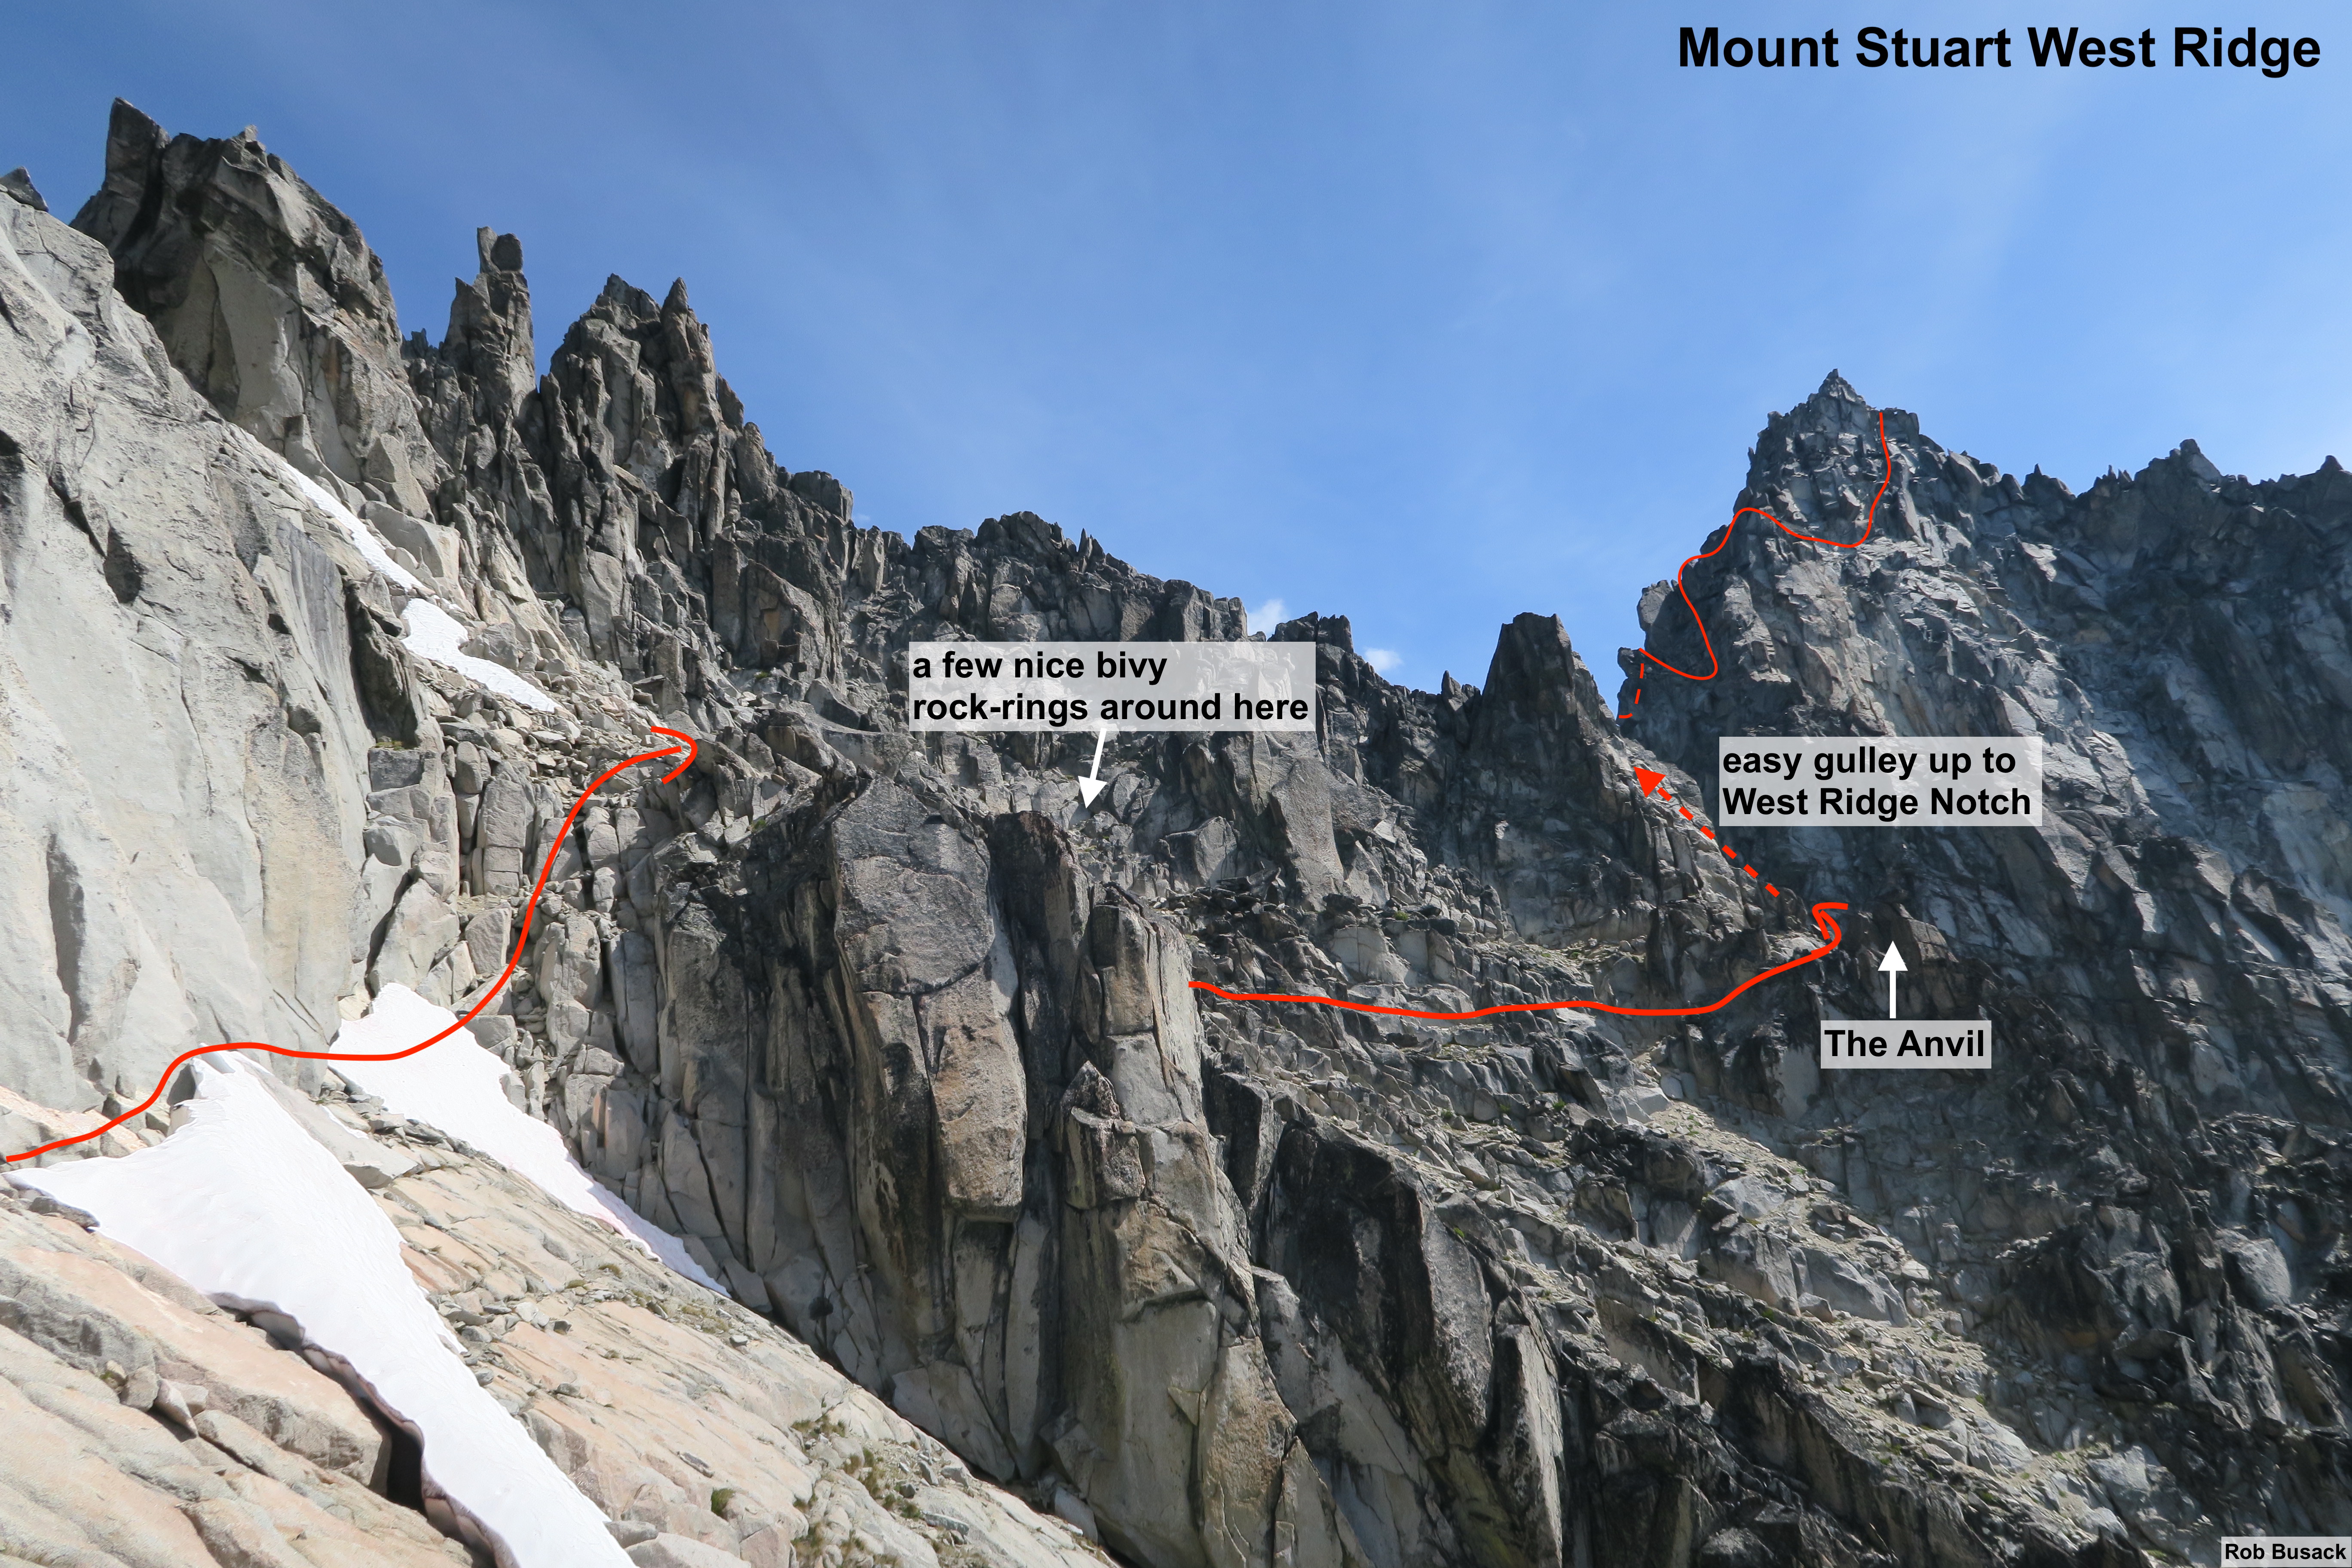
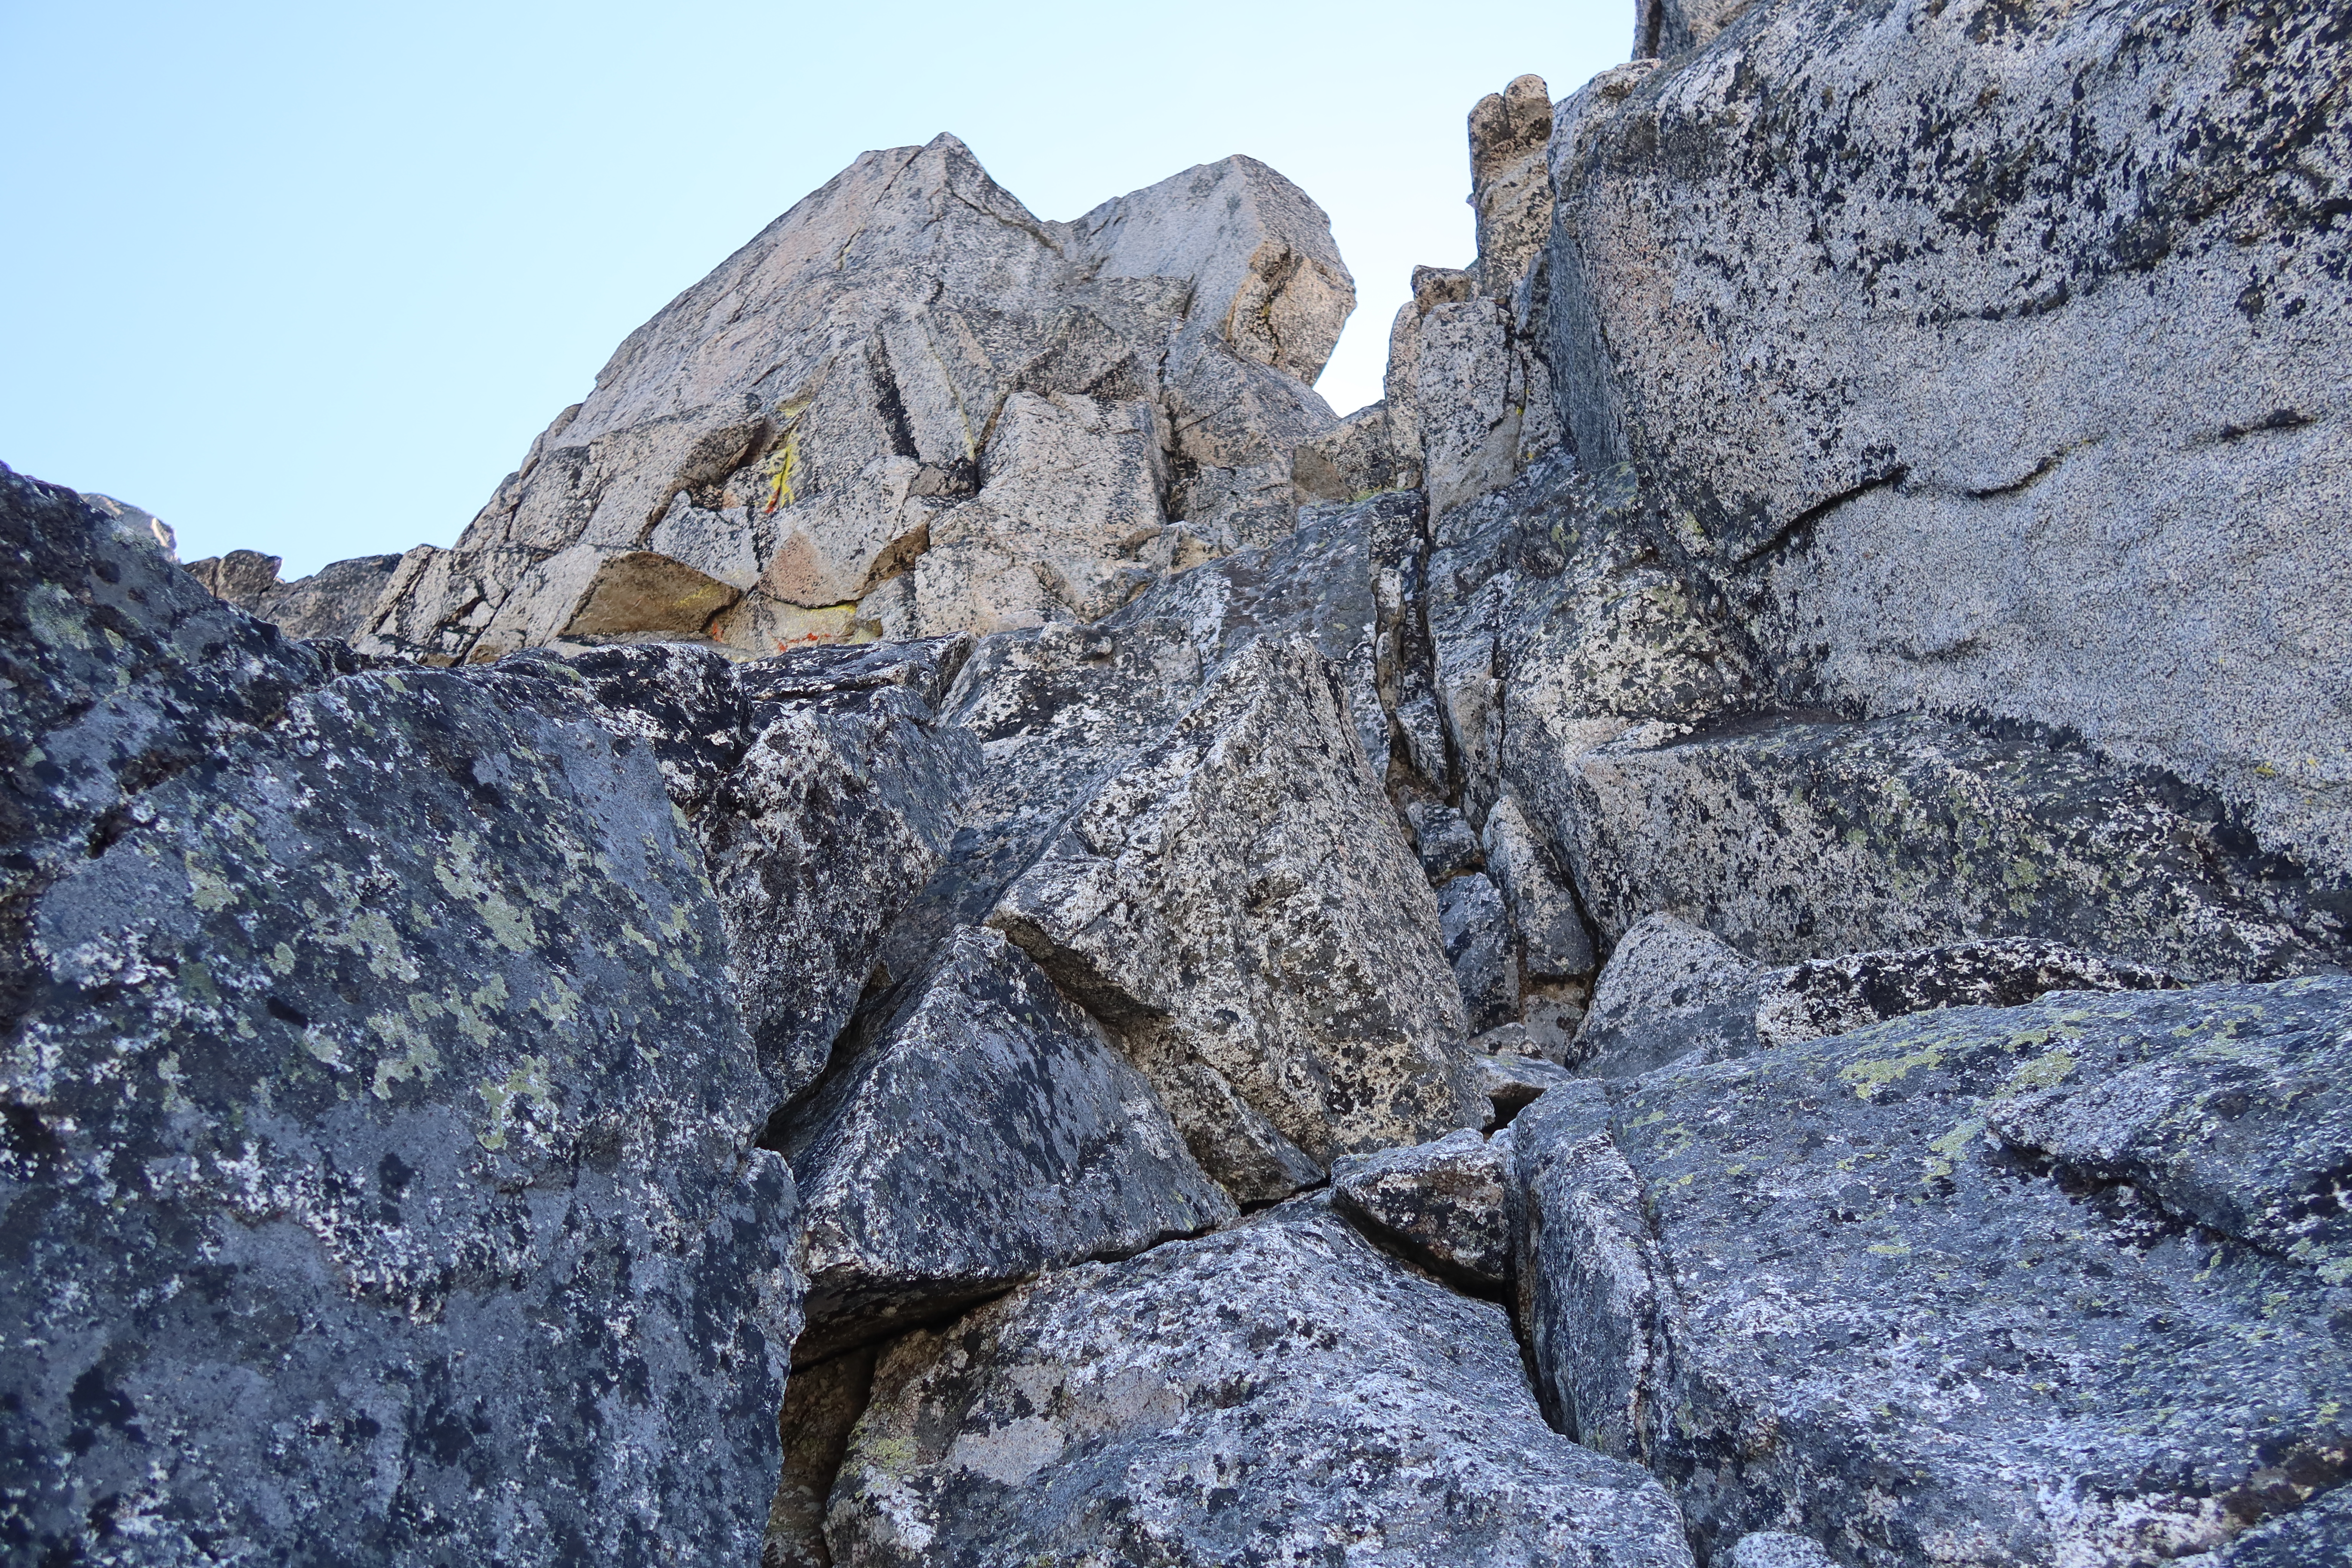
- after that, I always take the low-route, and there’s some crazy route finding, involving a hidden tunnel, a butt-scooch slab, another tunnel, past some bivy sites, past a cool anvil-shaped balanced rock, then up a relatively-easy gulley to arrive at the West Ridge Notch. This part is the most complicated route-finding. You should probably bring a copy of this trip report by “Cluck” https://cascadeclimbers.com/forum/topic/44925-stuart-west-ridge-more-beta-than-you-can-use/
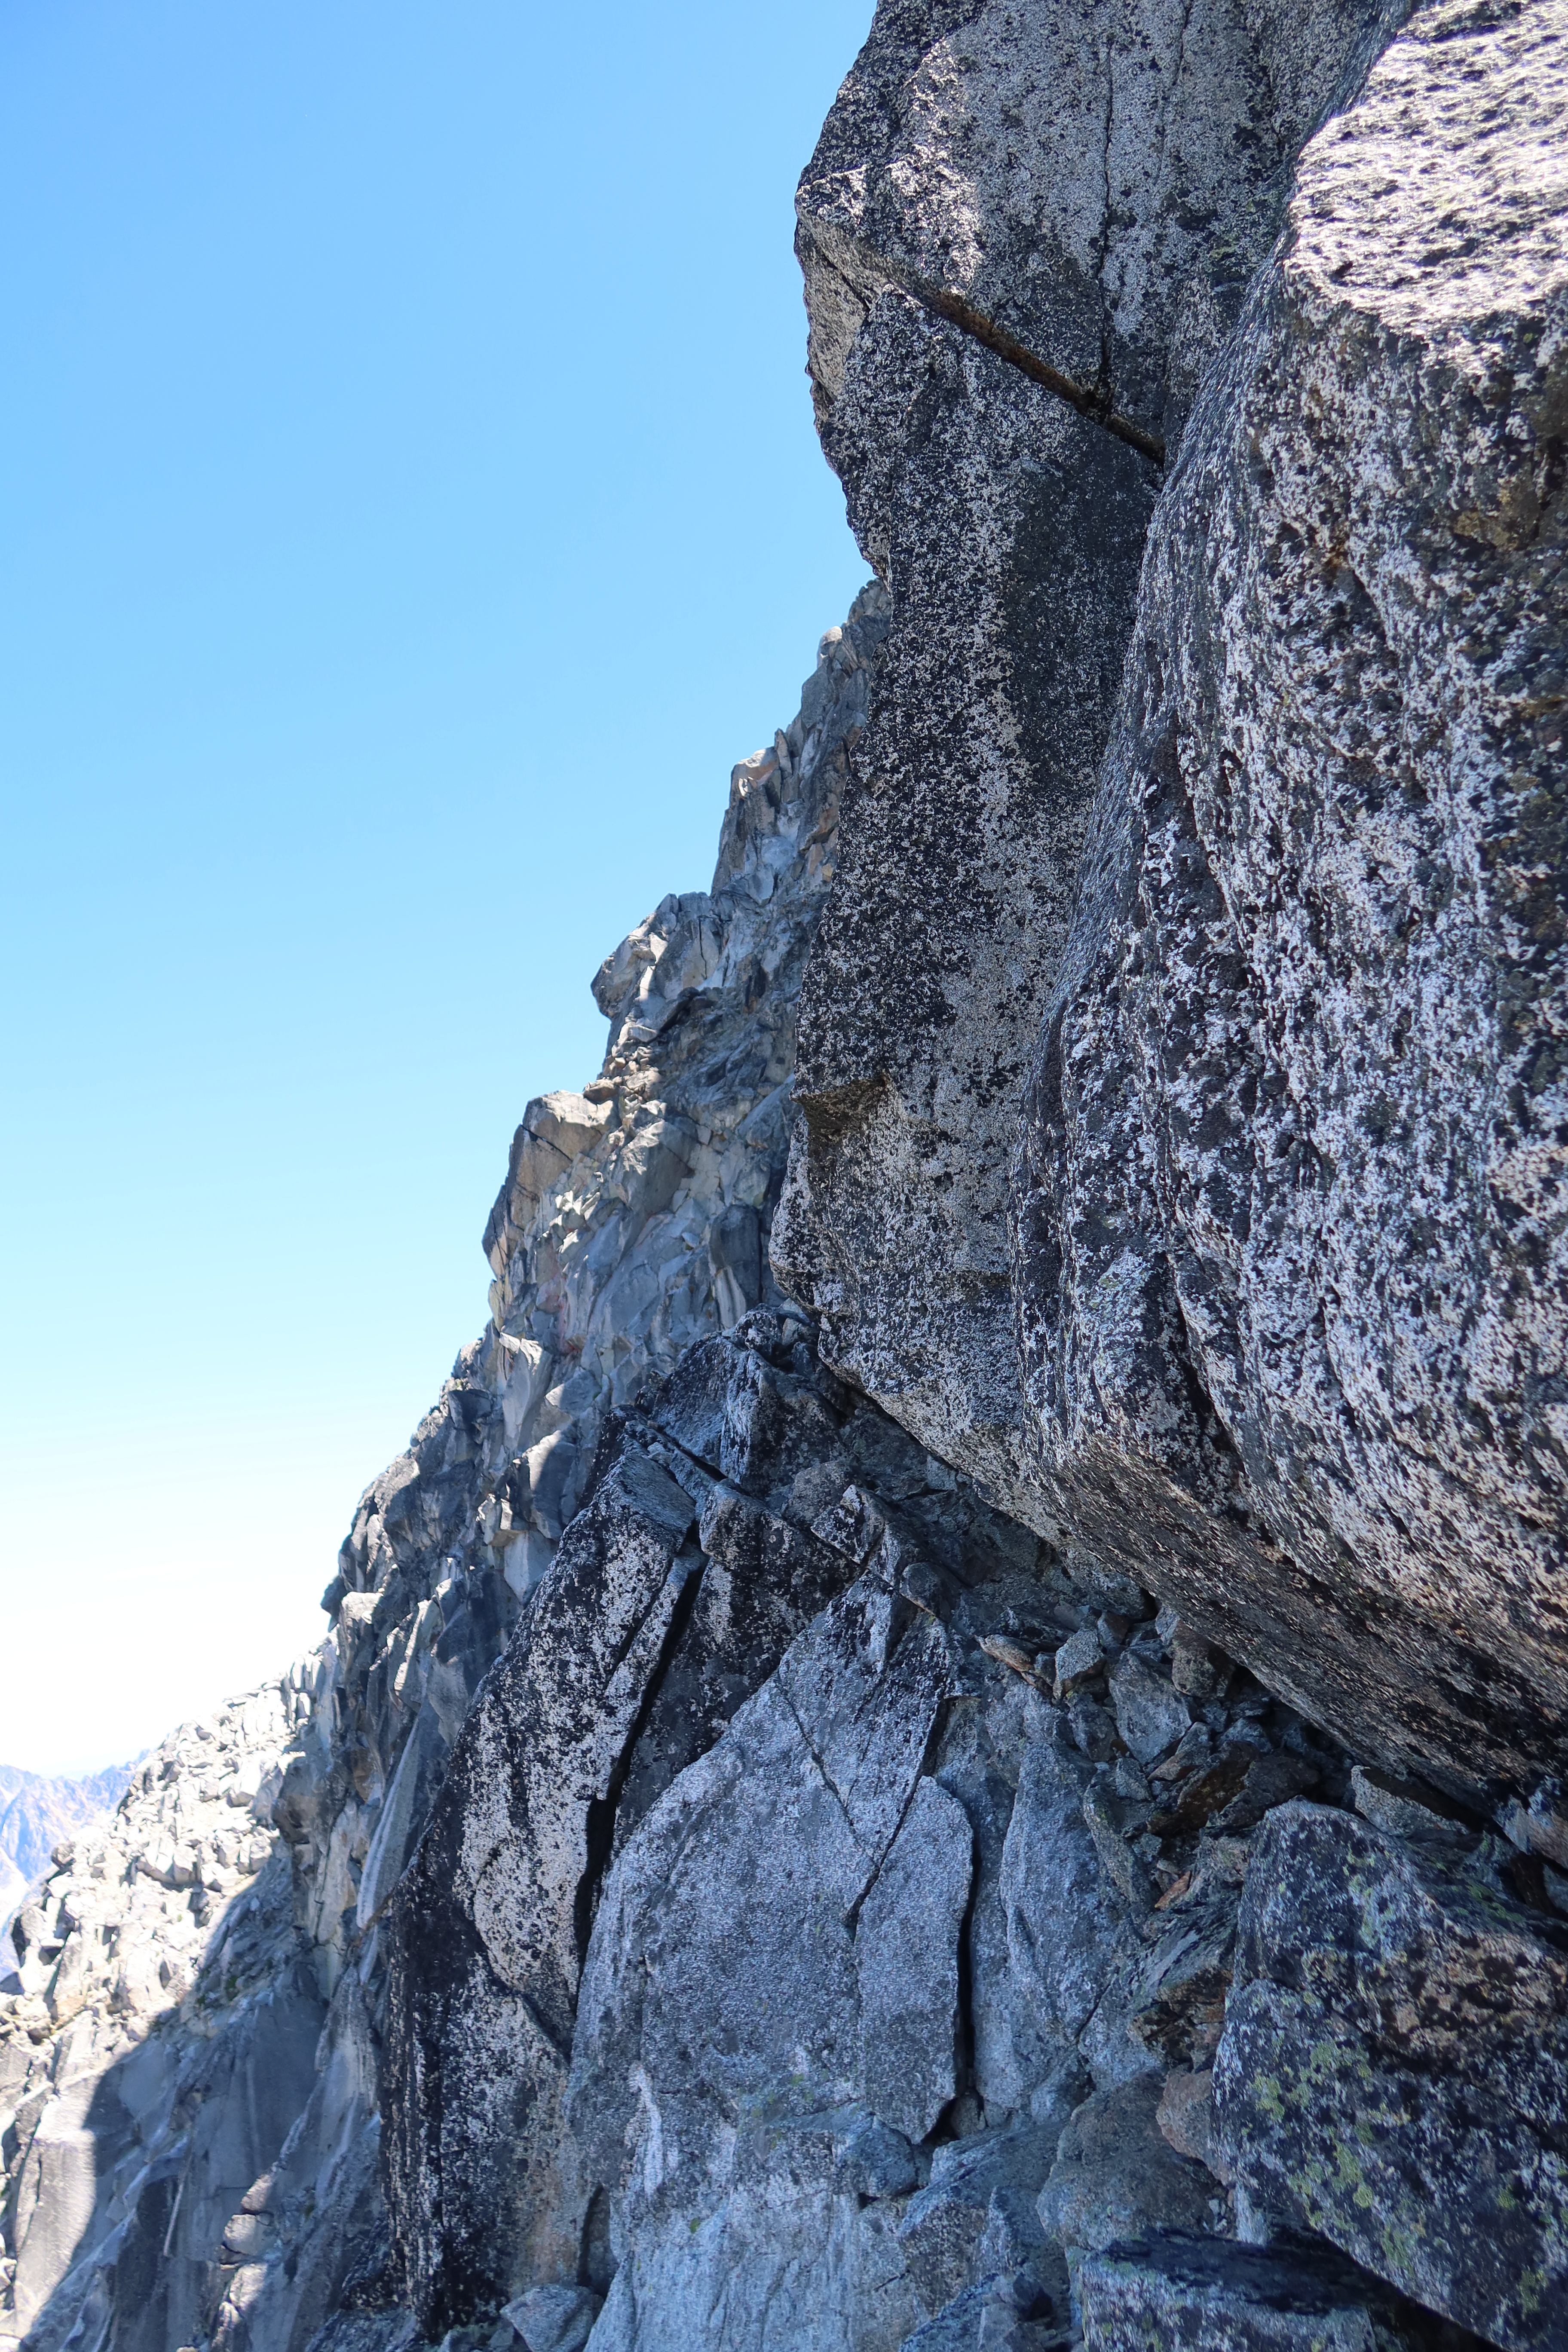
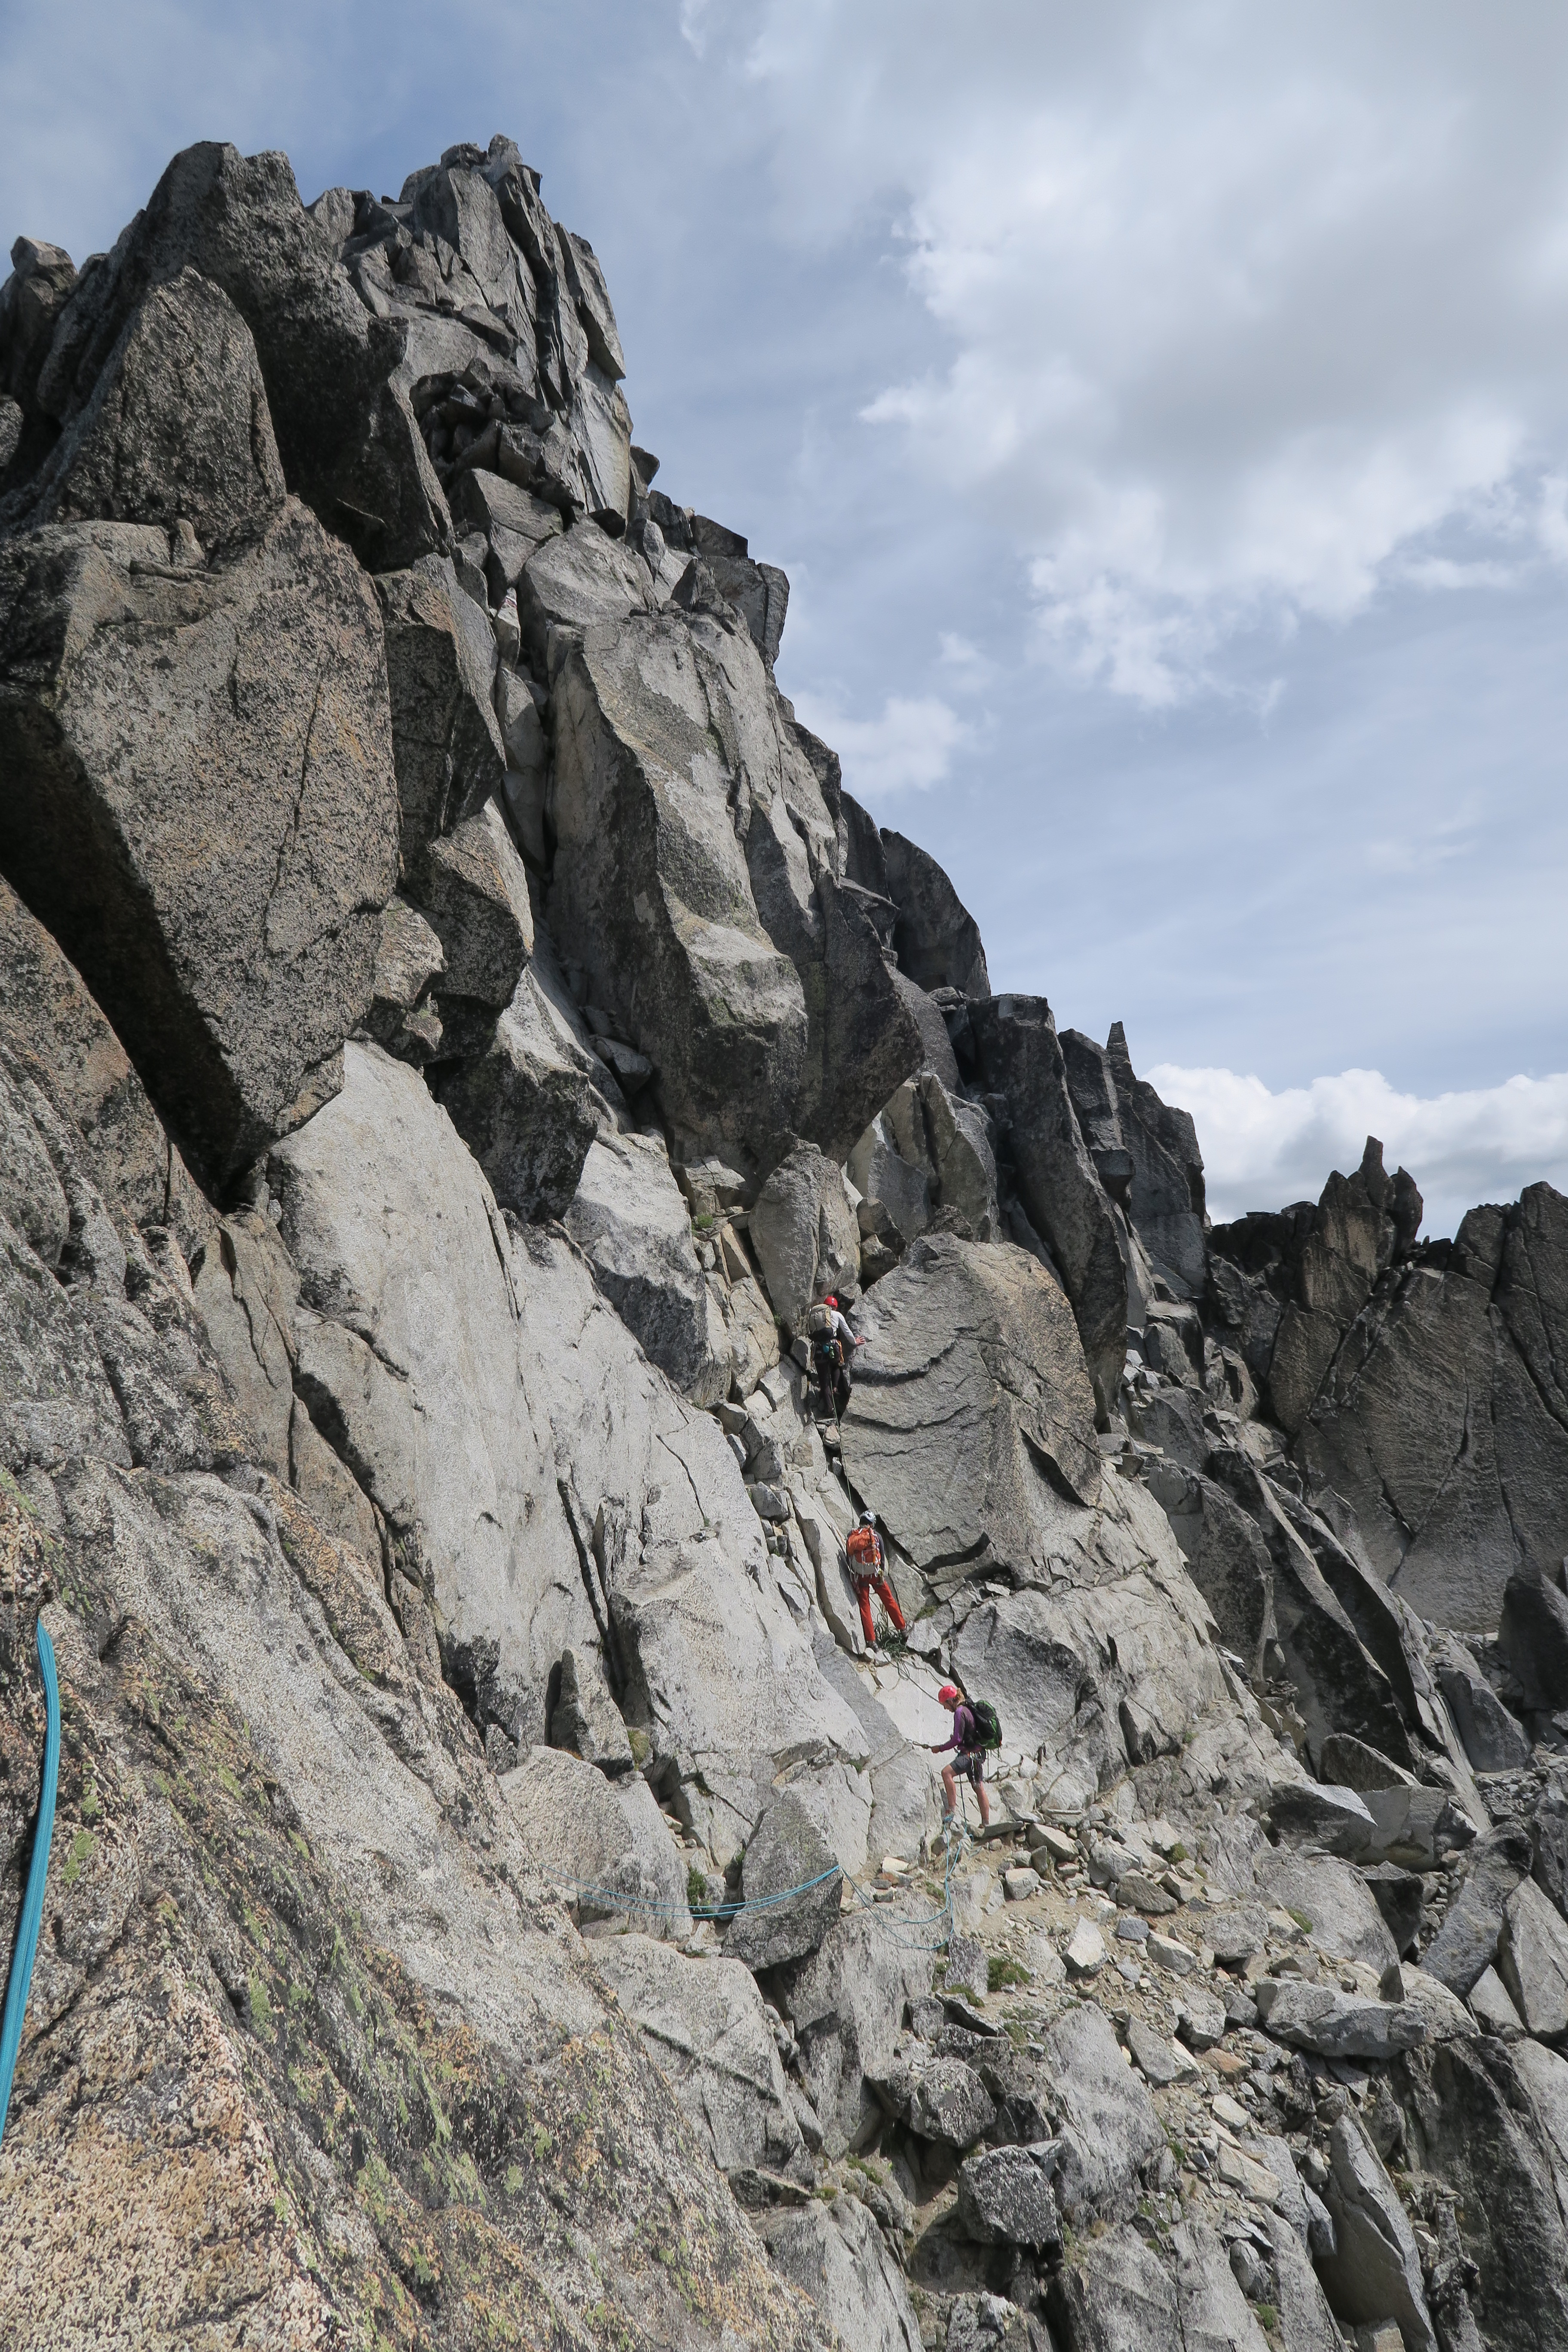
- 1:00pm – arrive at the West Ridge Notch, then scramble ~100 to ~200 higher than that notch to where we finally put harnesses on and rope up! From here, it’s 6 pitches to the summit, but they’re very short pitches (all sub 100′) and more scrambling than real climbing. The last pitch has the crux move, which is 5.6 (well, 5.6+). Since they’re short, if you’re efficient, you should get through those 6 pitches in under 3 hours.
- 4pm-ish – Summit!!
- See the earlier section, “Big Picture Schedule” for a list of places where you might spend the night, and choose what’s best given your remaining daylight.
- Summit to Ingalls Creek: typically ~4 hours for that descent
- Ingalls Creek to trailhead: typically 3 to 4 hours. (But consider adding an hour, as it’s often desirable to take a long leisurely break next to Ingalls Creek, with lots of drinking & refilling water. Many people are out of water and quite thirsty & fatigued by the time they reach Ingalls Creek.)
Other People’s Beta that really helped me
- I highly recommend carrying a copy of this trip report by “Cluck” on CascadeClimbers
- an old friend of mine, Paul Bongaarts, hand-drew a topo of the West Ridge route that’s really helpful too
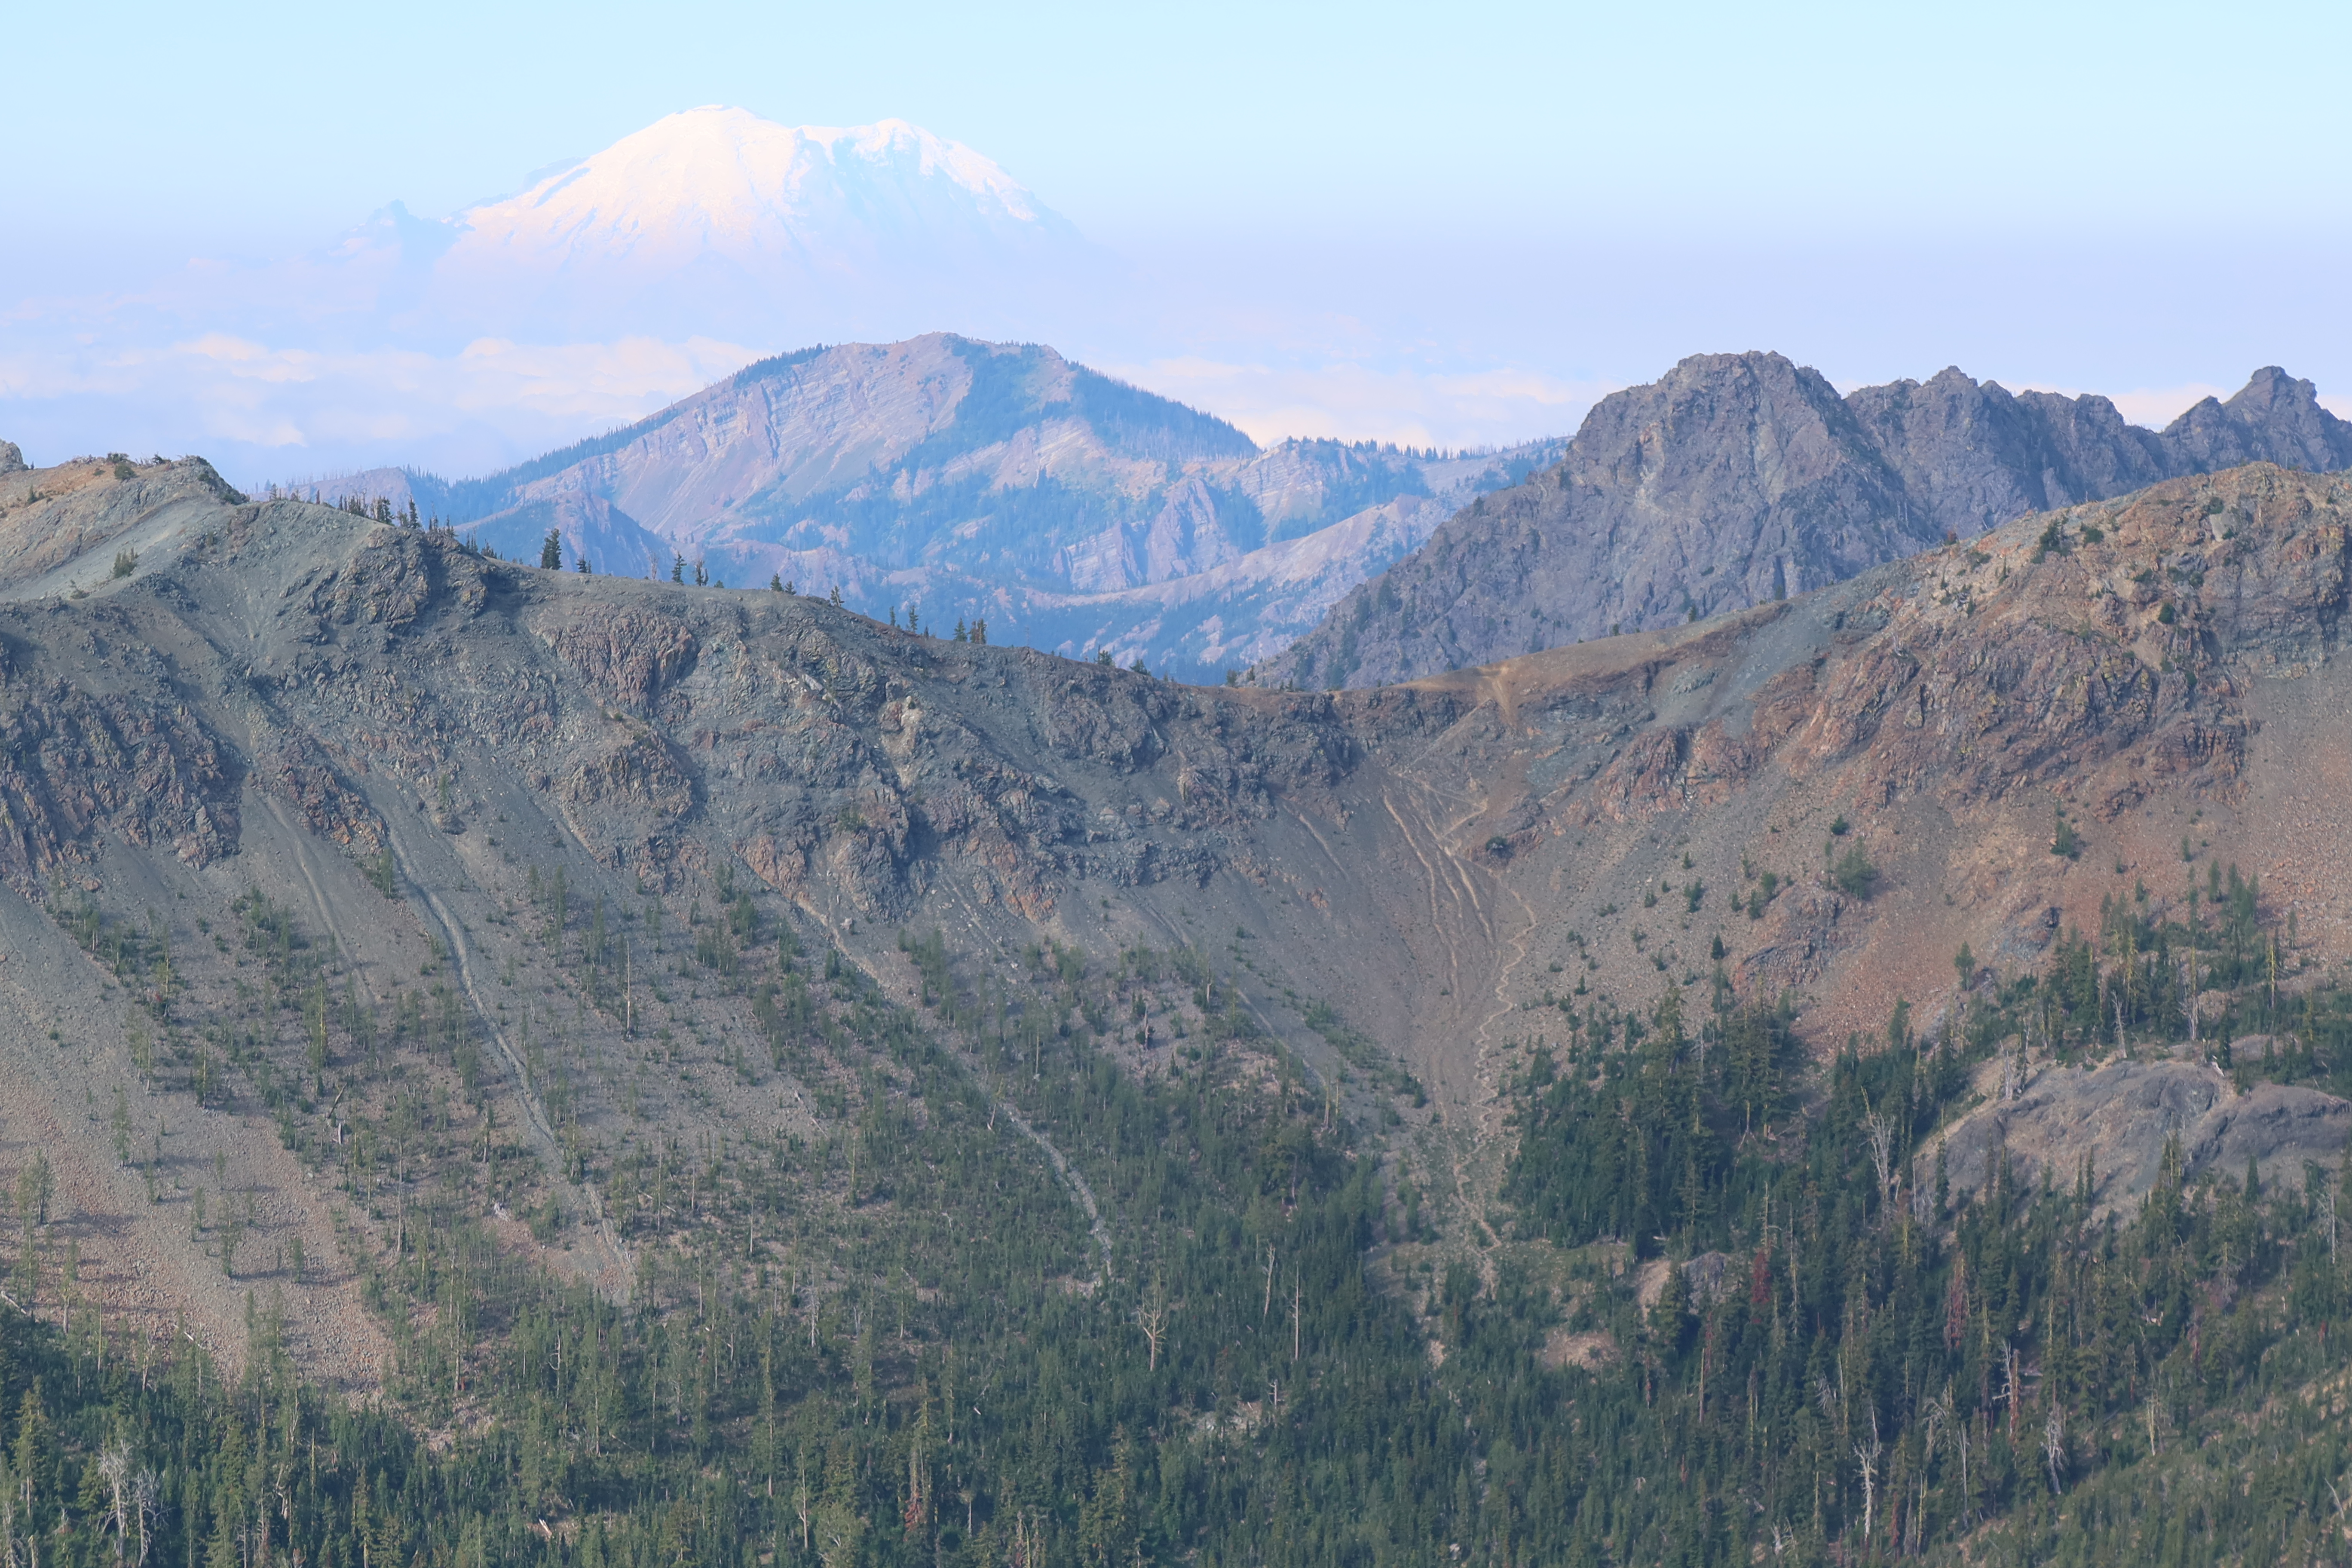
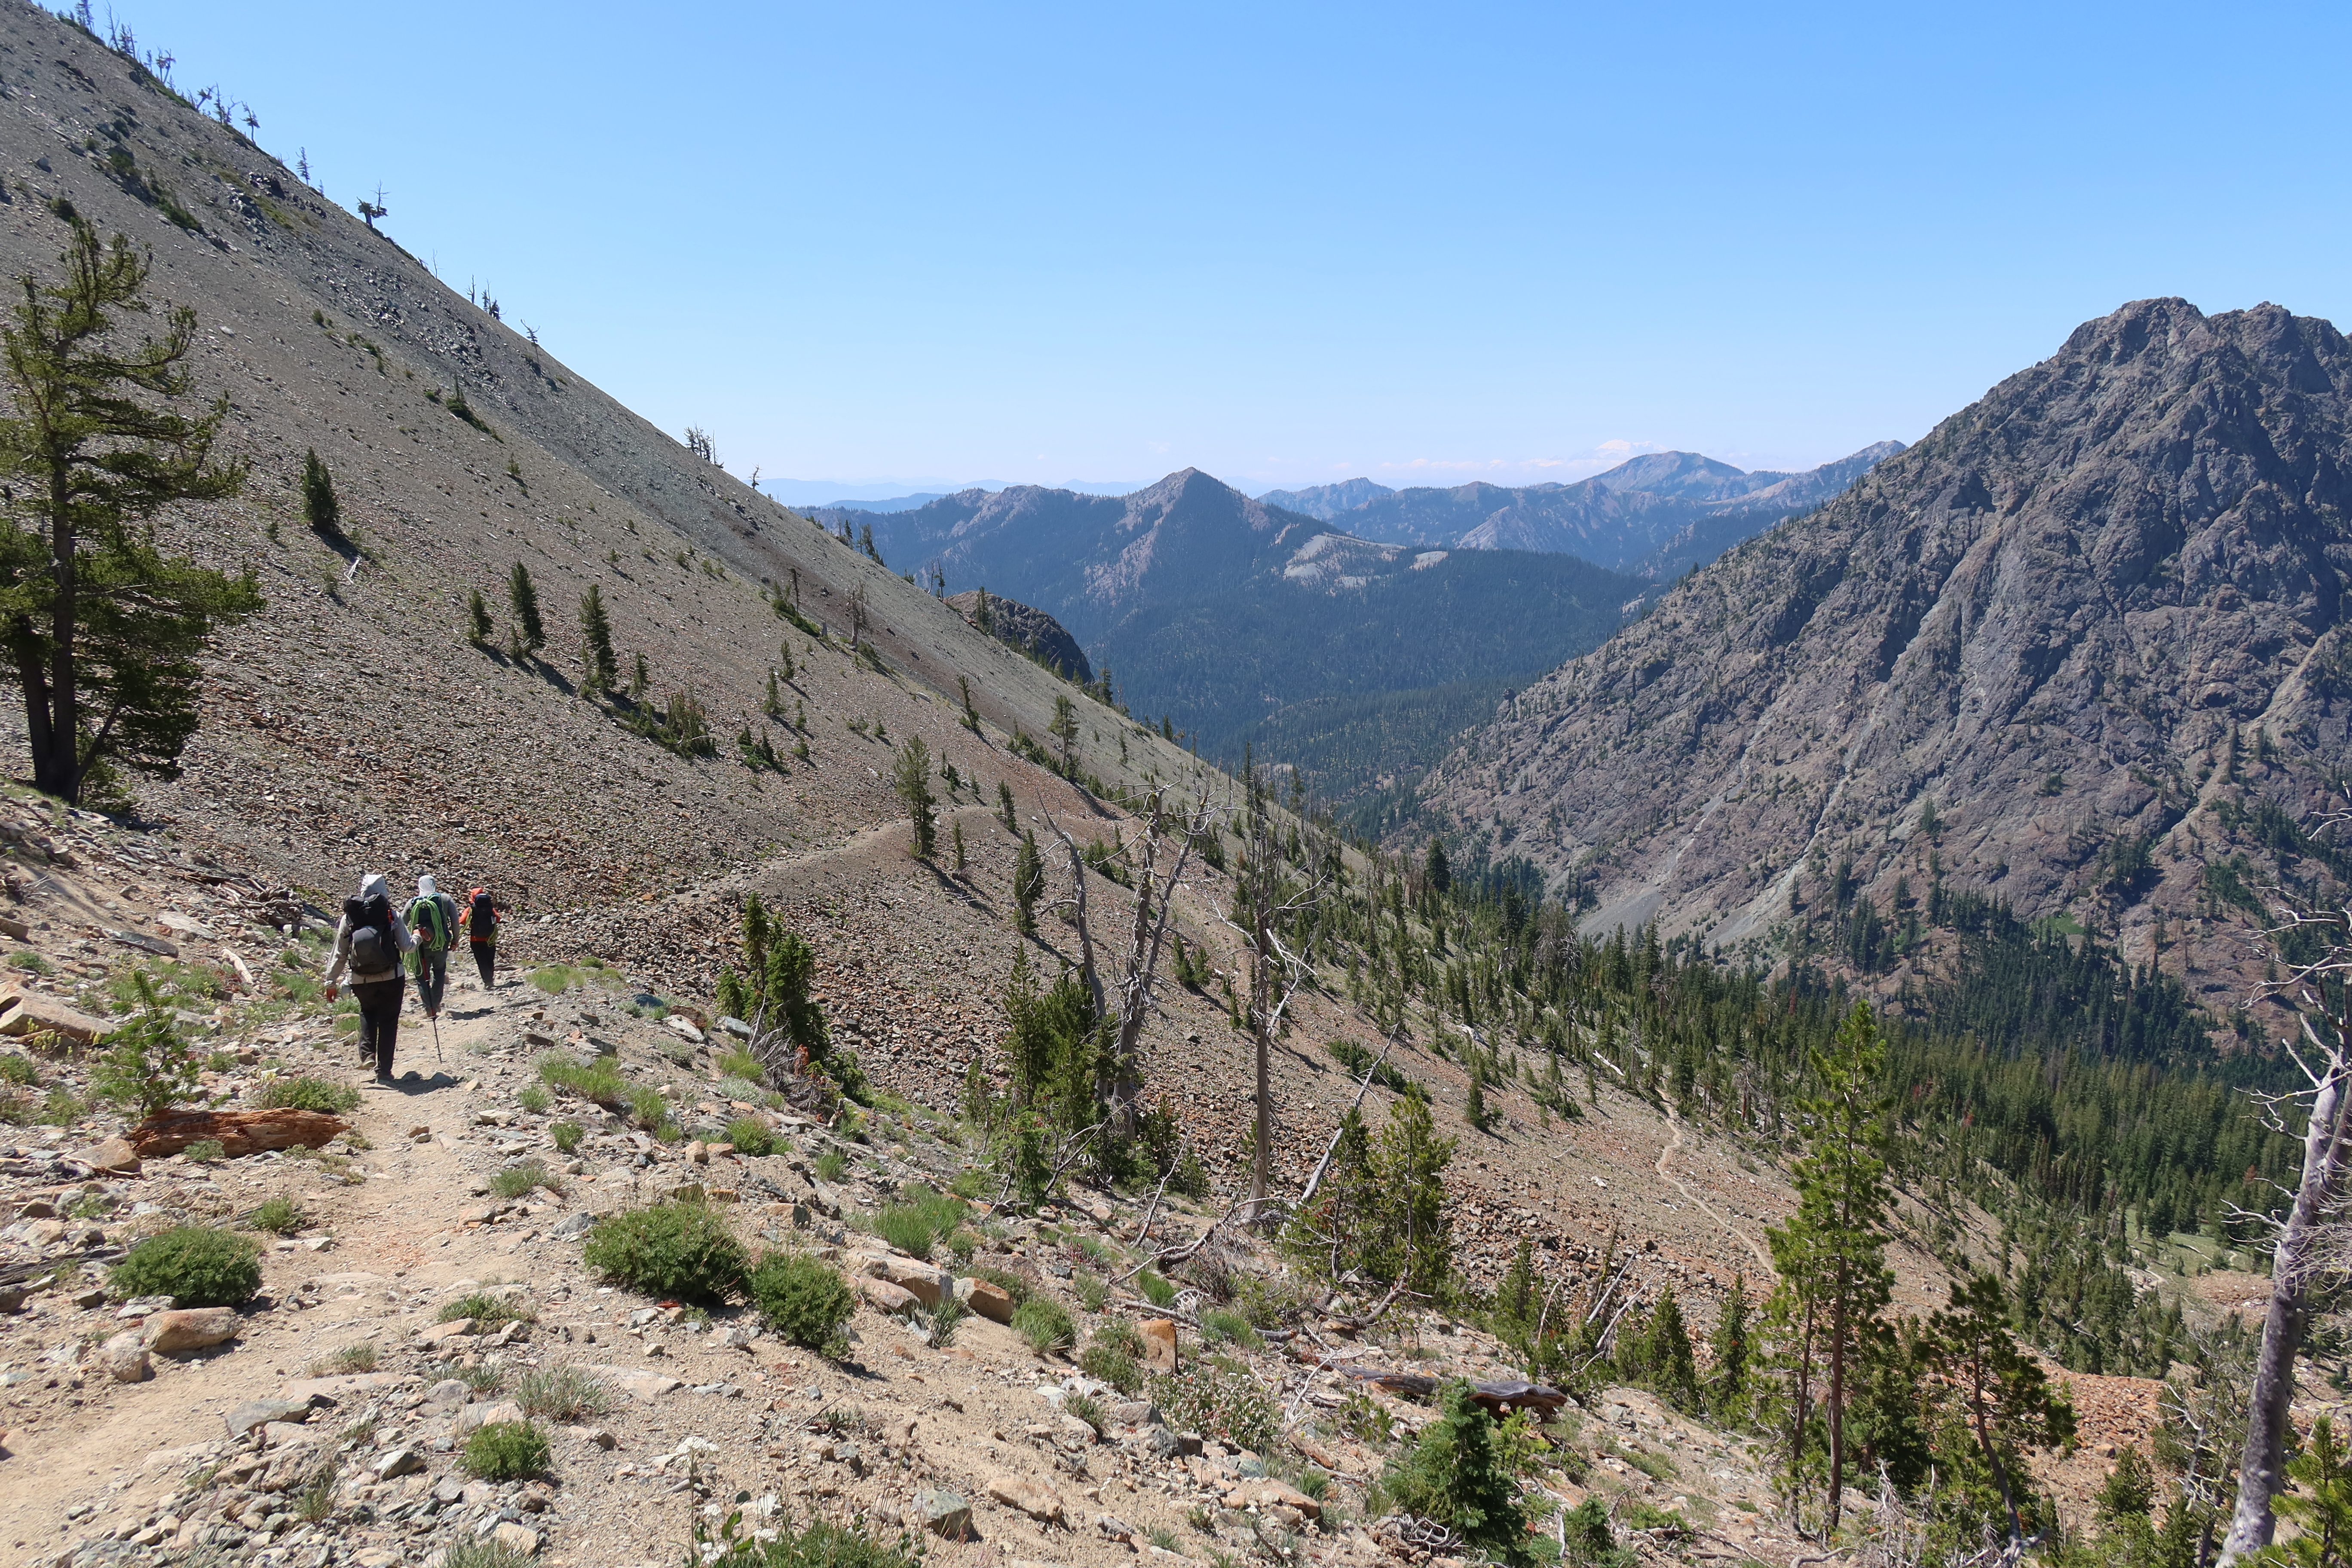
The Route in pictures


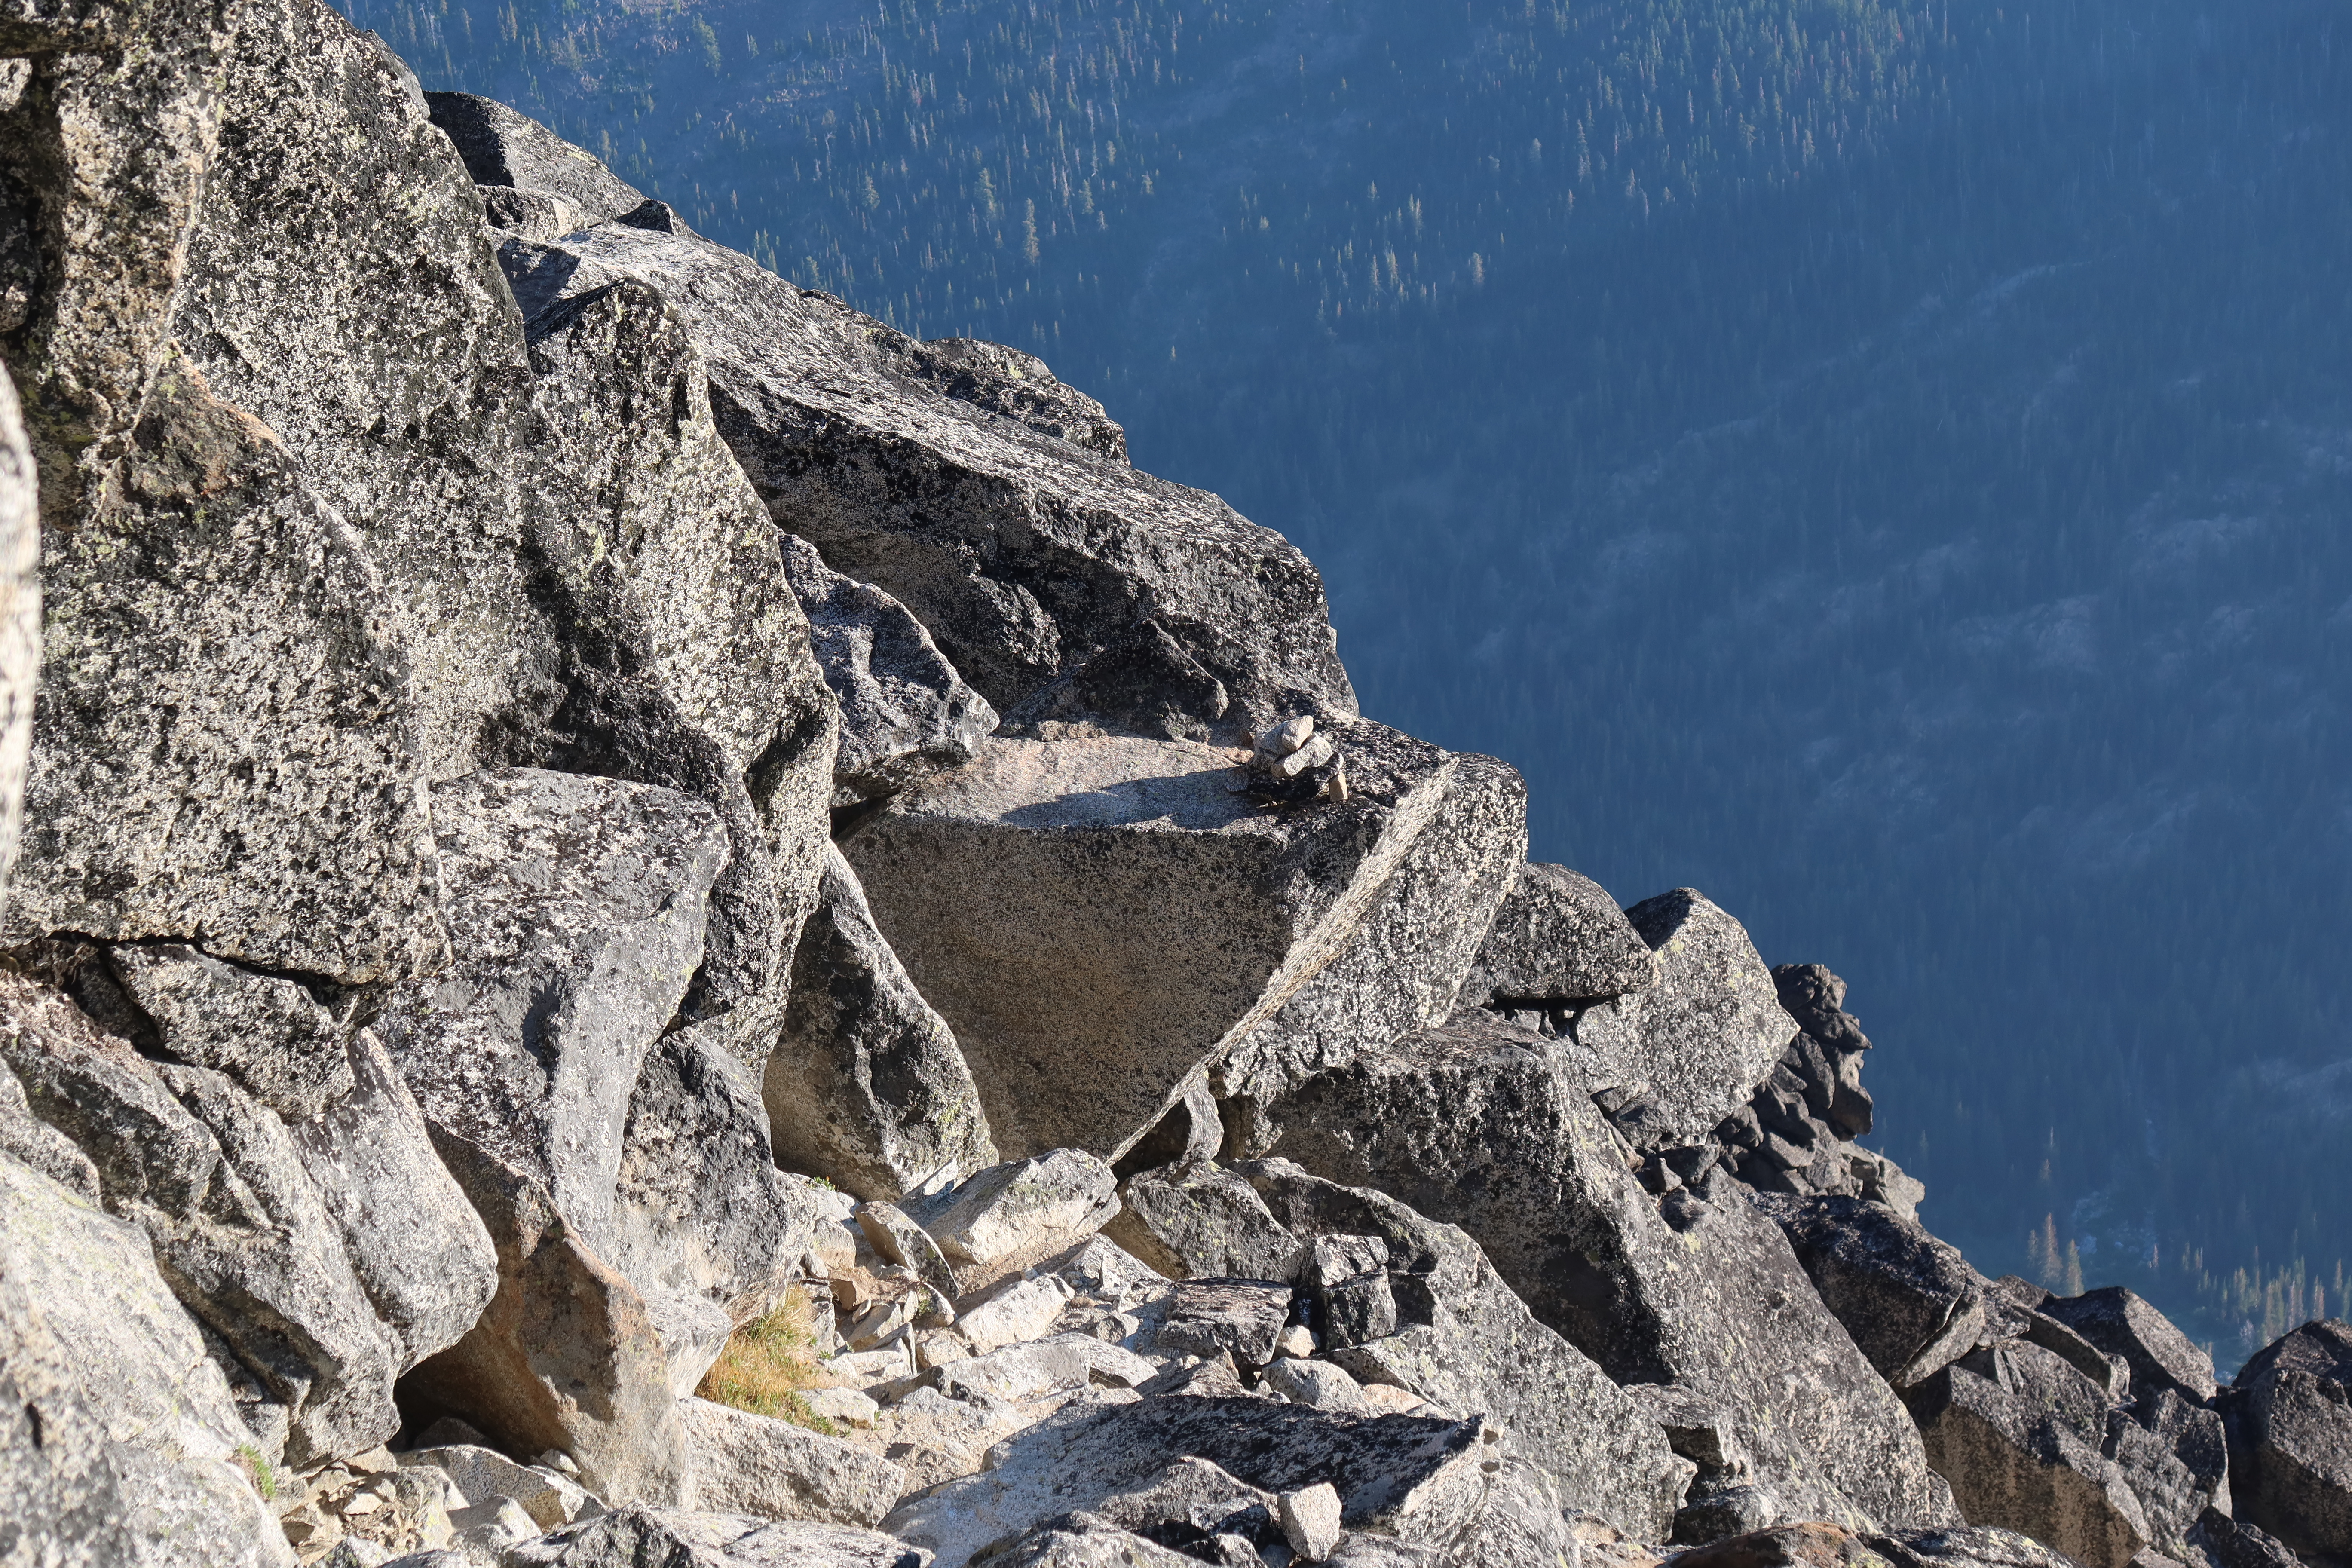
Descent


Thanks RobUSA, Just went up this last weekend and your trip report here made it a breeze. Appreciate your efforts.
Kyle
Glad to hear it! Thanks so much for saying so!
Pingback: Argonaut Peak via the south scramble route | Rock n' Rope Northwest
I just climbed Stuart’s West Ridge yesterday and used your trip report. The photos and related comments were like a Rosetta Stone, making it easy to stay on route and navigate a wonderful climb. Great job and much appreciated. Thanks!
Excellent, I’m so glad to hear it!
Pingback: Some notes on the North Ridge of Stuart | Rock n' Rope Northwest
Pingback: Some notes from the North Ridge of Stuart | Rock n' Rope Northwest
Best report! helped us a lot.
A few 360 photos links to share (If I may):
LJT and the exit of the 2nd Gully:
https://maps.app.goo.gl/mGu29vKj7vG7n22k8
https://maps.app.goo.gl/drYiMEopEF1ddnMGA
End of the class 3 section after the crux:
https://maps.app.goo.gl/JbUK85hVFZqbeMmY7
Butte above the crux:
https://maps.app.goo.gl/4dUJec75Ed6VLz2H9
Chimney at the top of the 2nd Gully:
https://maps.app.goo.gl/z9R5mmmGUyw9vsiWA
Look back at LJT:
https://maps.app.goo.gl/iB2HoukXia1d3UgX6
LJT Notch:
https://maps.app.goo.gl/Rg49L3Mh5PFQEYD7A
Thanks!
JianMing
Rob,
Thanks for the information it was helpful. We used it to climb the mountain last weekend. It didn’t stop us from taking a few wrong turns. We had a great time. Thank you!
Thanks, I’m glad to hear it! Yeah, the route-finding there is super complex! Nice work!!