
I’m so stoked that I finally got to actually climb an ice route!! It’s been just shy of 3 years. And not for lack of trying, I’ve just had so many turn-arounds and cancellations. Anyway, with Seattle itself being below freezing since Sunday, I was very optimistic about the chances of finding Skookum Falls in shape for climbing. I got Chris to go out there with me yesterday, Wednesday Dec. 29th, and the ice did indeed deliver!
Scoping it out
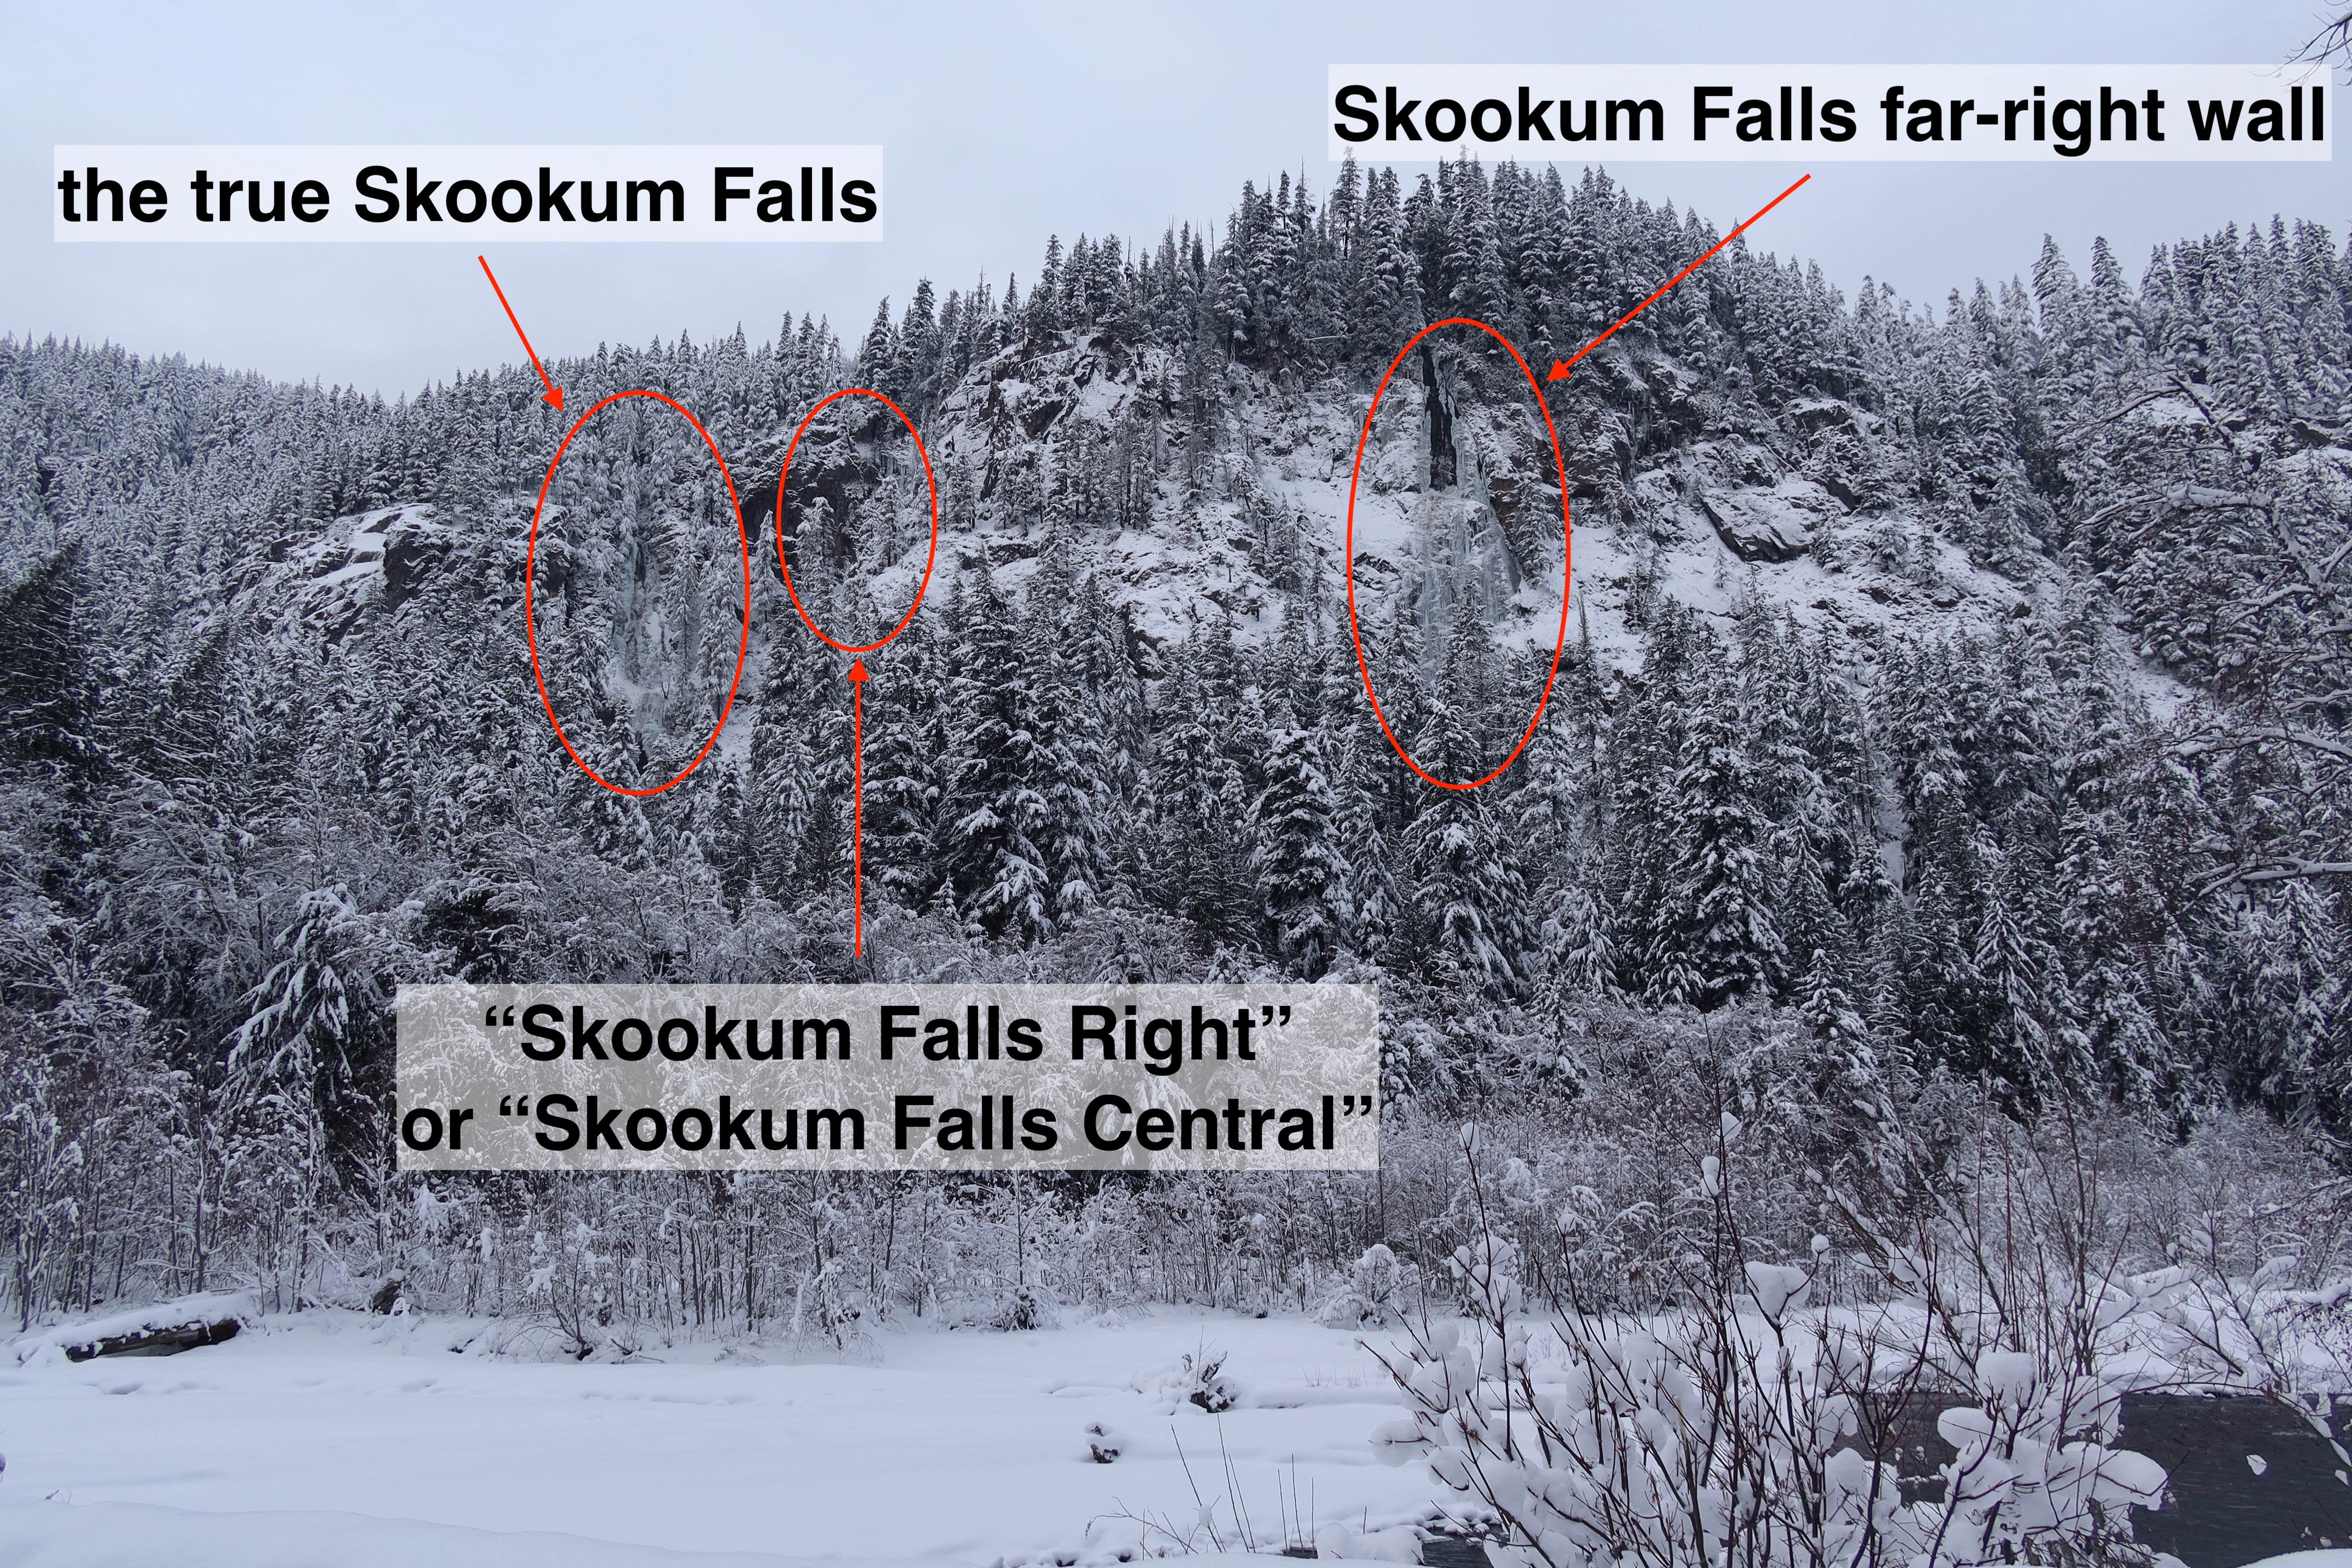
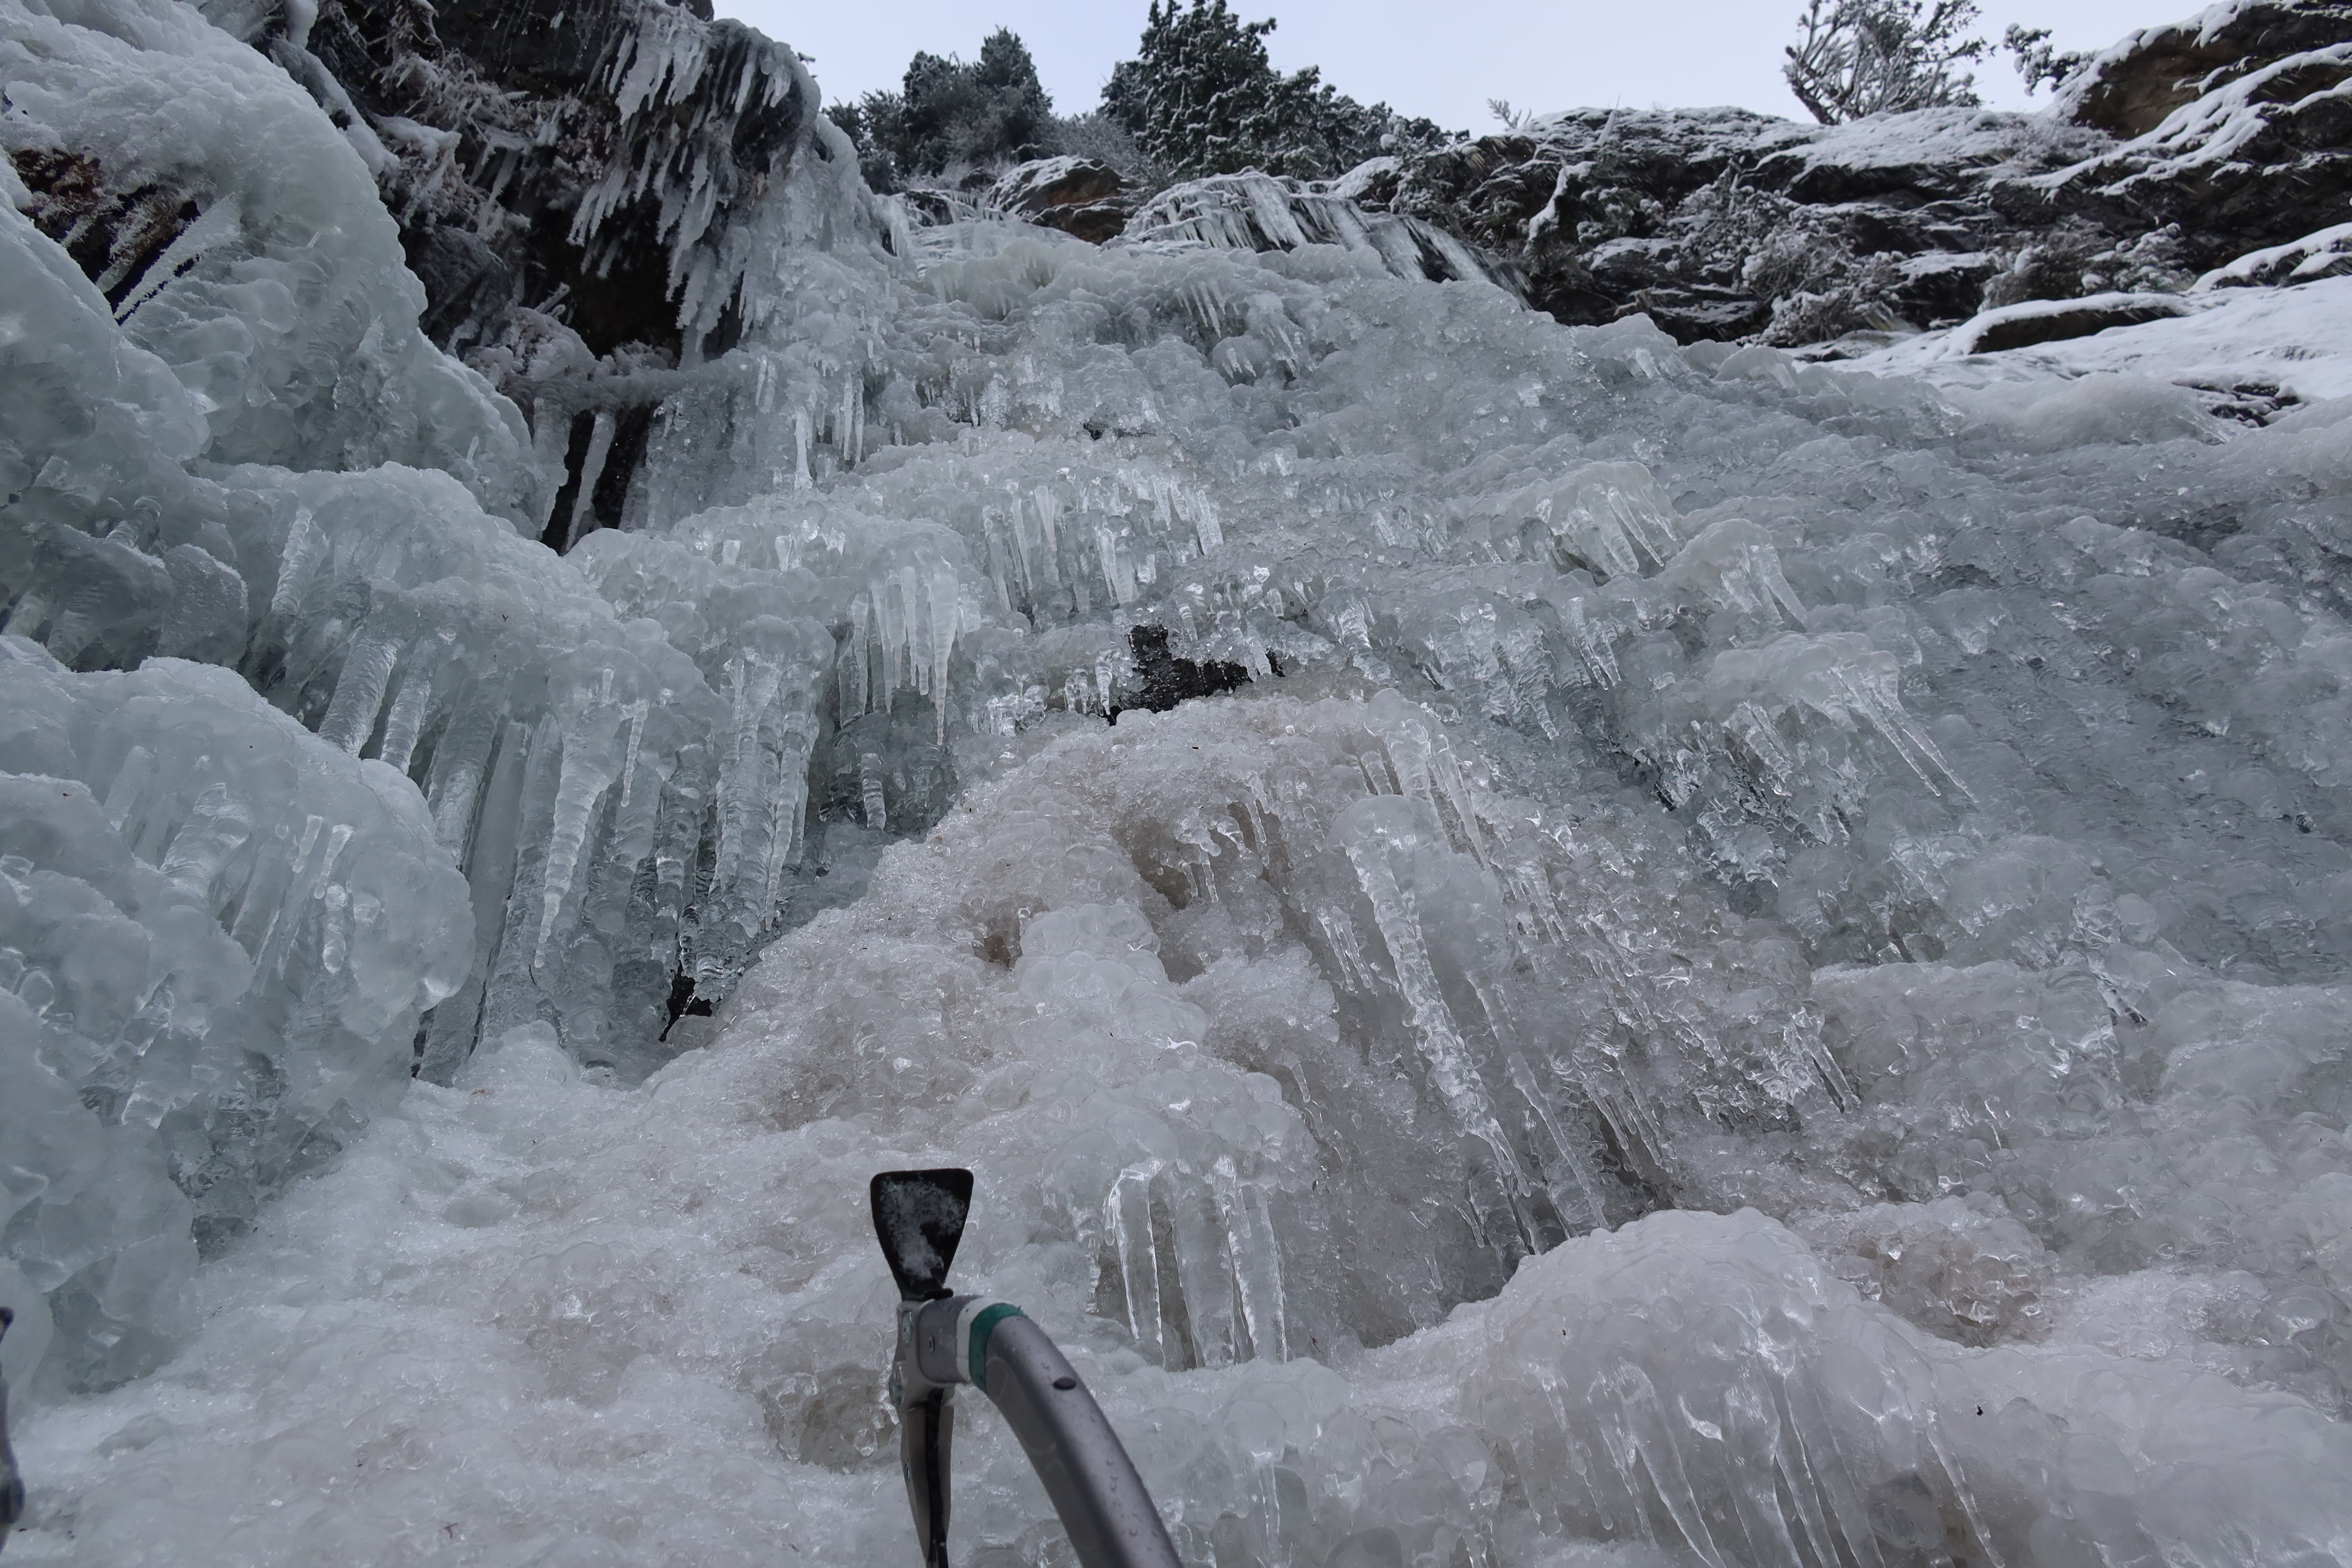
It’s worth driving to the Skookum Falls Viewpoint (47.05290, -121.57210) on Hwy 410 first and taking a look at the ice routes from there. I had packed binoculars for this, but they weren’t that necessary after all, the things you’re looking at are only a half-mile away, and fairly big. The true Skookum Falls waterfall, which people take pictures of in the summer months, is the one on the far-left, in a bit of a recess in the cliff. About 200 or 300 feet right of that, hidden in even more of a recess, is another flow that I’ve heard referred to as either “Skookum Right” or “Skookum Central” in various other descriptions. A full 1000 feet right of the namesake Skookum Falls, another lower-volume flow of water on a more broad and openly visible rock face creates a much more eye-catching wall of ice, which we’ll call “Skookum Far Right”, even though I feel like it almost deserves it’s own name. Anyway, it looks like the majority of the trip reports on CascadeClimbers.com, as well as the current single description on Mountain Project, are all referring to only this “Skookum Far Right” wall. The photo of Skookum Falls in the “Washington Ice” climbing guidebook by Krawarik and Martin is of one of the other flows: either the original Skookum Falls on the left, or its neighboring “Skookum Central” gully.


Approach
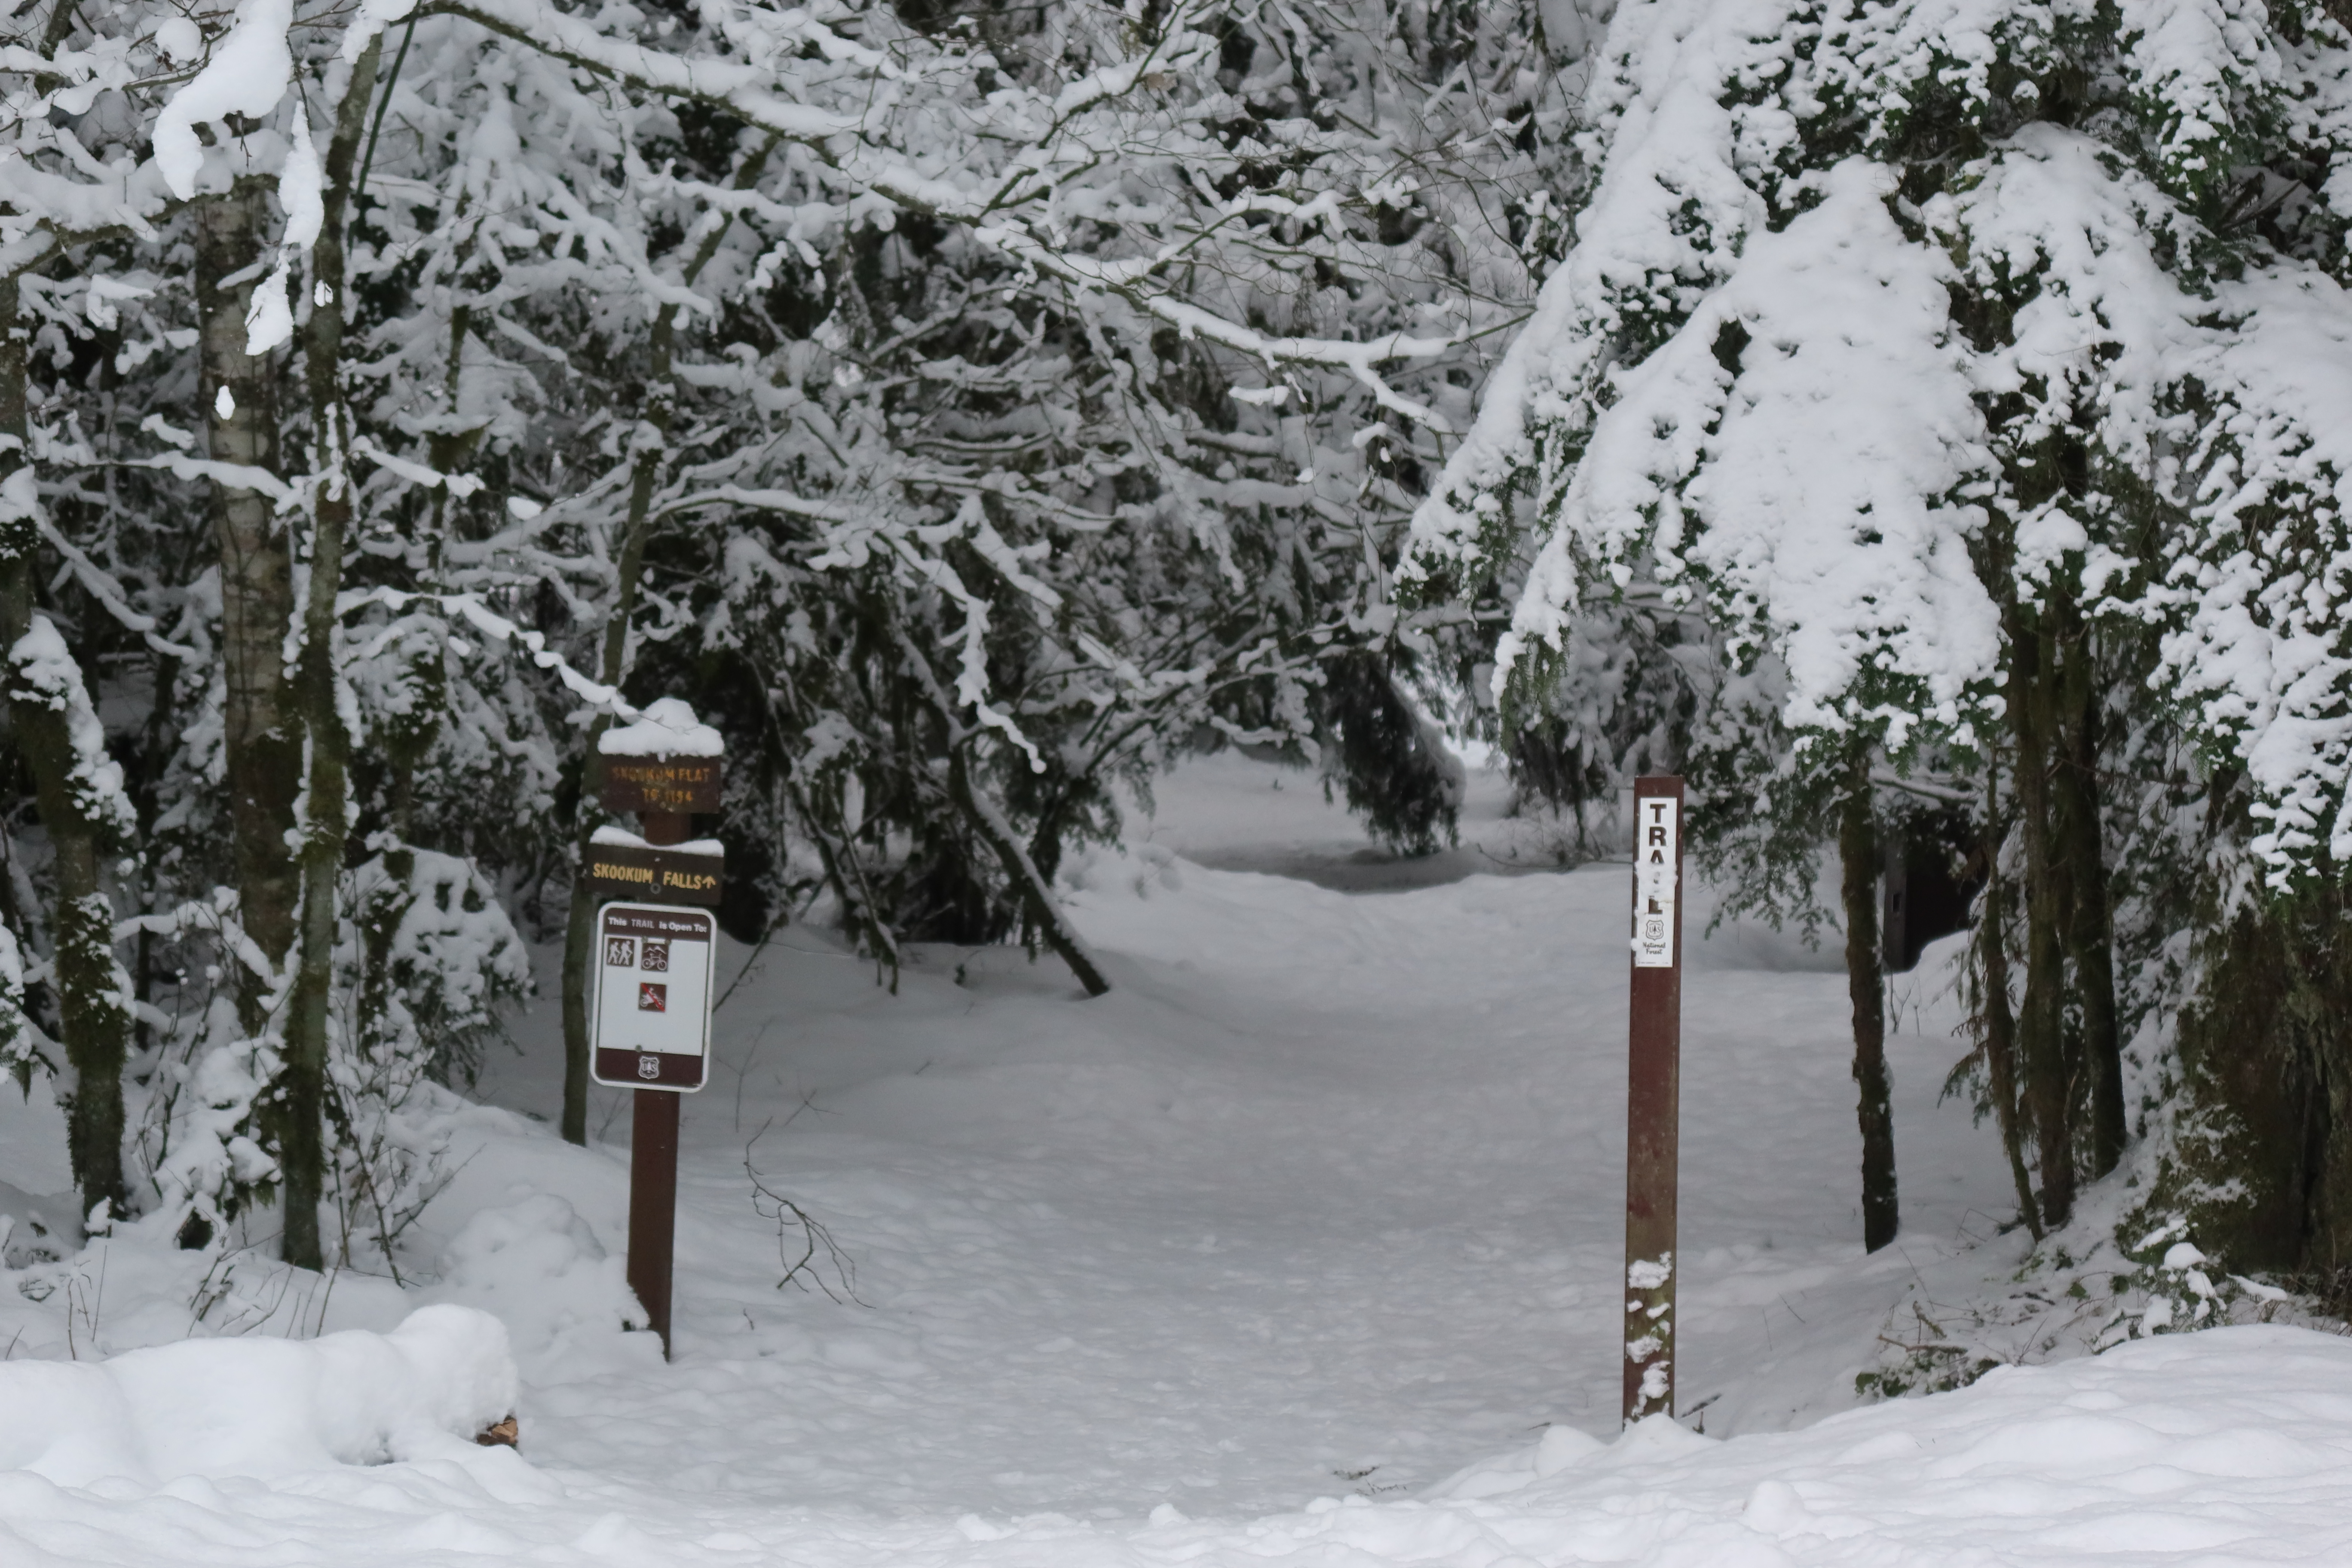
We’d heard plenty about people parking at the Skookum Falls Viewpoint on Hwy 410, and finding a way to cross the river from there. However, the alternative is parking 2 miles north, on Forest Road 73, at the “Skookum Flats North Trailhead,” and walking a flat and easy trail through the forest. (47.07796, -121.58586. Requires NW Forest Pass.) We opted to just accept the slightly longer distance to avoid any shenanigans or questionability of trying to cross the river. We also didn’t see any logs across anywhere within eyesight from the Skookum Fall Viewpoint, but admittedly we weren’t looking very hard since we had already mentally settled on taking the trail. Compared to what I’m used to hiking on for alpine climbs, the trail felt incredibly civilized: flat, straight, easy to follow, with a mere 2″ of snow, and even that had already been packed down by someone else. Luxurious.
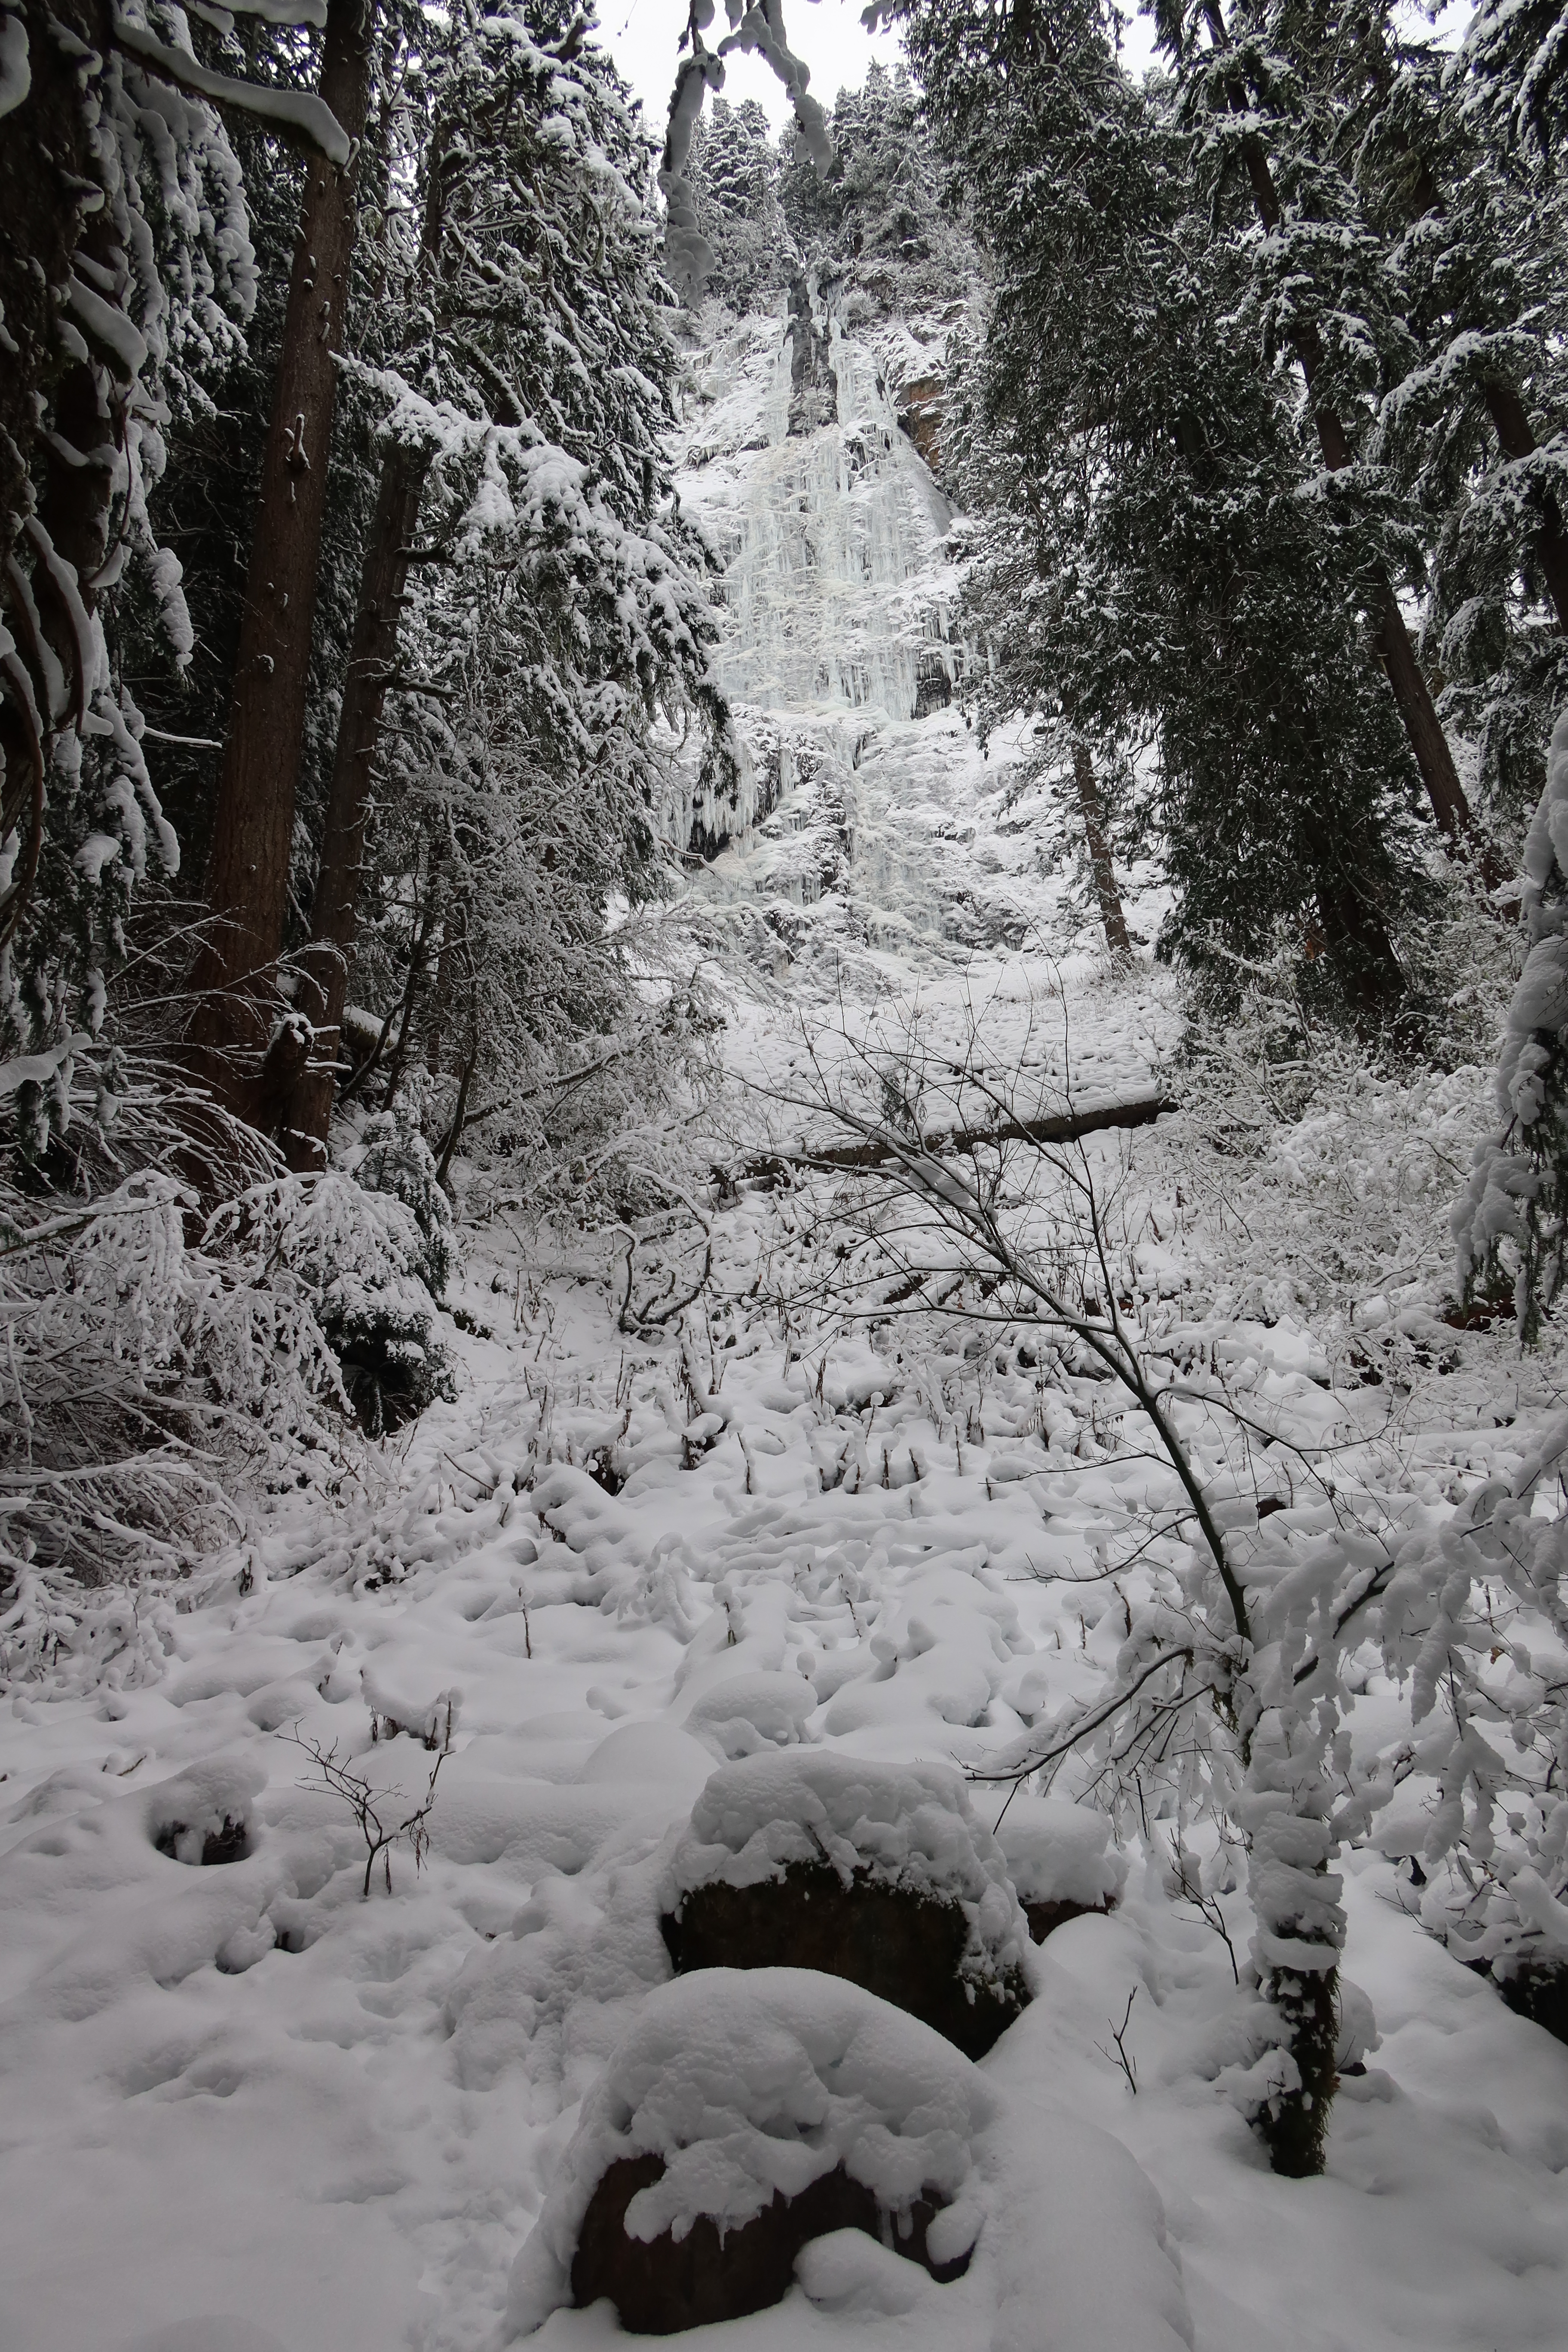
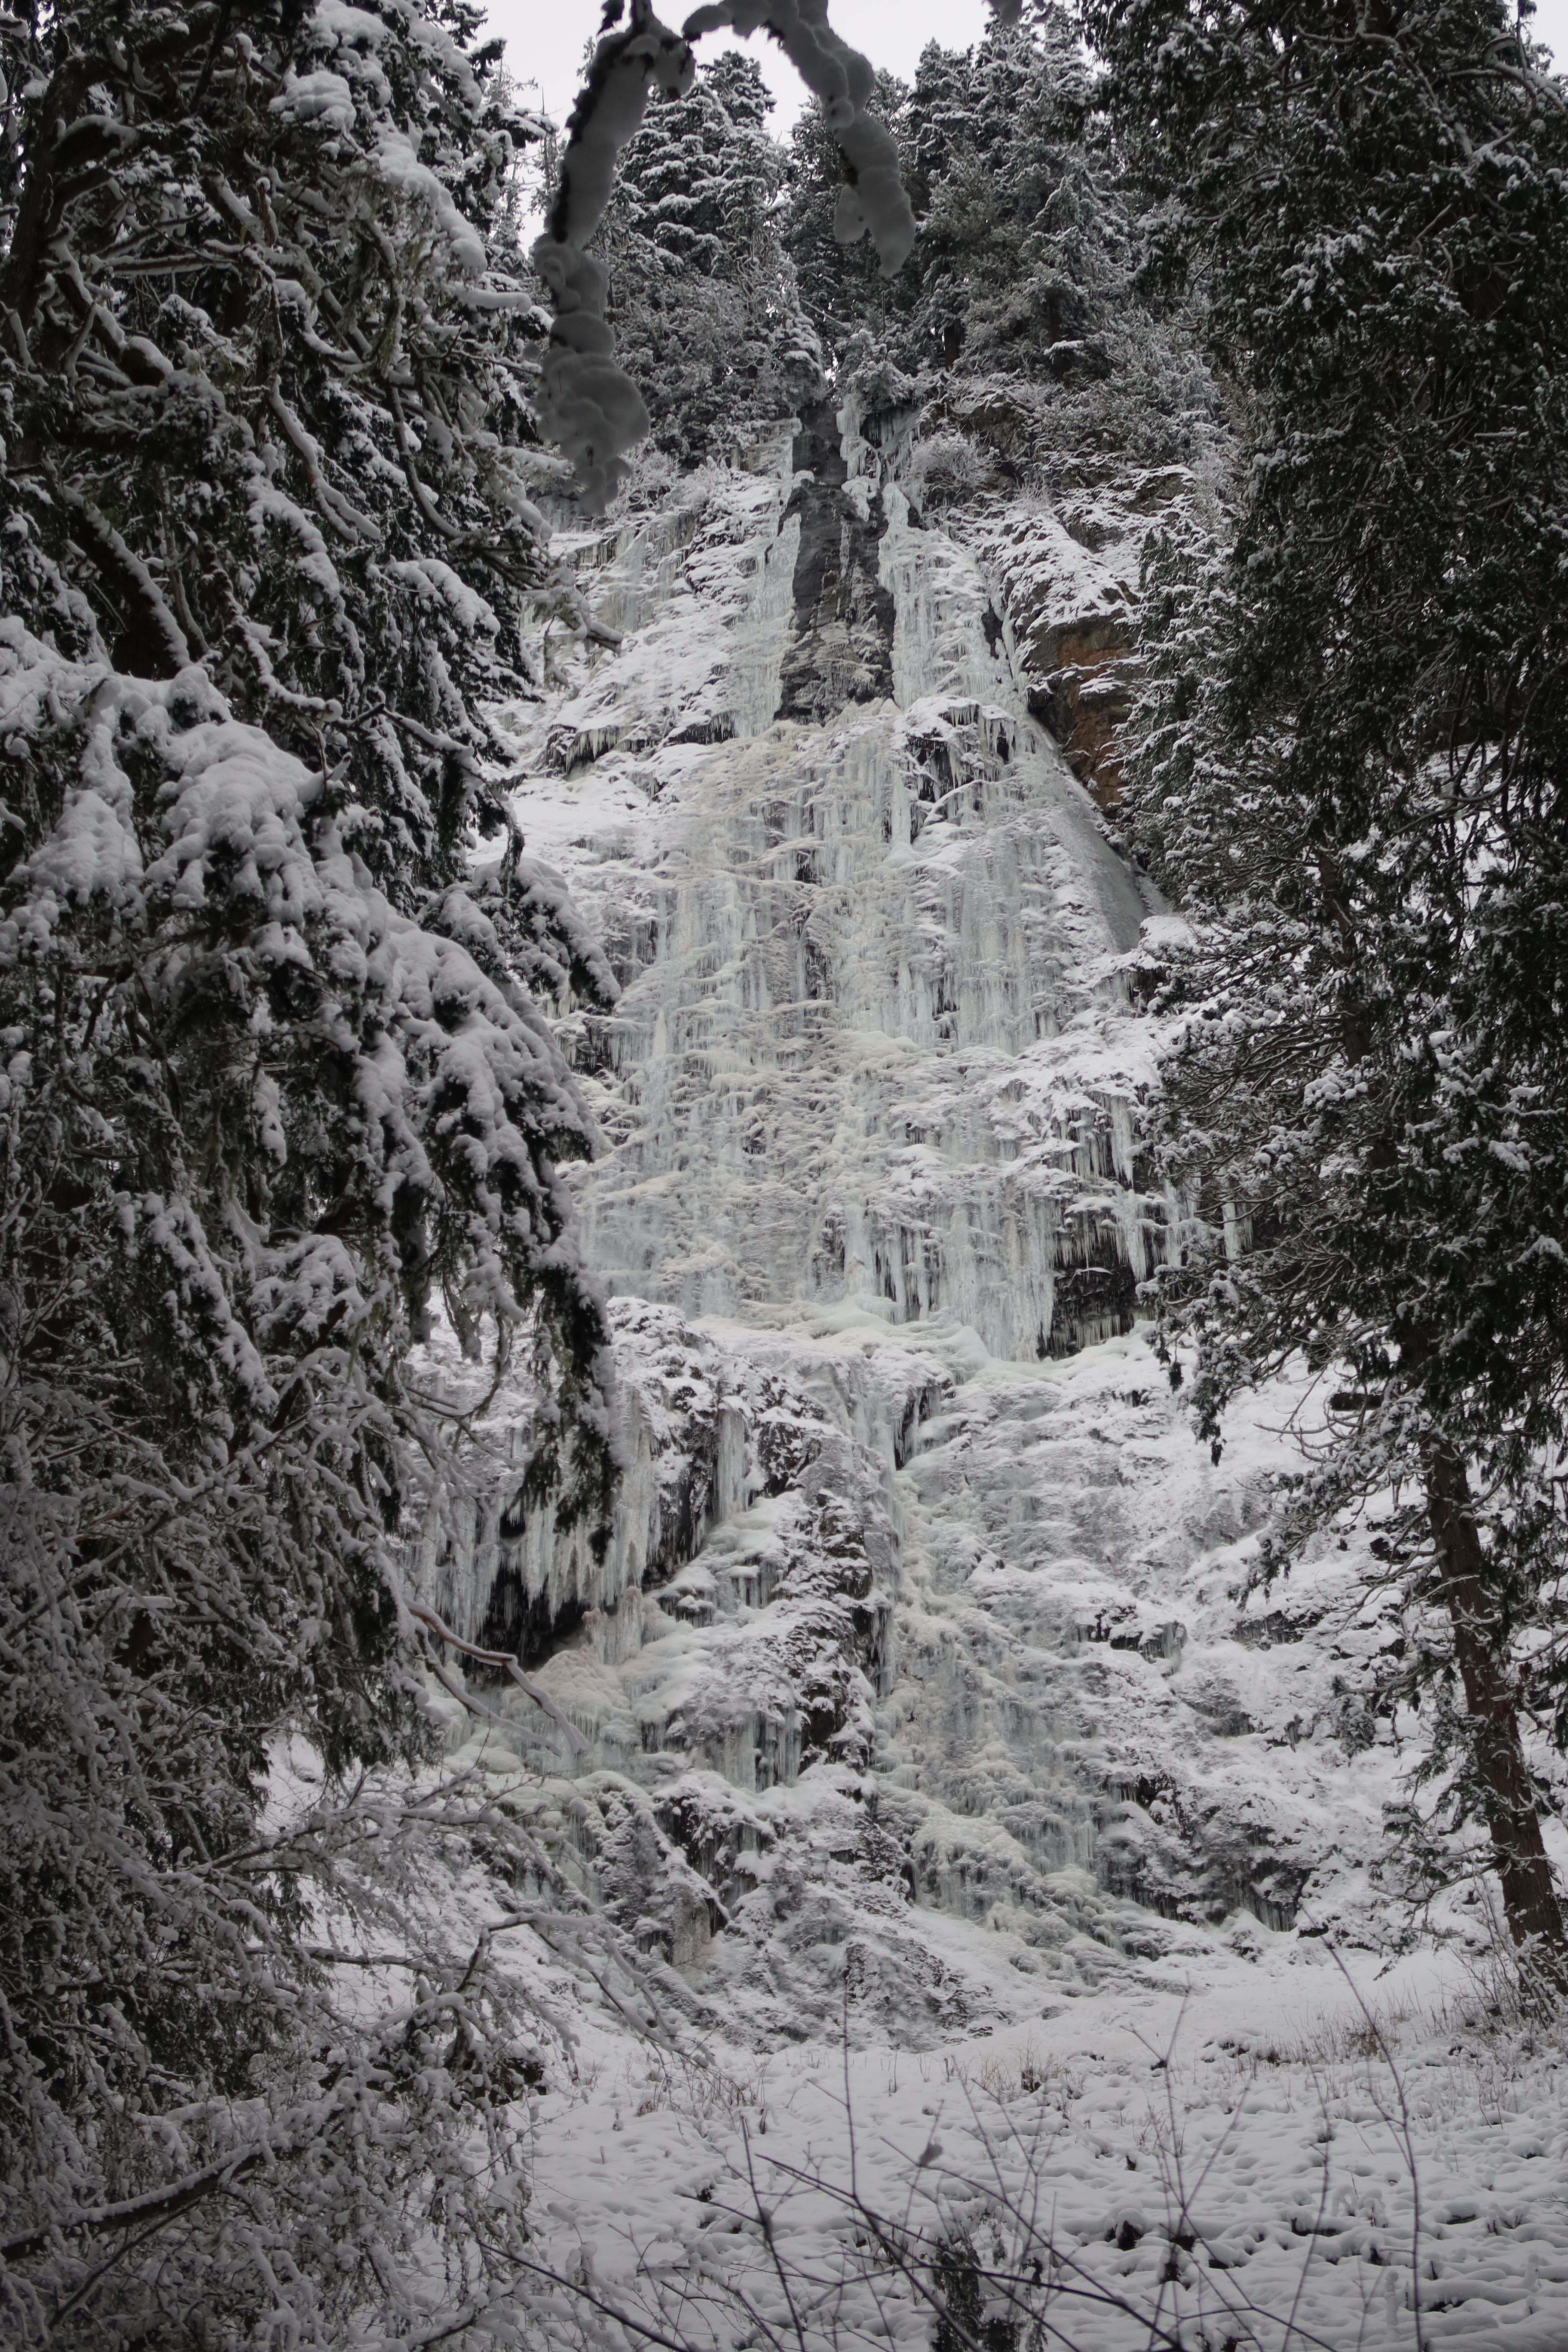
After 40 minutes on the trail, (and one army-crawl under a blowdown,) Chris & I arrived at some very prominent flagging tape hanging from tree bough. We were directly underneath “Skookum Far Right”, with a wide-open swath through the forest giving us a perfect view up at it. Getting up that open swath was a bit trickier though, especially after we had been lulled by the nice trail until then. It took us another 25 minutes to gain that 200′ up through snow-covered rocks, logs, & devils club. We stopped at the last big tree on the right to transition and gear up for the actual ice climb! (47.05237, -121.57610)
Pitch 1
It took 40 minutes at our transition spot to eat, drink, change layers, put on harnesses, crampons, rack up the screws, stuff some essentials in a smaller climbing pack, and flake the ropes. I asked Chris to let me have the first lead, and he agreed. I started right up the middle of the wall, which looked the easiest, consistent and fun WI3 where you could always keep your weight on your feet. 16cm screws worked most places if chosen carefully to keep them from bottoming out. The crux of this pitch was about 70′ up when I found myself needing to traverse back to the right, through a section of ice that was slightly steeper, and was hollow with quite a bit of water flowing behind it, but it all worked out.
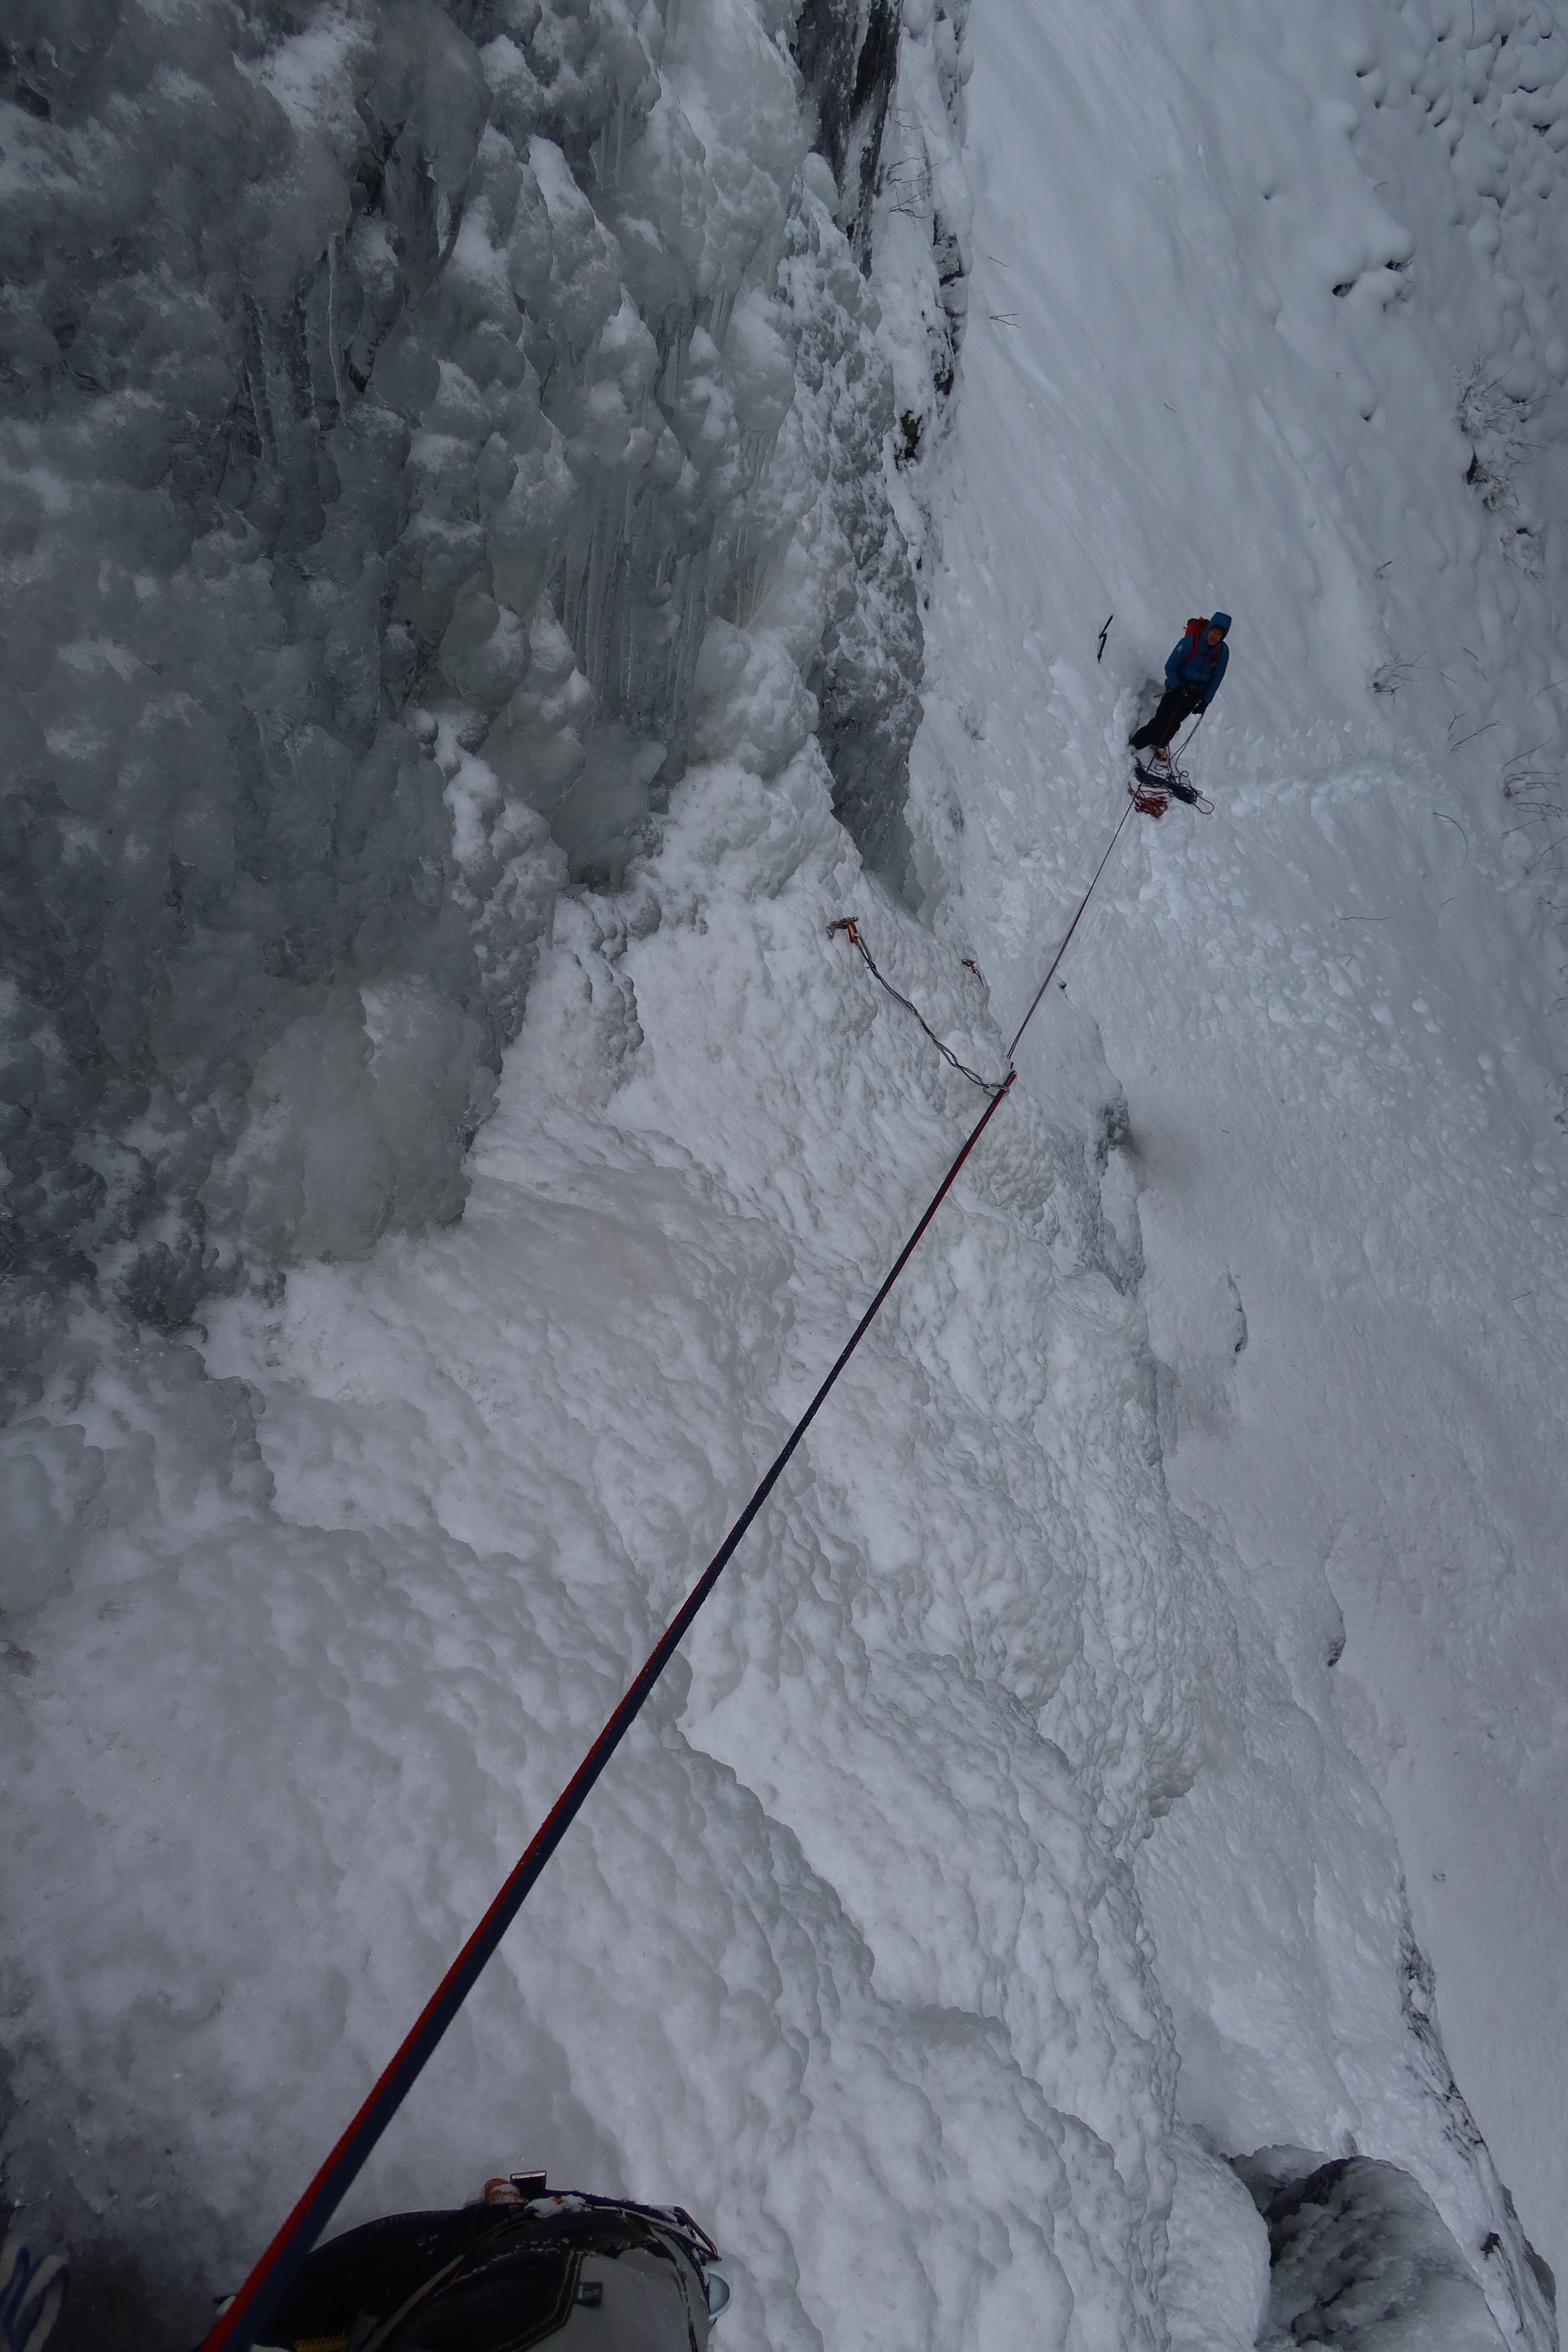
Above, I moved left onto an inviting big sloping ledge that made a great spot to belay from, with nice deep ice where I was able to bury two 22cm screws for a comfortable anchor, ending this pitch at 150′ long. Only downside was that it was out of sight from Chris, but we could just barely shout to each other, and I belayed him up to me.

Pitch 2
Above us, there were two options for our second pitch. We could either go straight up, which looked like more of the same consistent WI3 climbing. Or, there was a bit of an ice ramp going off to the left, which looked a bit lower angle and easier.

I really appreciated Chris coming out and doing this with me, and wanted to give him a chance to lead if he wanted it. The ramp to the left looked like it was more his cup of tea, so that’s the way we went! Unfortunately, what we couldn’t tell before we were on it is that left ice ramp actually had pretty shallow ice the whole way up. Even with 13cm screws, Chris’s screw placements would often bottom out, so he’d have to pull them and try placing again in a different spot.
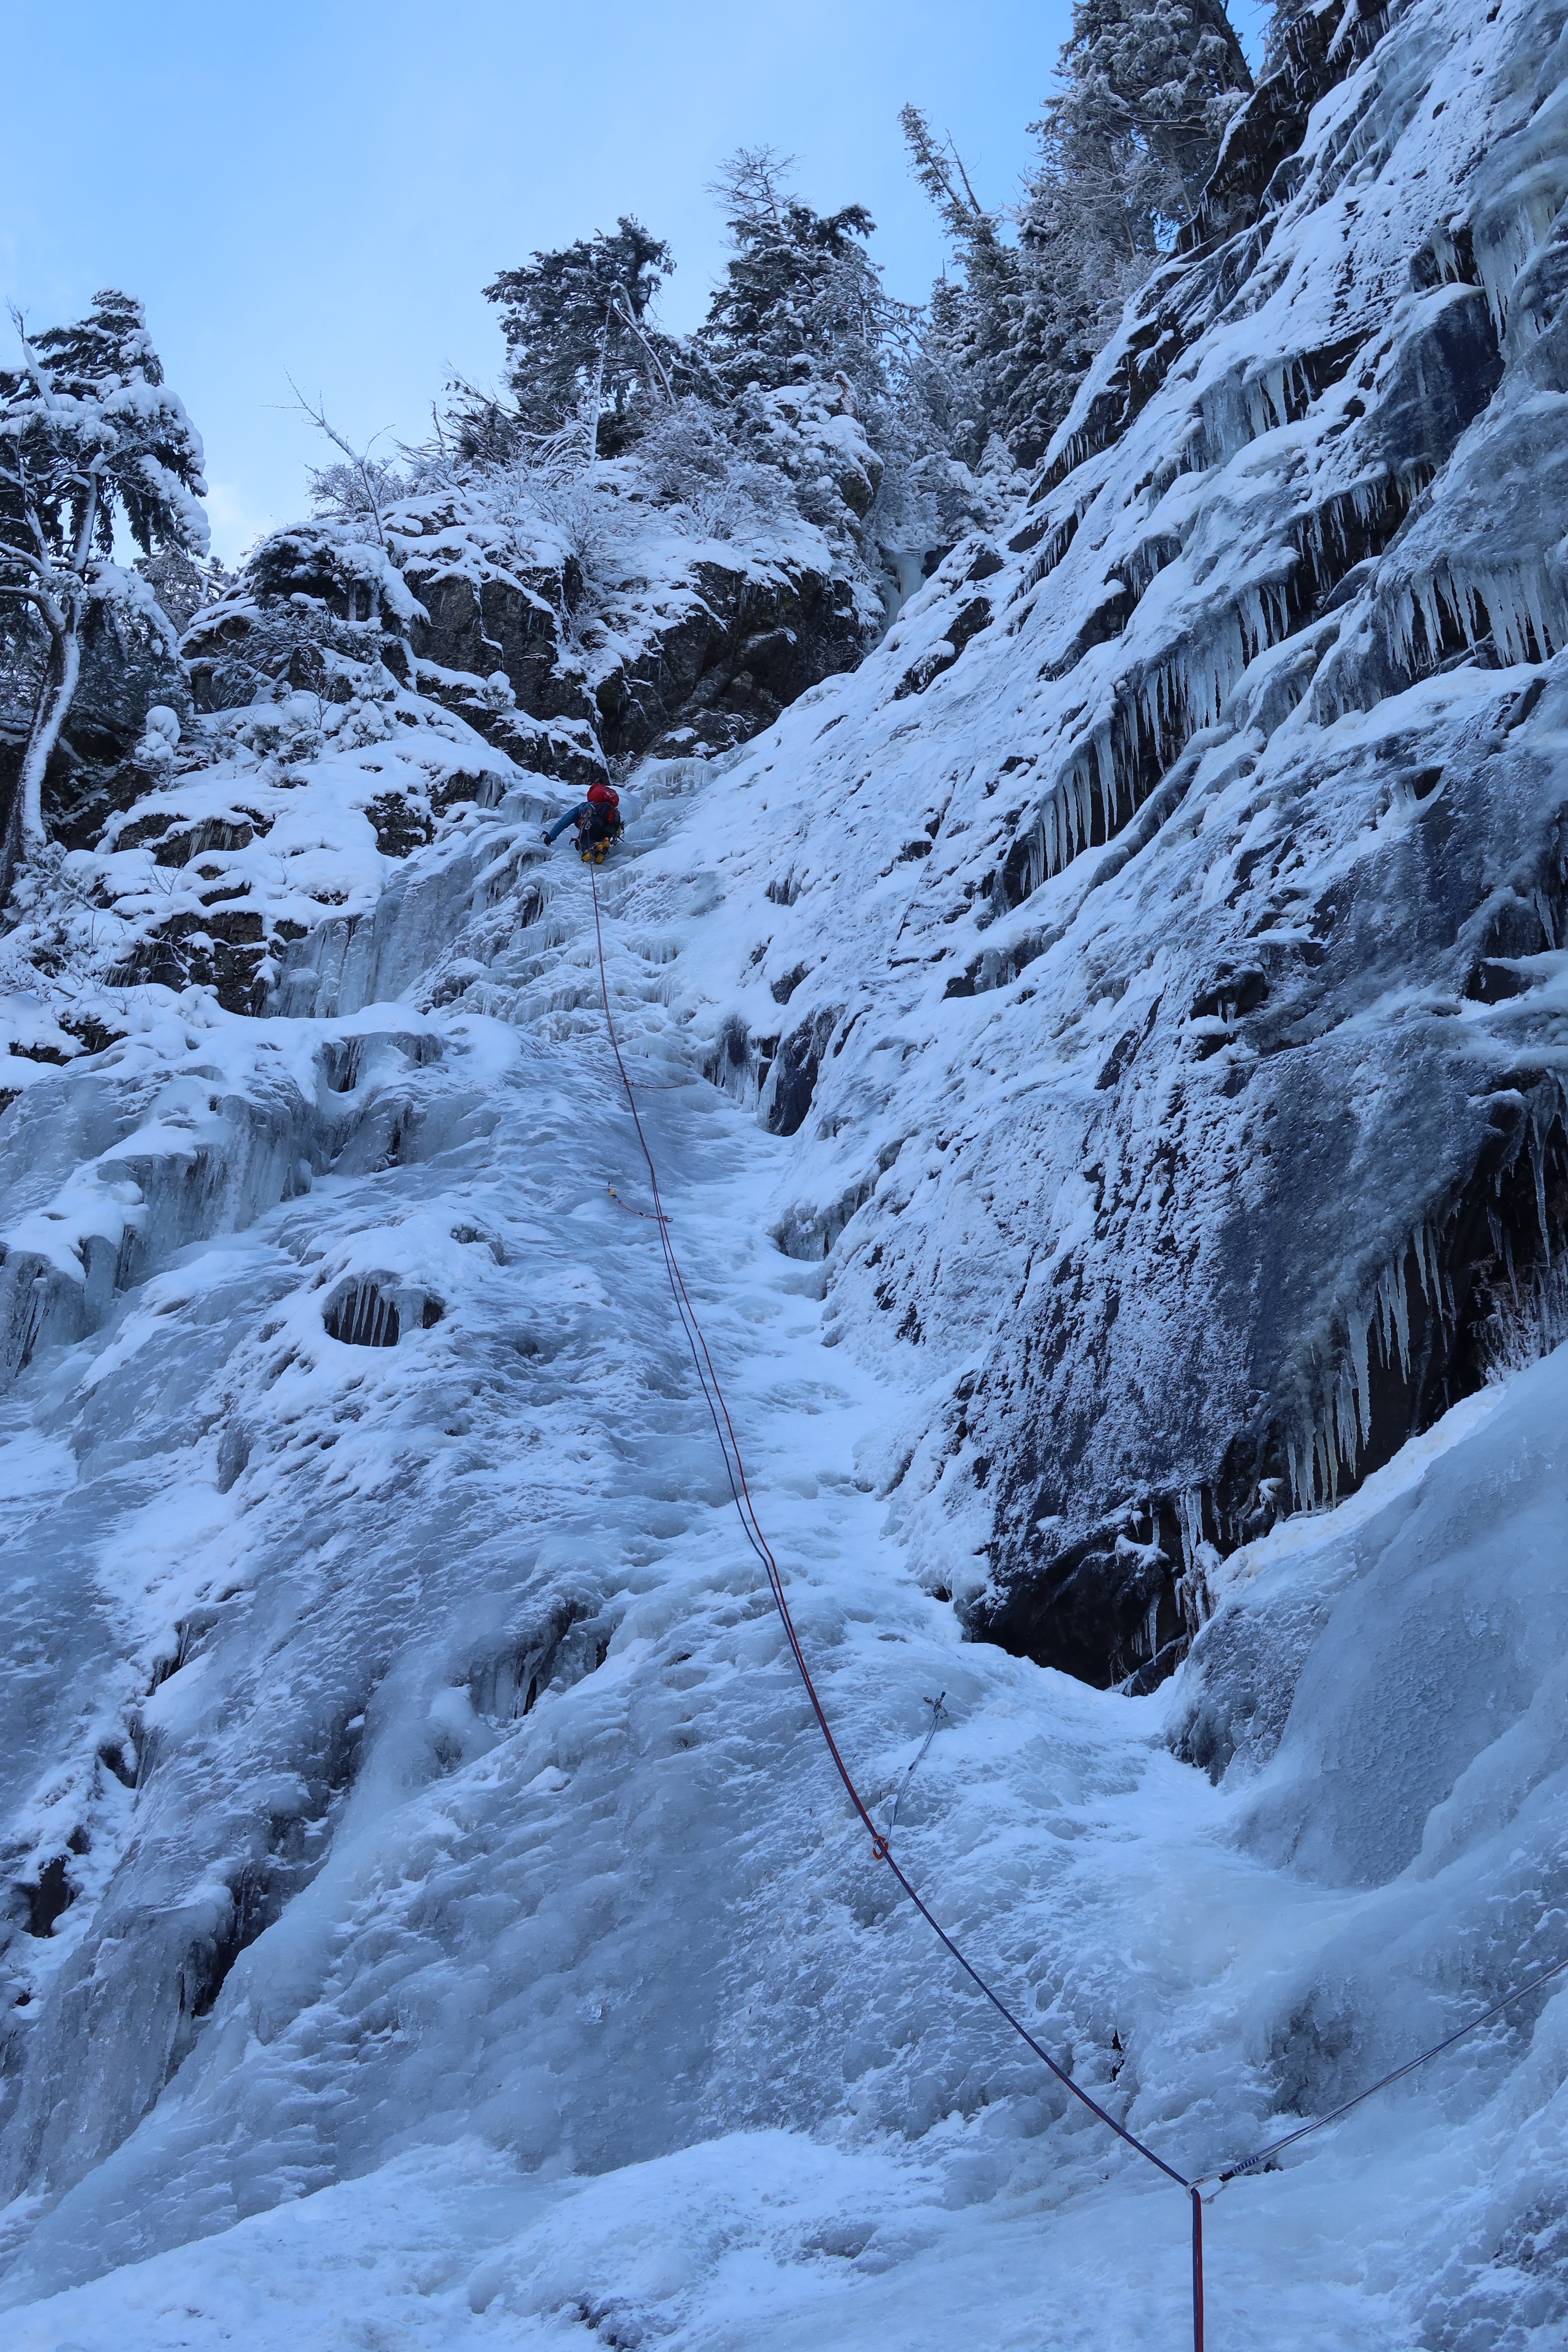
Despite the pro, his climbing looked great, and he made solid work of the pitch, disappearing up and right out of sight and earshot, ultimately using every foot of the 60 meter ropes. I tried yelling to him about being out of rope, but there was no response, and I’m pretty sure he couldn’t have heard me. I figured he’d be searching for a belay anchor, and since I was a on a relatively comfortable ledge, I broke down my anchor and simuled a bit along with any further rope movement, in case he needed a little more. I only moved about 10′ from where my anchor had previously been when the ropes stopped moving all together for quite a long time, much longer than normal anchor-building time. I stood and waited, and began to get rather chilly, and kept wishing for the ropes to get moving again. Eventually, I heard a distant climbing command yelled by Chris, it was really good to hear that he was anchored and that I was on belay so that I could get climbing. Body heat came back quickly as I cruised up the pitch, and when I joined him at the top, I could see what all the delay was about: there really was no good option for a belay anchor anywhere around. A lot of the ice was still much thinner than it looked, but he did a great job working something out anyway, combining three shallow screw placements.
After Pitch 2…
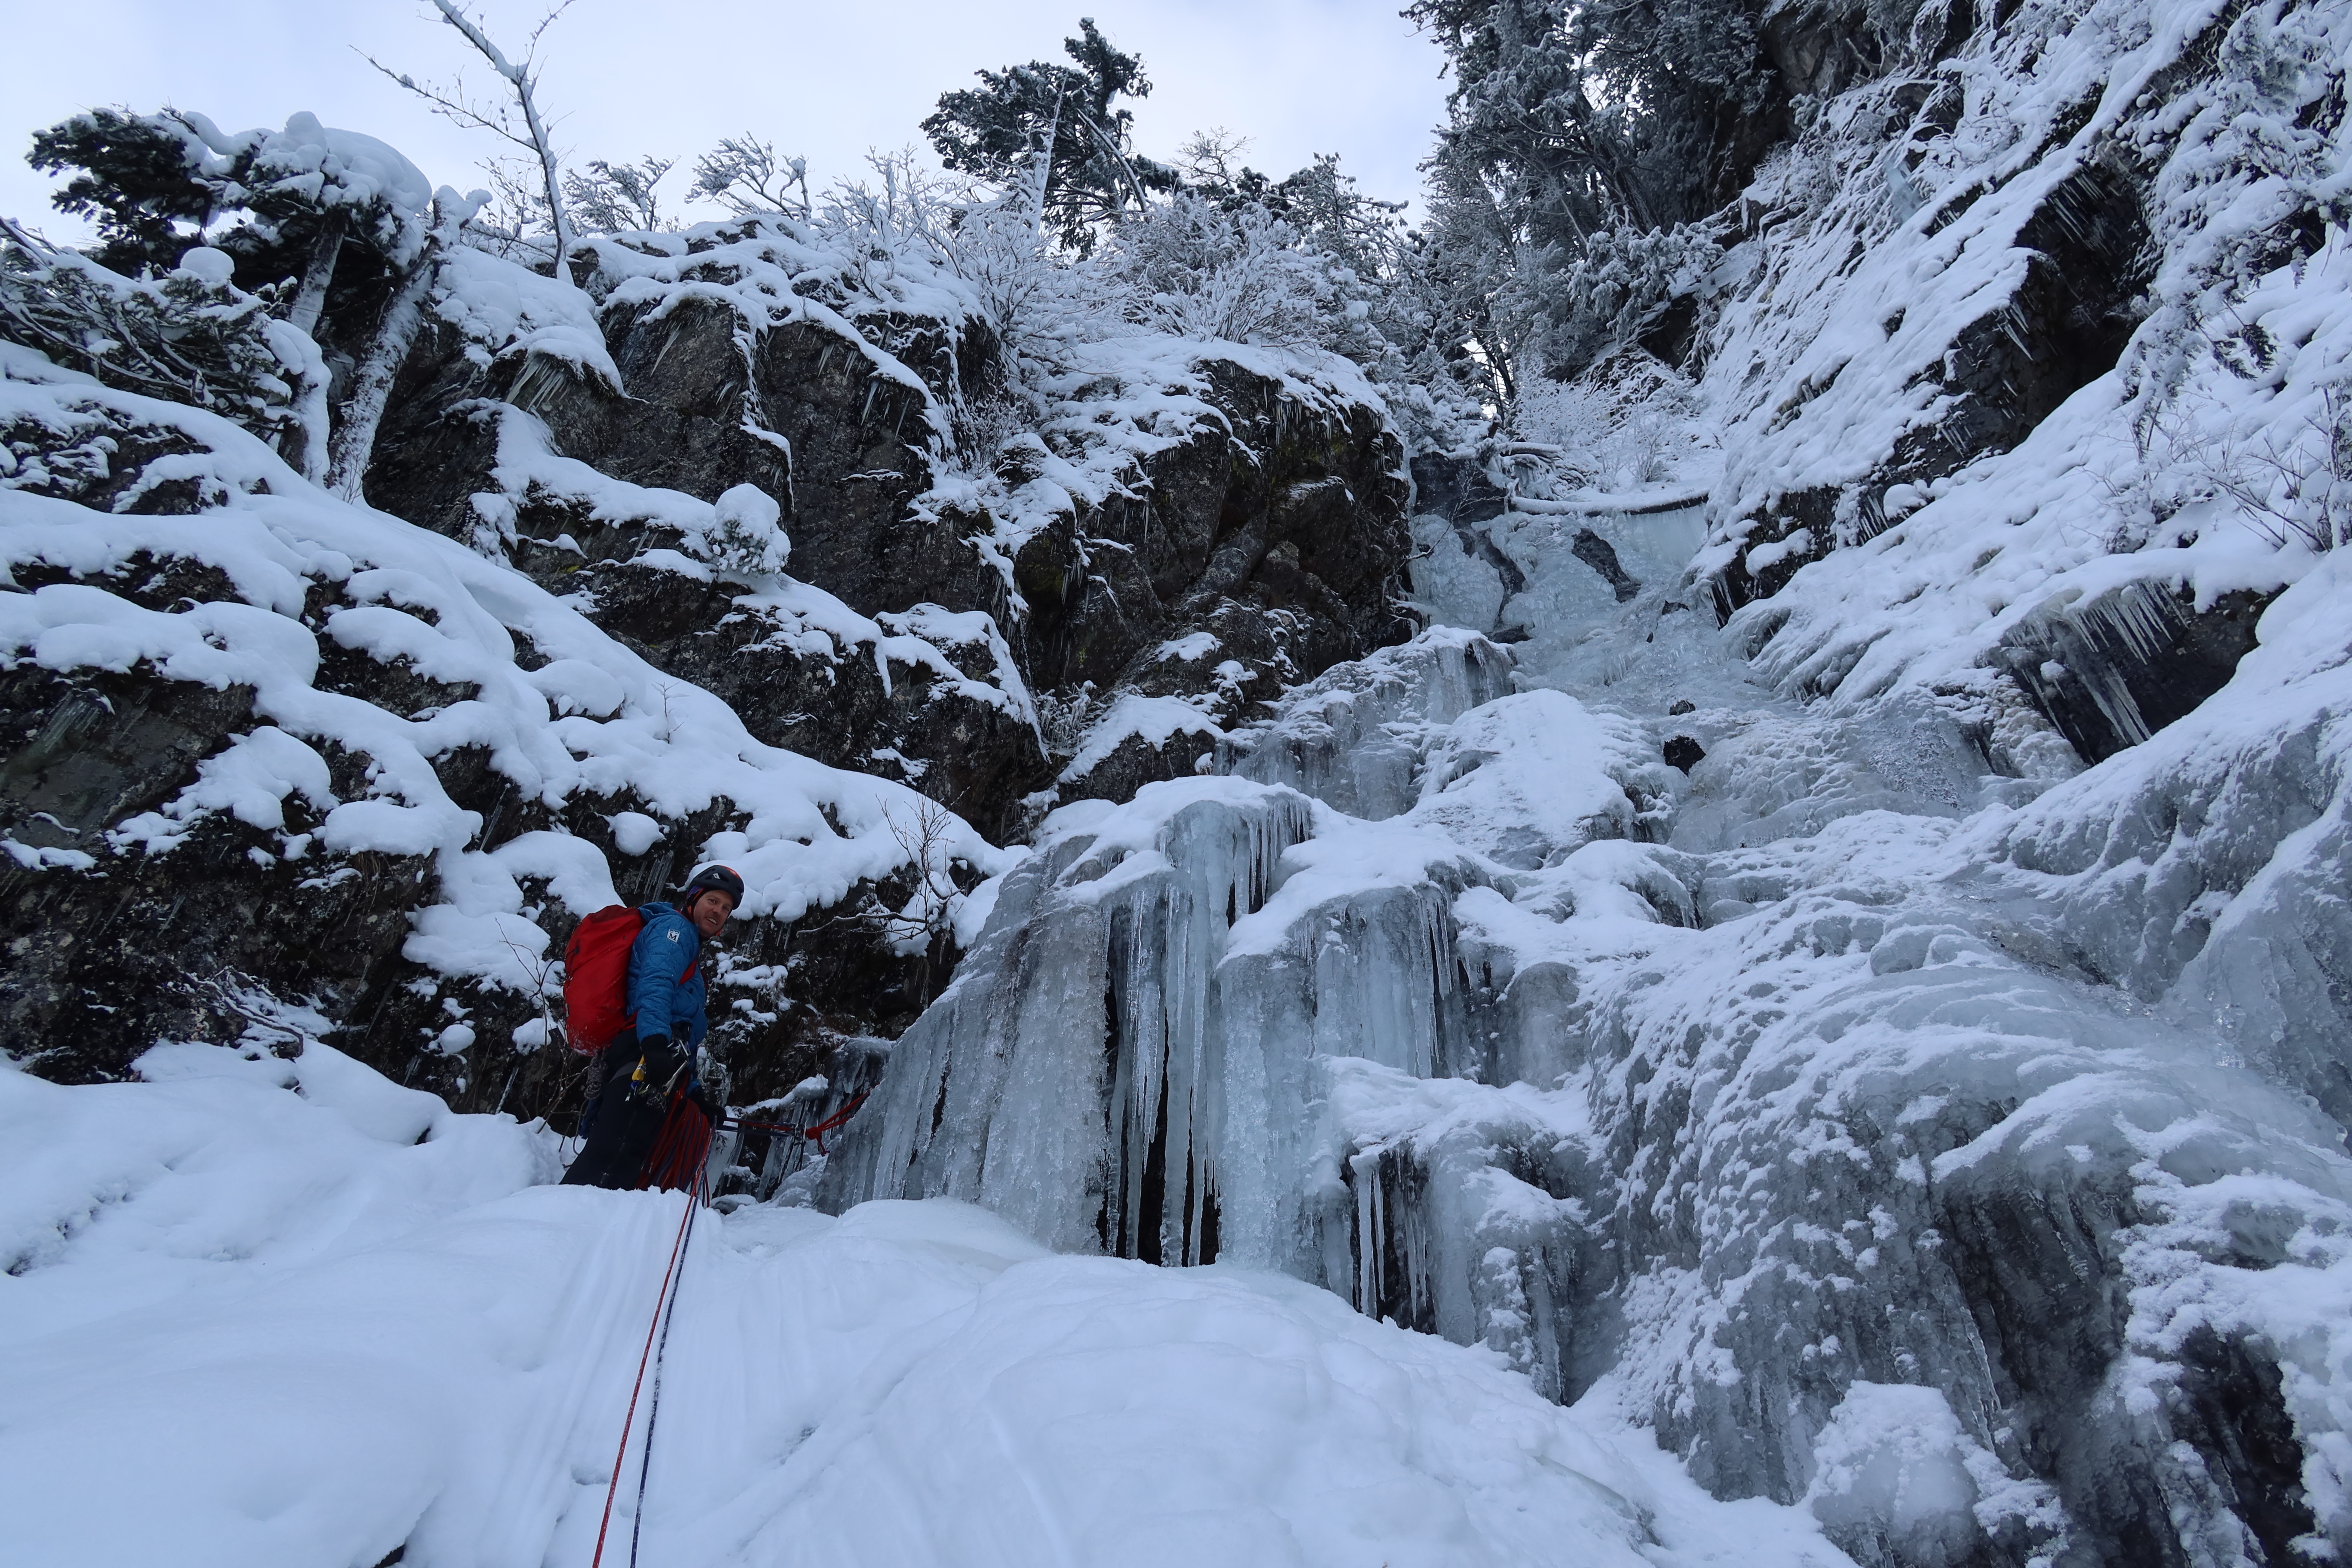
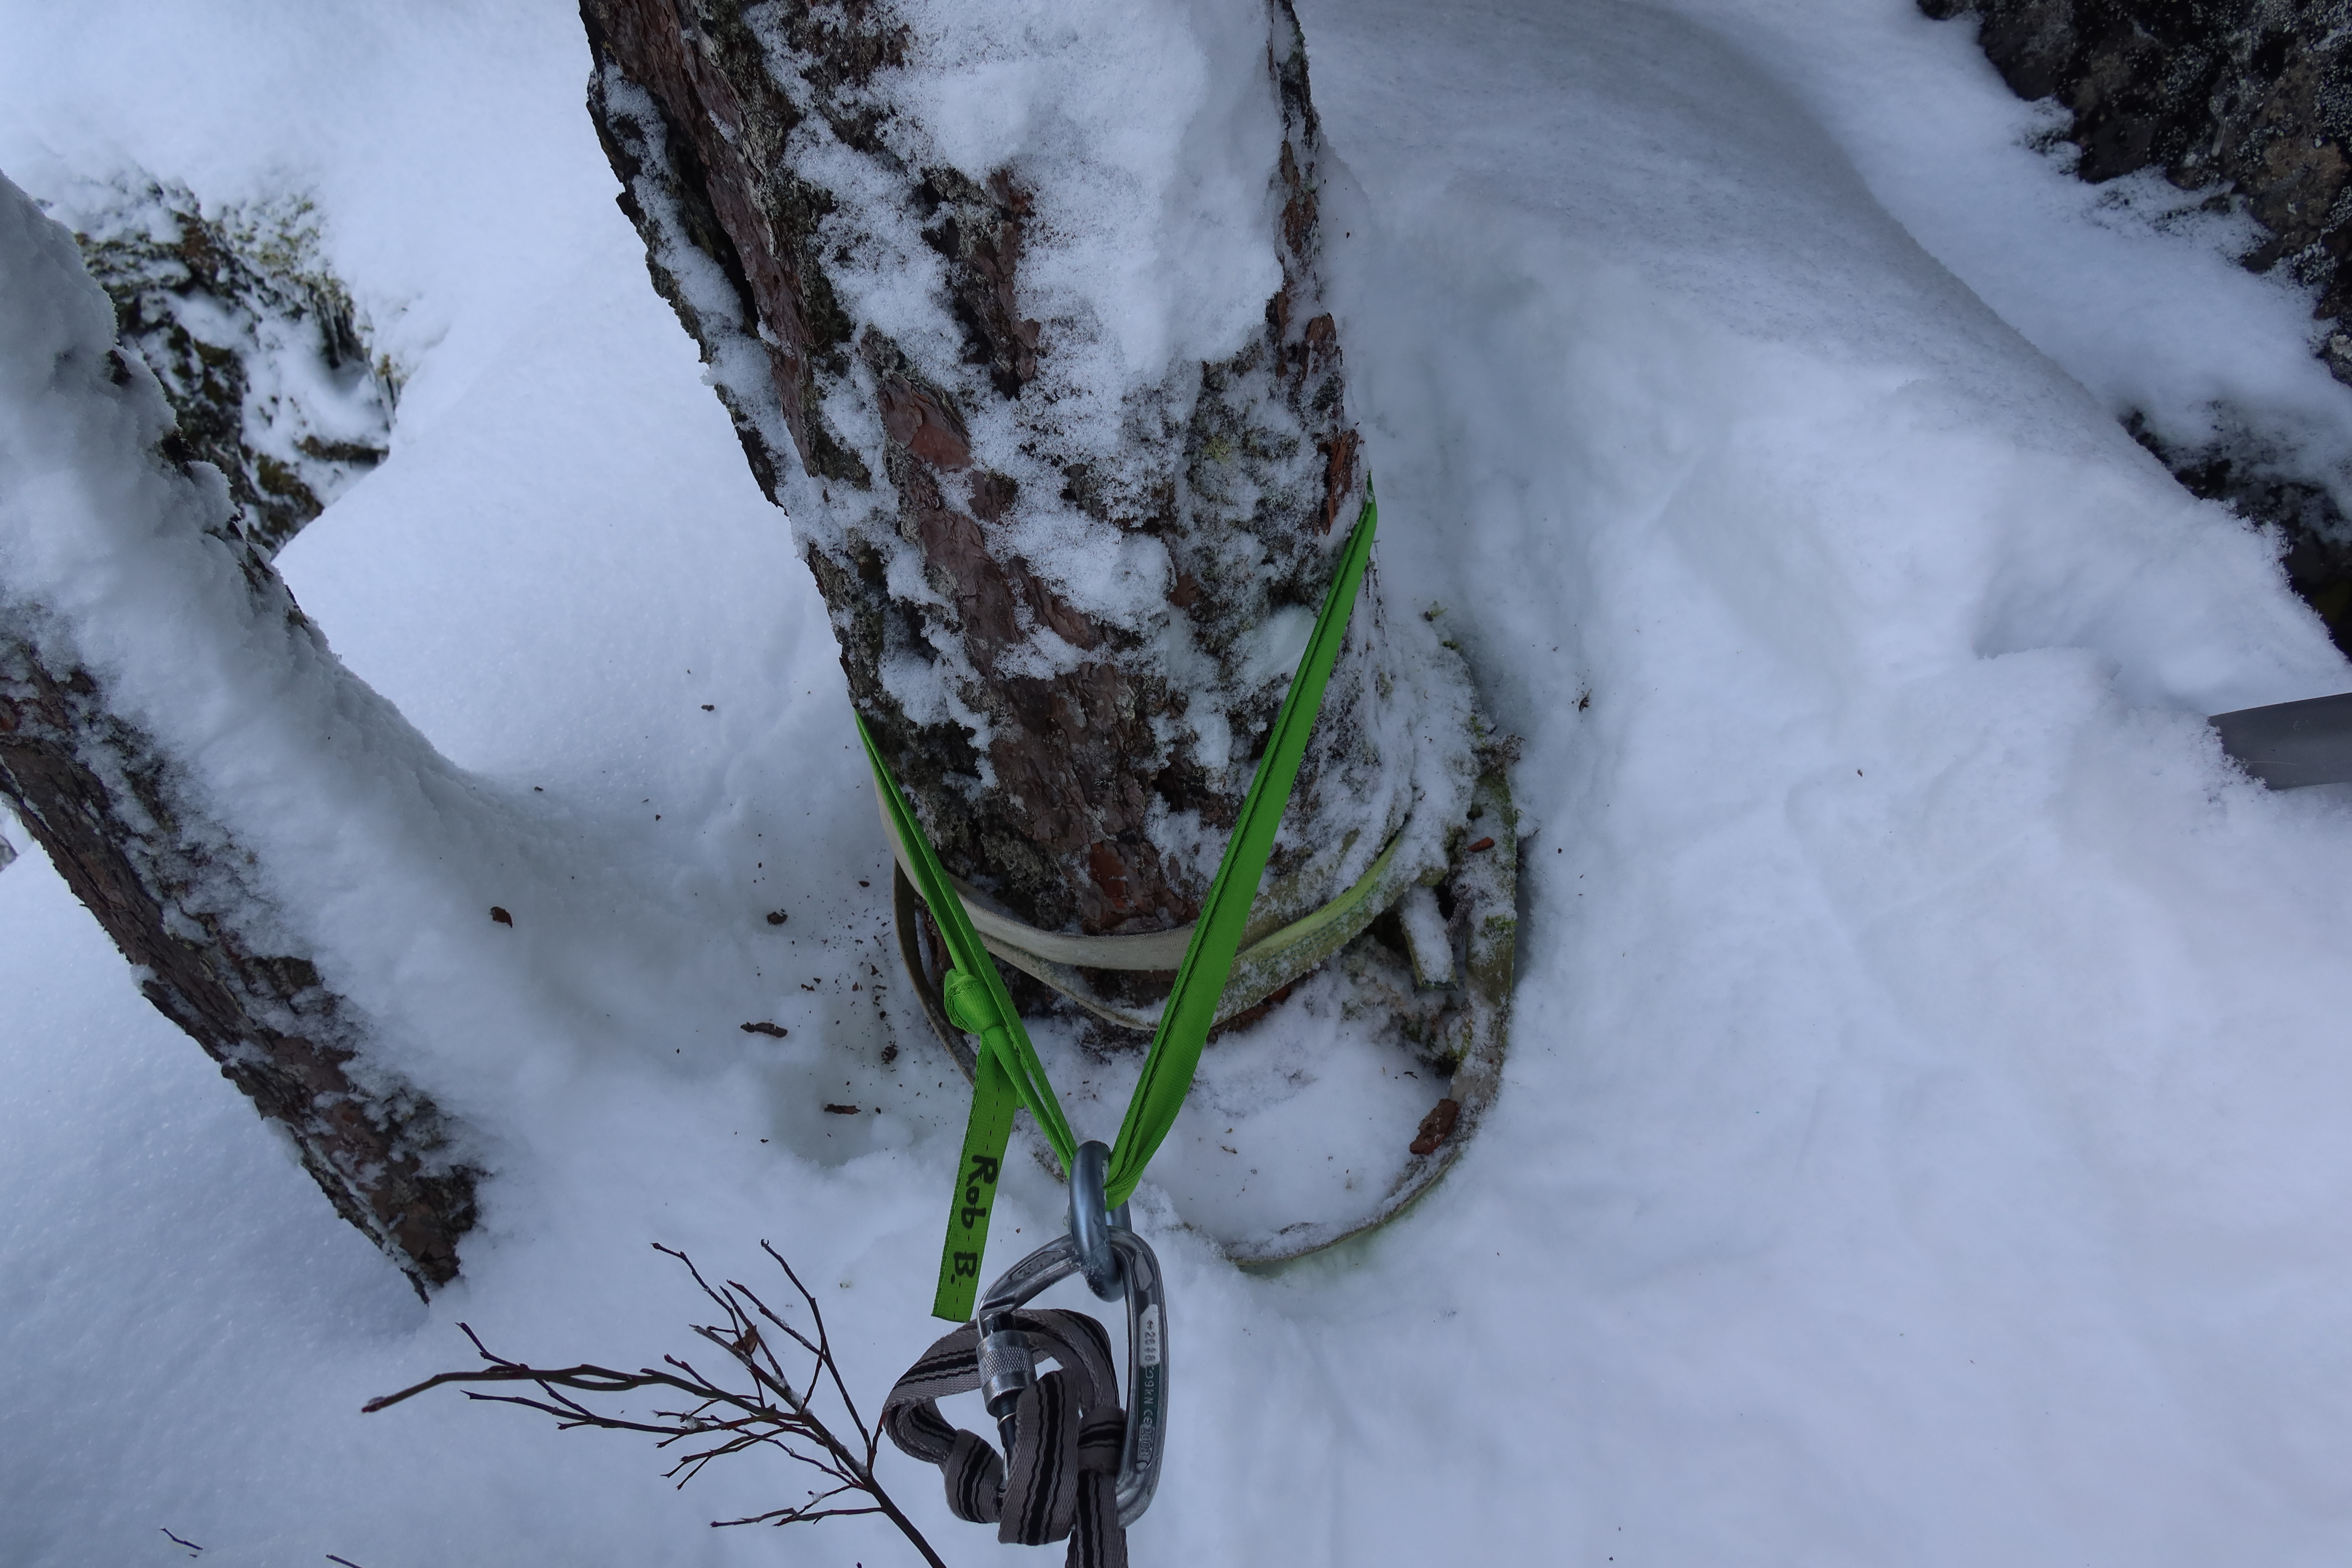
Once we were up here and could see it better, it became clear that this was as far up as we were climbing on this side. The ice above us would soon become disjoint, interrupted too often with just open water over bare rock, and the ice that was there was too thin. So, we needed to go back down. We certainly weren’t going to get a V-thread made in any of the ice here, so we needed something else to rap off of. Another 20-something feet beyond Chris were some trees up on the rock buttress, we agreed that a short pitch could be done to reach those. I led that and got us to our target tree, which unsurprisingly had faded white/yellow webbing already on it, so I built a new rap anchor and cut away the old stuff.
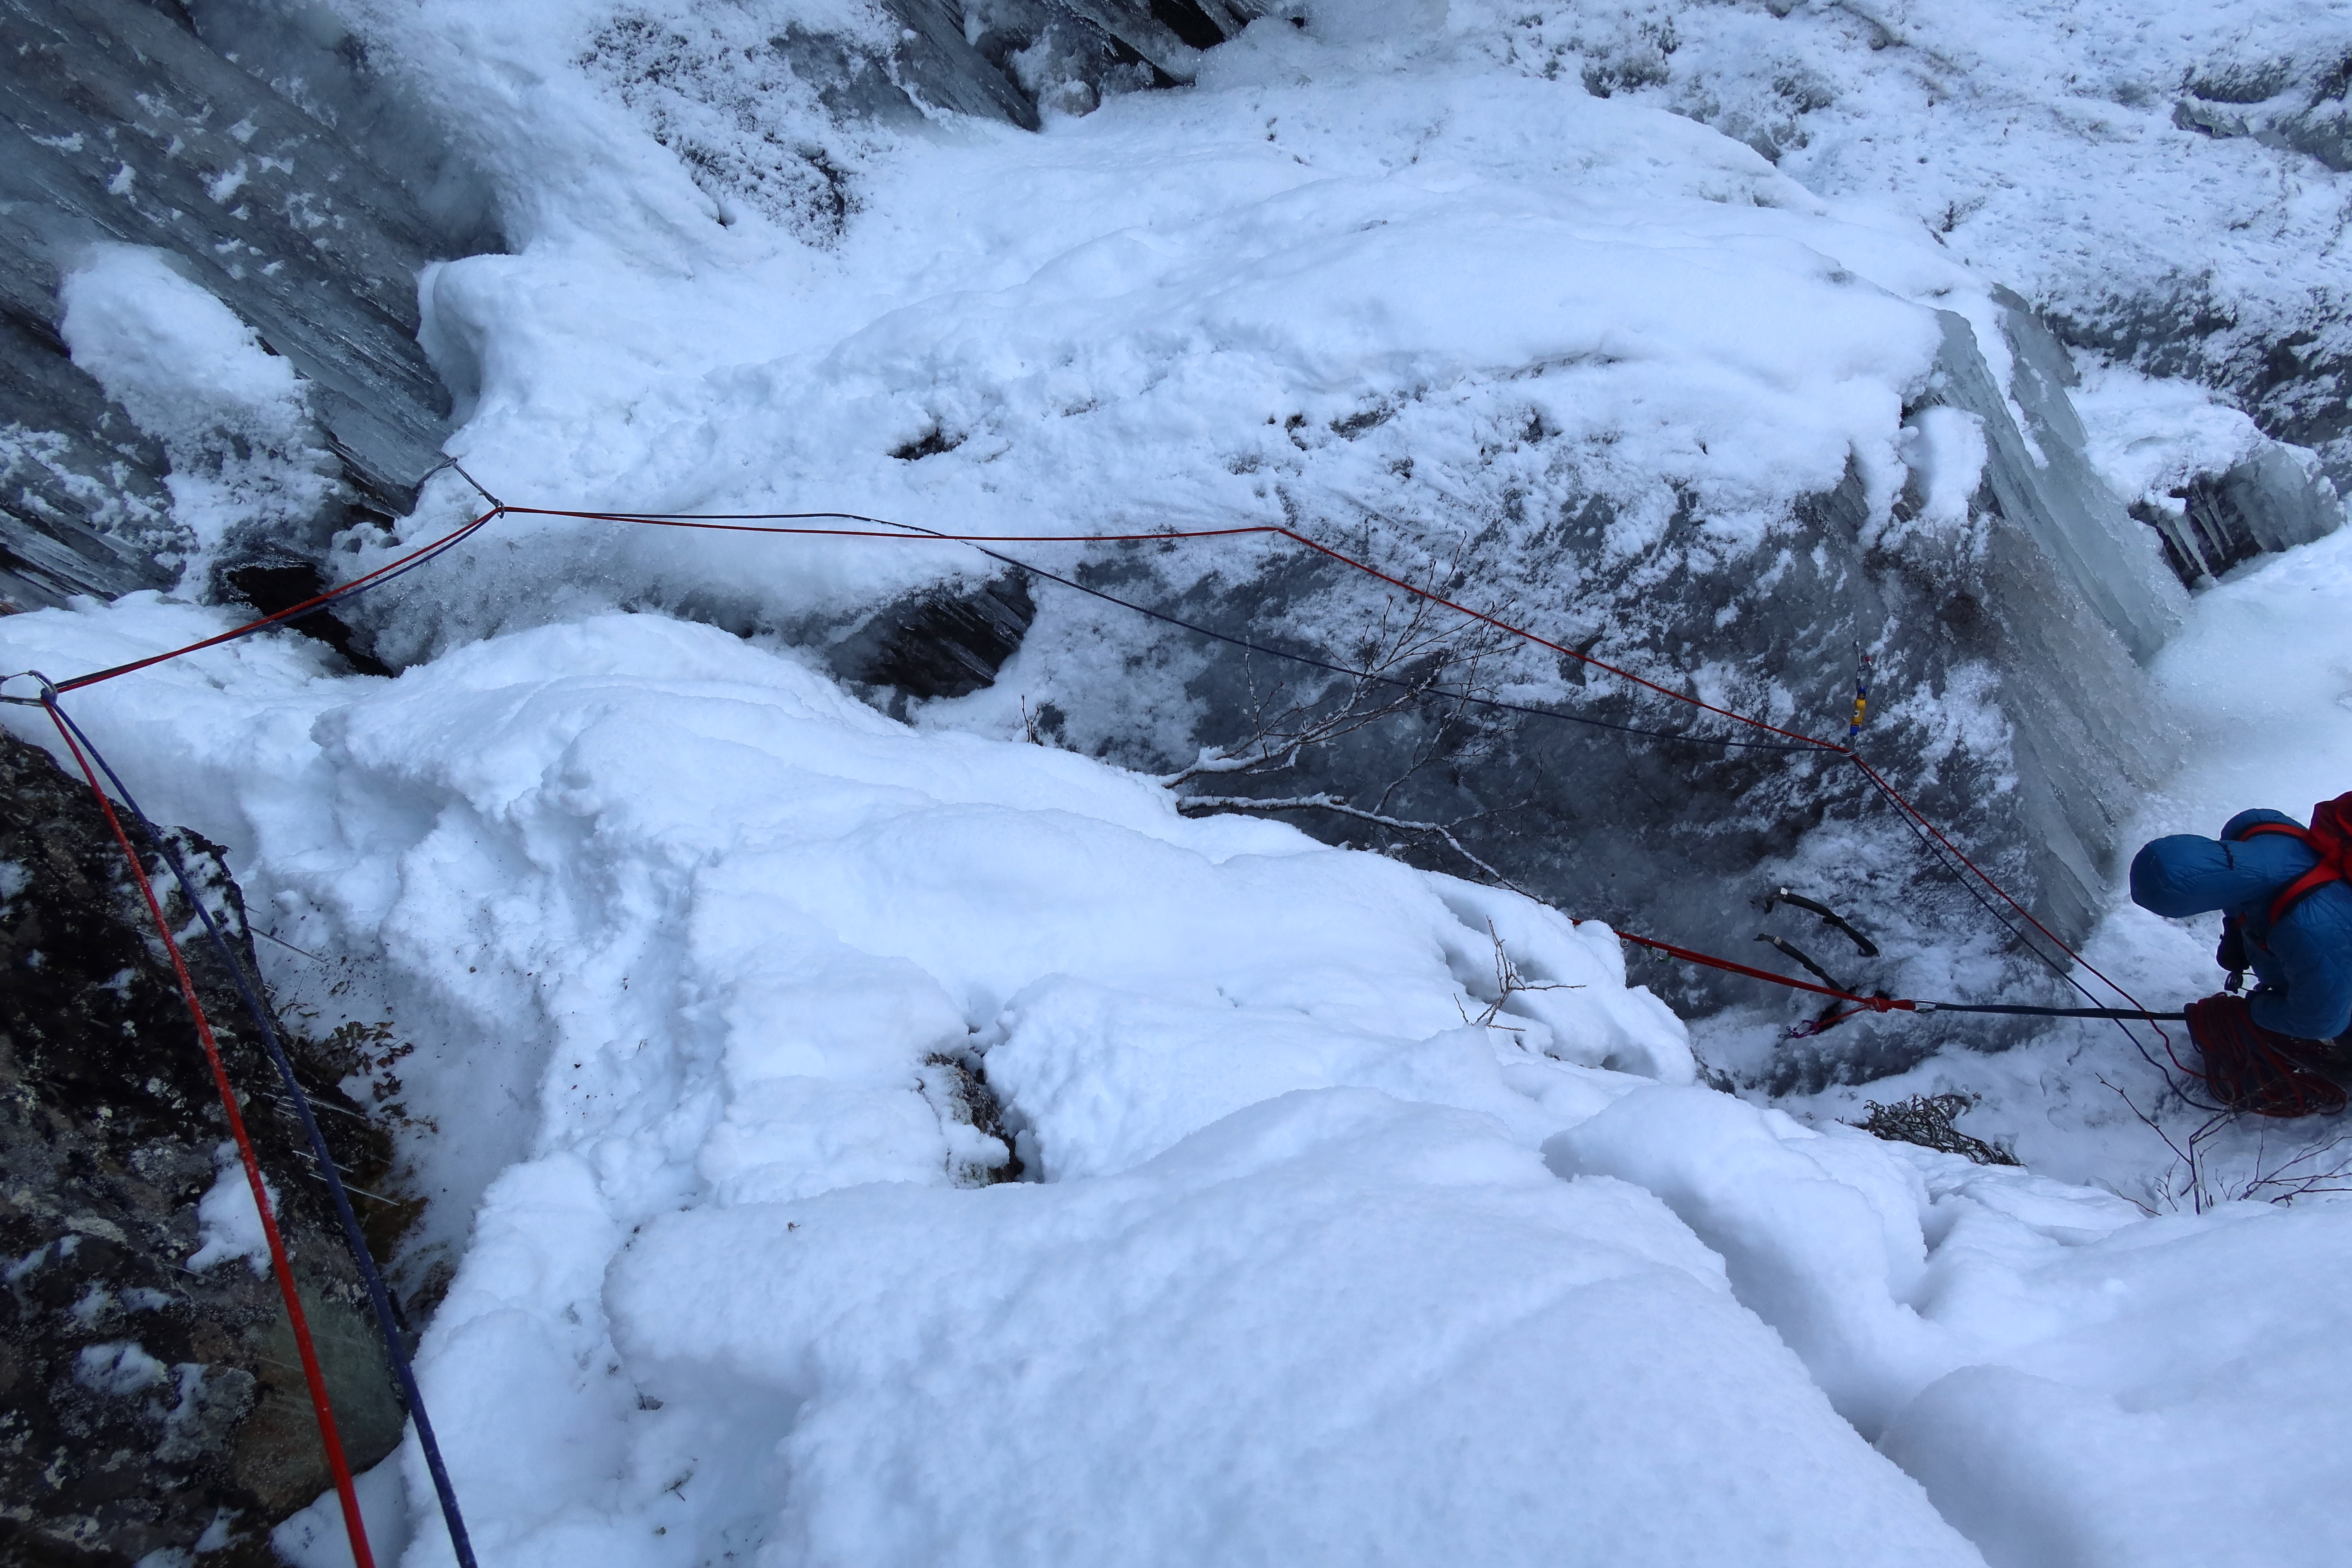
From there, we rappelled back to the ledge where I had ended the first pitch. I was too hasty throwing the rappel ropes, didn’t coil them neatly before throwing, and paid for that time many times over trying to untangle the rats-nest of twin ropes throughout most of my rappel. We didn’t quite reach the spot I had belayed from before, but we did manage to find a place with good ice where a V-thread was possible. As we were pulling our rappel rope, I brought up the idea of possibly doing a third pitch of the day from here, climbing the WI3 that was straight up from this point. However, when we checked our watches, it turned out it was later in the day than we realized, and we agreed it was time to be going down. Unfortunately, during this, the untieing of one stopper-knot in the rappel rope was forgotten, and it turns out the rappel rope wasn’t coming down anyway. So, for better or for worse, I got to lead one more pitch anyway, repeating our pitch 2, and once again at the top rapping of the same tree.

This time we were very careful pulling the rope, and everything went smoothly. We set up V-thread with one screw backing it up, Chris rapped first, with me going second without the backup screw, since I’m the shorter & slightly lighter one out of the two of us. It was 4:15pm by the time we were all back on the ground. It took about a half hour to transition, coiling the ropes and packing away all of the sharp things. It took us just shy of an hour to descend the forest clearing and hike back to the car, which did mean we did have to break out the headlamps for the last half an hour.
All and all, what an incredibly fun day!!! I’m so thankful that we got to do this, and take advantage of this rare opportunity for Washington ice!!
Gear Notes
We had been worried about screw lengths. We both owned a lot of long screws, which are appropriate for summer glacial ice, but we knew the ice here would be thinner and we didn’t want to be constantly bottoming out screws against the rock. Fortunately, between the two of us, we had a decent number of medium screws: 4x 16cm, 2x 13cm, and one stubby 10cm. We also had 3x 19cm and 4x 22cm screws, but those didn’t get used as much, the ice was rarely thick enough for them. The 16cm screws were definitely what we used the most. It would have been nice to have a few more of our screws be shorter. It would have really helped to have a second or maybe even third 10cm stubby.
