
Some other excellent trip reports:
I got all the beta I needed from these two trip reports. Thank you Isley and Jianing for your write-ups!
- https://www.mountaineers.org/activities/trip-reports/intermediate-alpine-climb-forbidden-peak-west-ridge-6
- https://www.mountaineers.org/activities/trip-reports/forbidden-peak-west-ridge-2
Contents
Strategy
The route is inherently time-consuming, even with strategies employed to “go fast”. To climb the West Ridge, the two most appealing strategies are (1) do it in-a-day, with no backcountry camping, or (2) get backcountry camping permits for the ‘Boston Basin Cross Country Zone’ (organized under “High Use Cross Country Zones”) and spend at least one night at the Boston Basin High Camp (at 6200′, around 48.5012, -121.0638). Whether you camp or not, going for the summit is going to be quite a long day. In-a-day, you can expect a 17-hour car-to-car day if things go well, and it’s certainly possible for the day to be considerably longer if anything goes less than perfectly. Even with camping: a 12-hour day camp-to-camp is fairly common. The approach from car to camp can be only 3 hours if you bang it out. Getting out from camp-to-car can be only 2 hours. (But add an hour to break camp, so even with high-camp strategy, camp-to-summit-to-cars becomes a 15 hour day in best case scenario; still a very long day.) In any case, parties should be prepared for the possibility of an emergency-bivy somewhere unexpected, as the chances doing one are relatively higher on this route than most. I recommend each person carry a light mylar emergency bivy bag, a bit of extra food, maybe some caffeine, and extra headlamp batteries (or perhaps a whole second headlamp) in their summit-packs, just in case. The biggest hazard on this route is other-parties, both in terms of potential rockfall concerns in the Cat Scratch Gullies, and also just the time-cost of traffic delays. One of the best ways to make this route relatively-safer is to climb on a weekday, instead of a weekend. It’s also significantly easier to get camping permits for a mid-week trip. Even though camping doesn’t shave that much time off of summit-day compared to doing the trip entirely in-a-day, camping with an alpine-start gives you much better odds of actually being first on-route than starting from the cars with an alpine-start.
On route:
- Ice axe / crampons / anything else you don’t need for rock climbing can be stashed at the base of the Cat Scratch Gullies. A rock outcropping at 48.5101, -121.0613 makes a great place to stash gear.
- Climbing up the Cat Scratch Gullies can be a high rockfall hazard with a lot of danger if there are other parties above you. The best possible thing you can do is get there first, then also climb quickly up to the West Ridge Notch so that you clear out of there quickly for the sake of any parties who may be waiting behind you. If there is a party higher than you in the Cat Scratch Gullies that you have anything less than perfect confidence in their ability to move delicately and avoid triggering rockfall in loose terrain, it may be prudent to wait out of the way at the bottom for them to get all the way to the West Ridge Notch first, then start your ascent up. Or, maybe you could climb a different specific-Cat-Scratch than they did, reducing the odds that you’re in their firing line.
- The first pitch of the Cat Scratch Gullies is worth pitching out, with normal belays provided for both the leader & follower. (I went about ~130′ for this pitch. If the rope you are using limits you to 100′, I’m sure that would be fine too, but you’ll have to look a little harder for somewhere to build a belay anchor.)
- After one pitched-out pitch to start the Cat Scratch Gullies, the gullies ease back to more like exposed Class 3, with sections of grass & wildflowers. I recommend simul-climbing the entire remainder of the Cat Scratch Gullies up the West Ridge Notch.
- Once up at the West Ridge Notch, there are a few bivy sites, and comfortable places to take a break if desired.
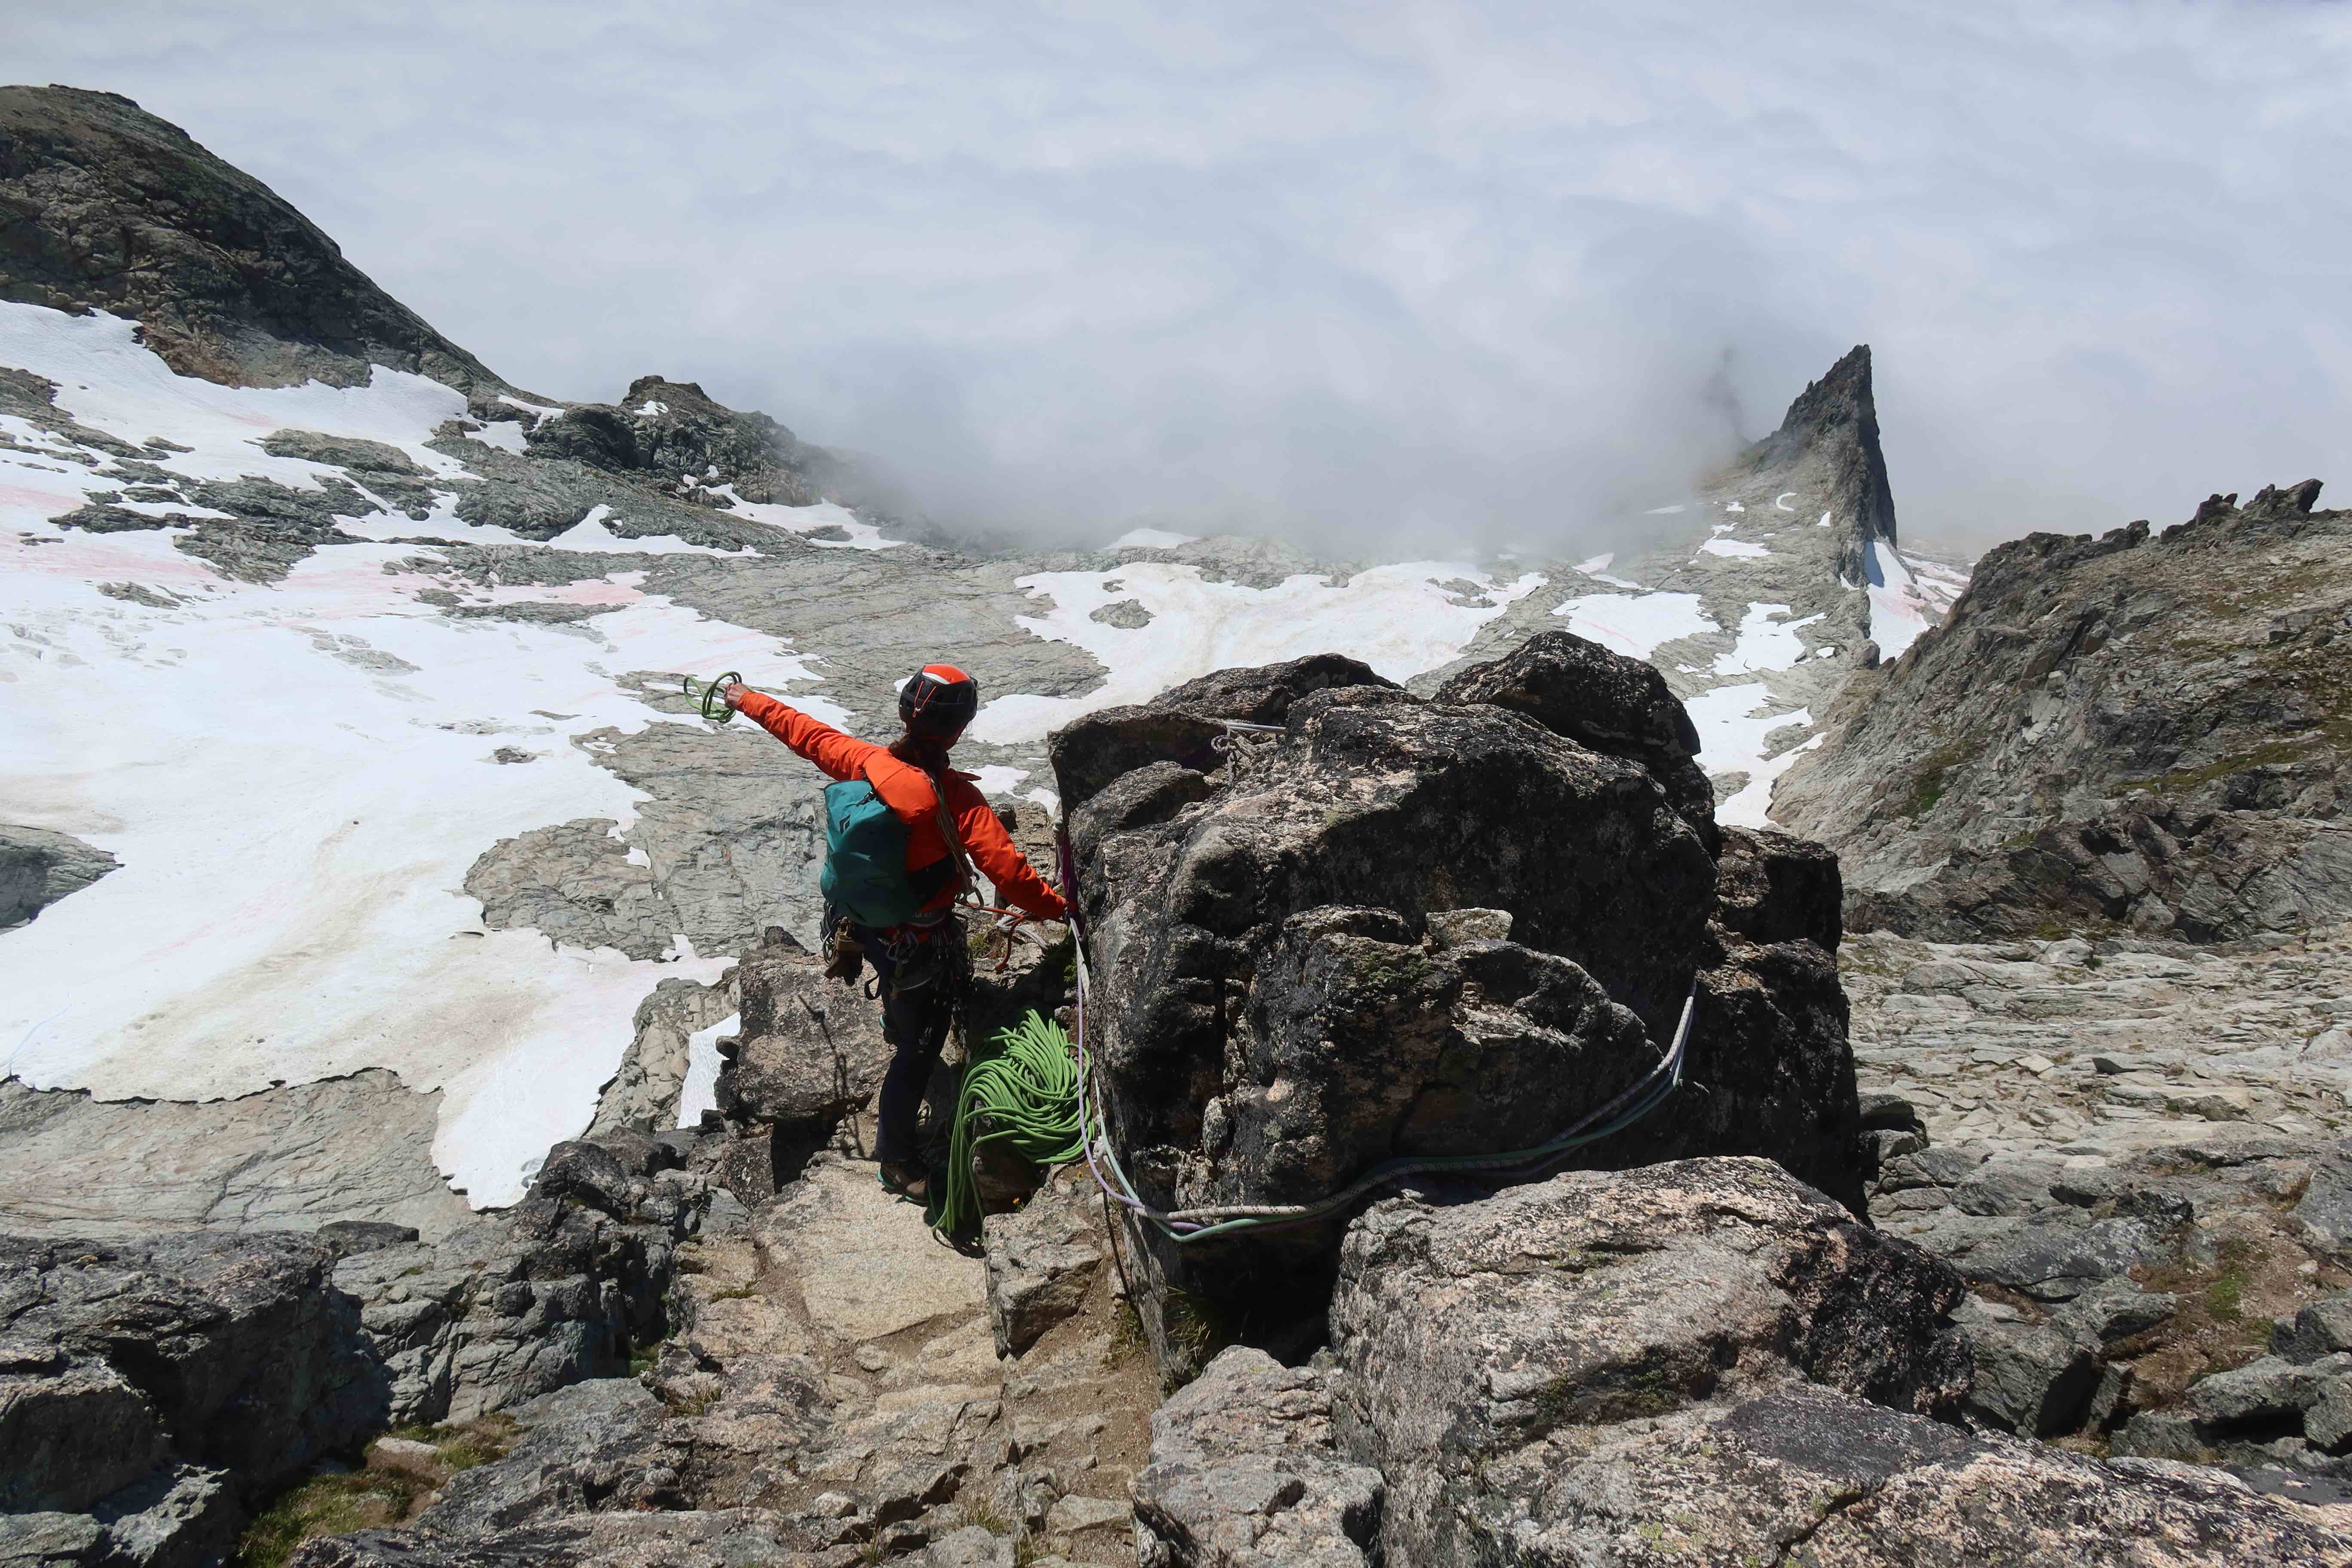
- For climbing along the entirety of the West Ridge, up from the West Ridge Notch to the summit, everything can and should be simul-climbed. Climb either along the crest of the ridgeline itself, or anywhere within a few dozen feet lower than the ridgeline on the north side, a lot of the terrain goes just fine. Move at your best possible speed, both for the sake of your own schedule, and everyone else’s. If any other parties catch up to you, do offer to let them pass. (There’s enough space most places that if you coordinate with them a little, likely both your party & theirs can all keep climbing, just on slightly different lines.) Even the “crux” 5.6 tower about two-thirds of the way up the ridgeline can be simul-climbed. After the leader gets up it, they can clip a Mircotraxion or Tibloc to the existing rap-anchor at the top of that tower to guard against follower-falls, and then keep leading onward without delay.
- For reversing the West Ridge (from summit back down to West Ridge Notch,) again much of it can and should be simul-climbed. Most parties will want to do at least one rappel somewhere along this ridge descent. (We did exactly one rappel, down that 5.6 crux tower.) Try not to do any more than a couple rappels total though, as they’ll really eat your time. Optimize for simul-down-climbing as much as possible. (And remember, for down-leading, it may be better for the less-strong climber to go first, since the person who goes first gets to feel like they’re on a top-rope, and they’re mostly placing pro for the benefit of the second-climber.)
- Once back at the West Ridge Notch, unrope, and scramble down about ~200′ in elevation to the first rappel station for the Cat Scratch Gullies. Five <30m rappels from there will return to bottom of the Cat Scratch Gullies.
Rappelling the Cat Scratch Gullies
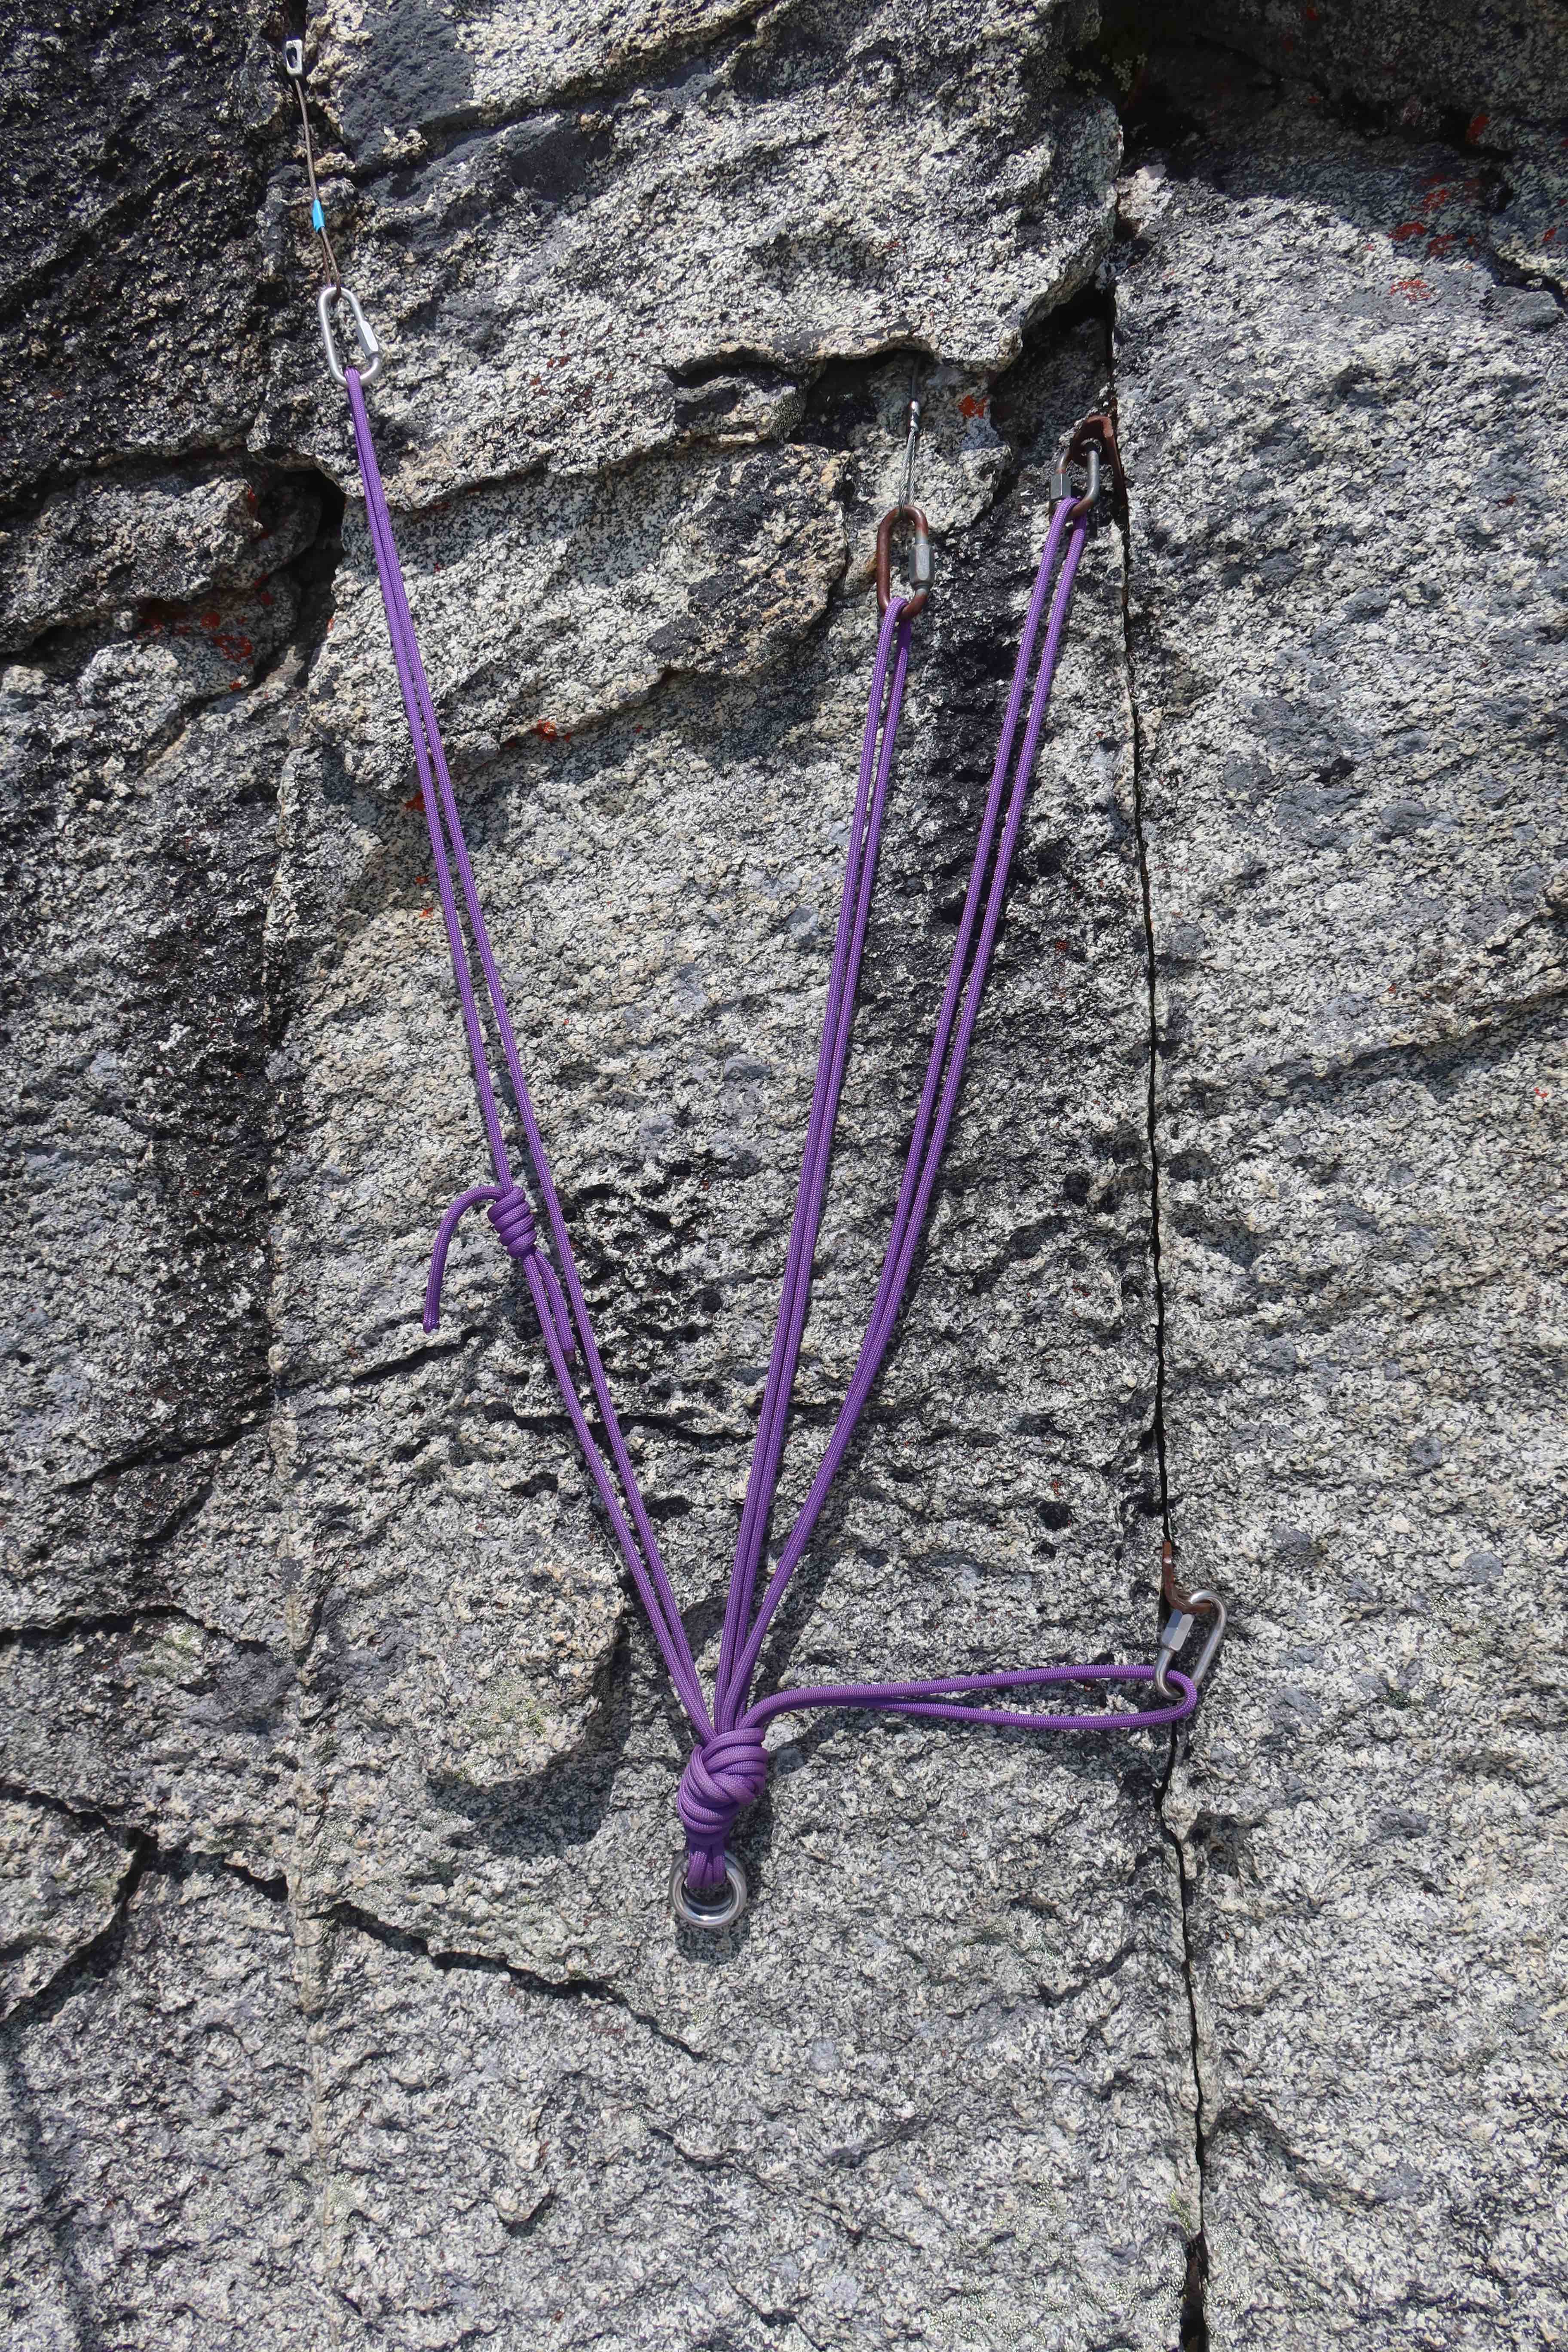
Five <30m rappels. The first rappel station is at 8150′, at 48.5112, -121.06145. It’s about 200′ in elevation below the West Ridge Notch, and can be reached by scrambling down rocky Class 2 terrain. Be very careful not to knock down any loose rocks while scrambling down, as any rockfall induced here has the potential to severely injure or kill anyone who may be lower than you in the Cat Scratch Gullies. Fortunately, the recommended rappel route is in a really thoughtfully-chosen location: it starts and stays mostly on top of a rock rib, making each of the rappel anchors locations where falling rocks are likely (but not guaranteed) to bounce away from. It’s certainly much better than if the rappel anchors were down inside the dip of one of the gullies, where any falling rocks would be likely to funnel into and bounce around in.
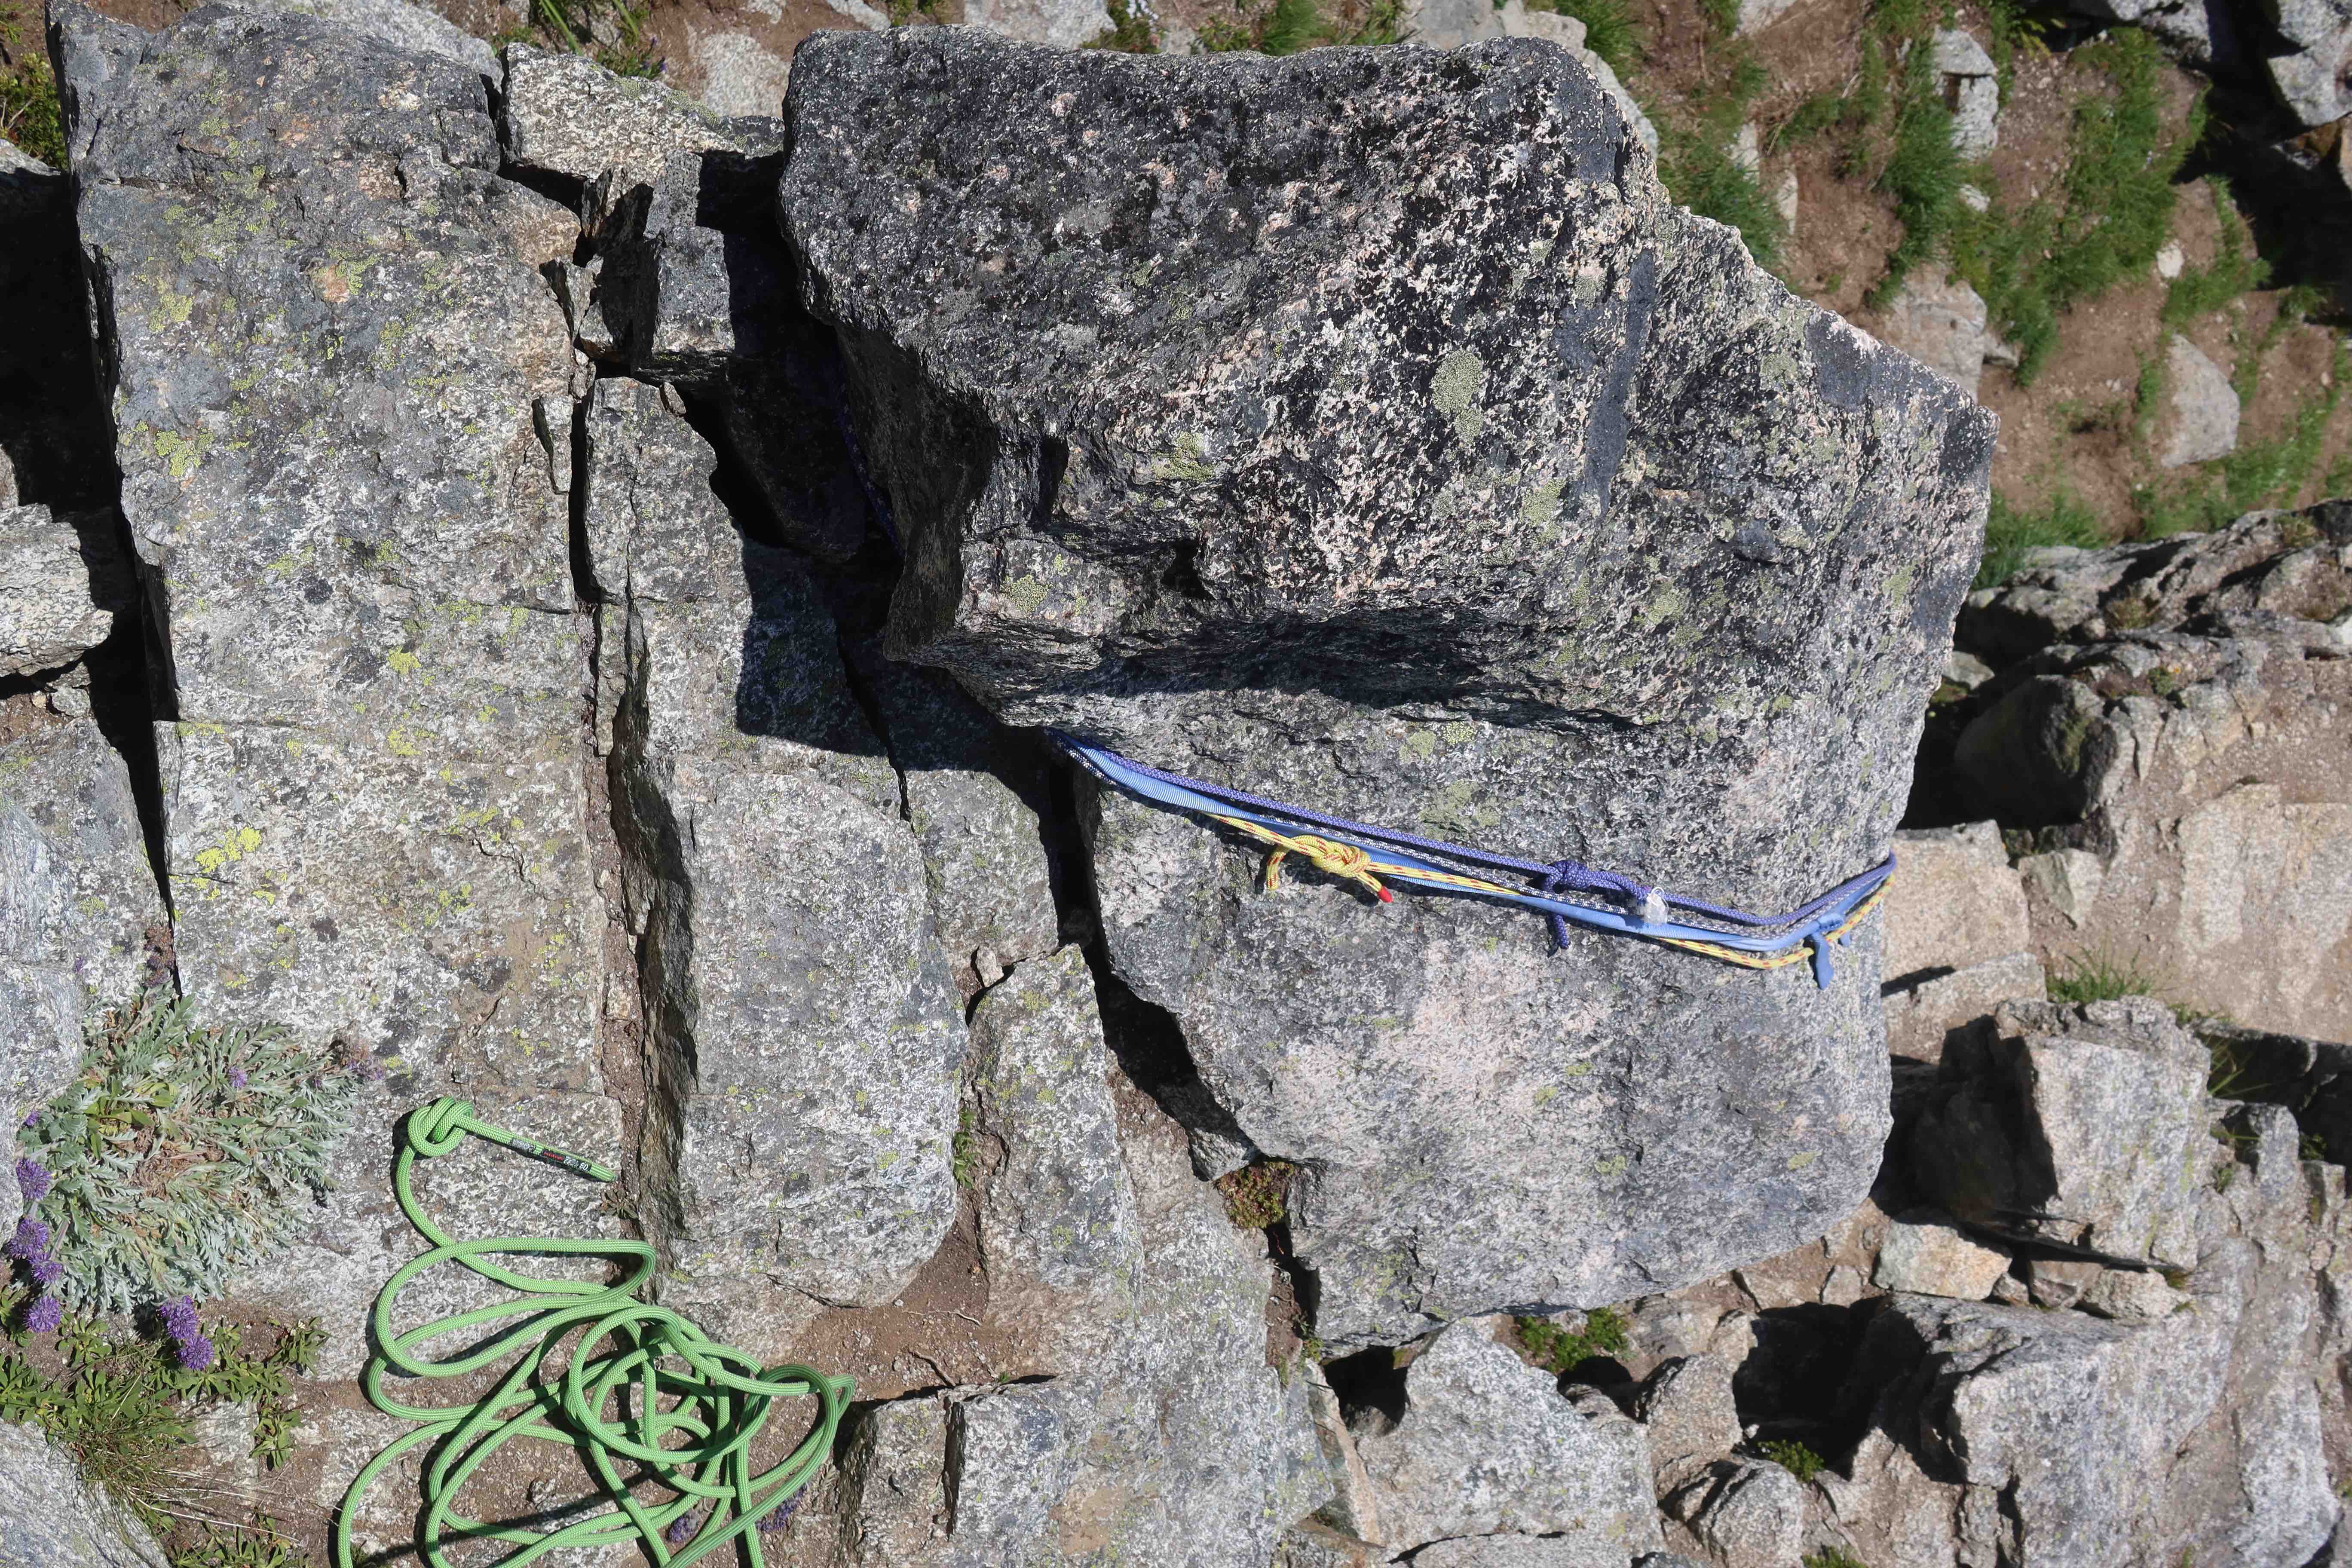
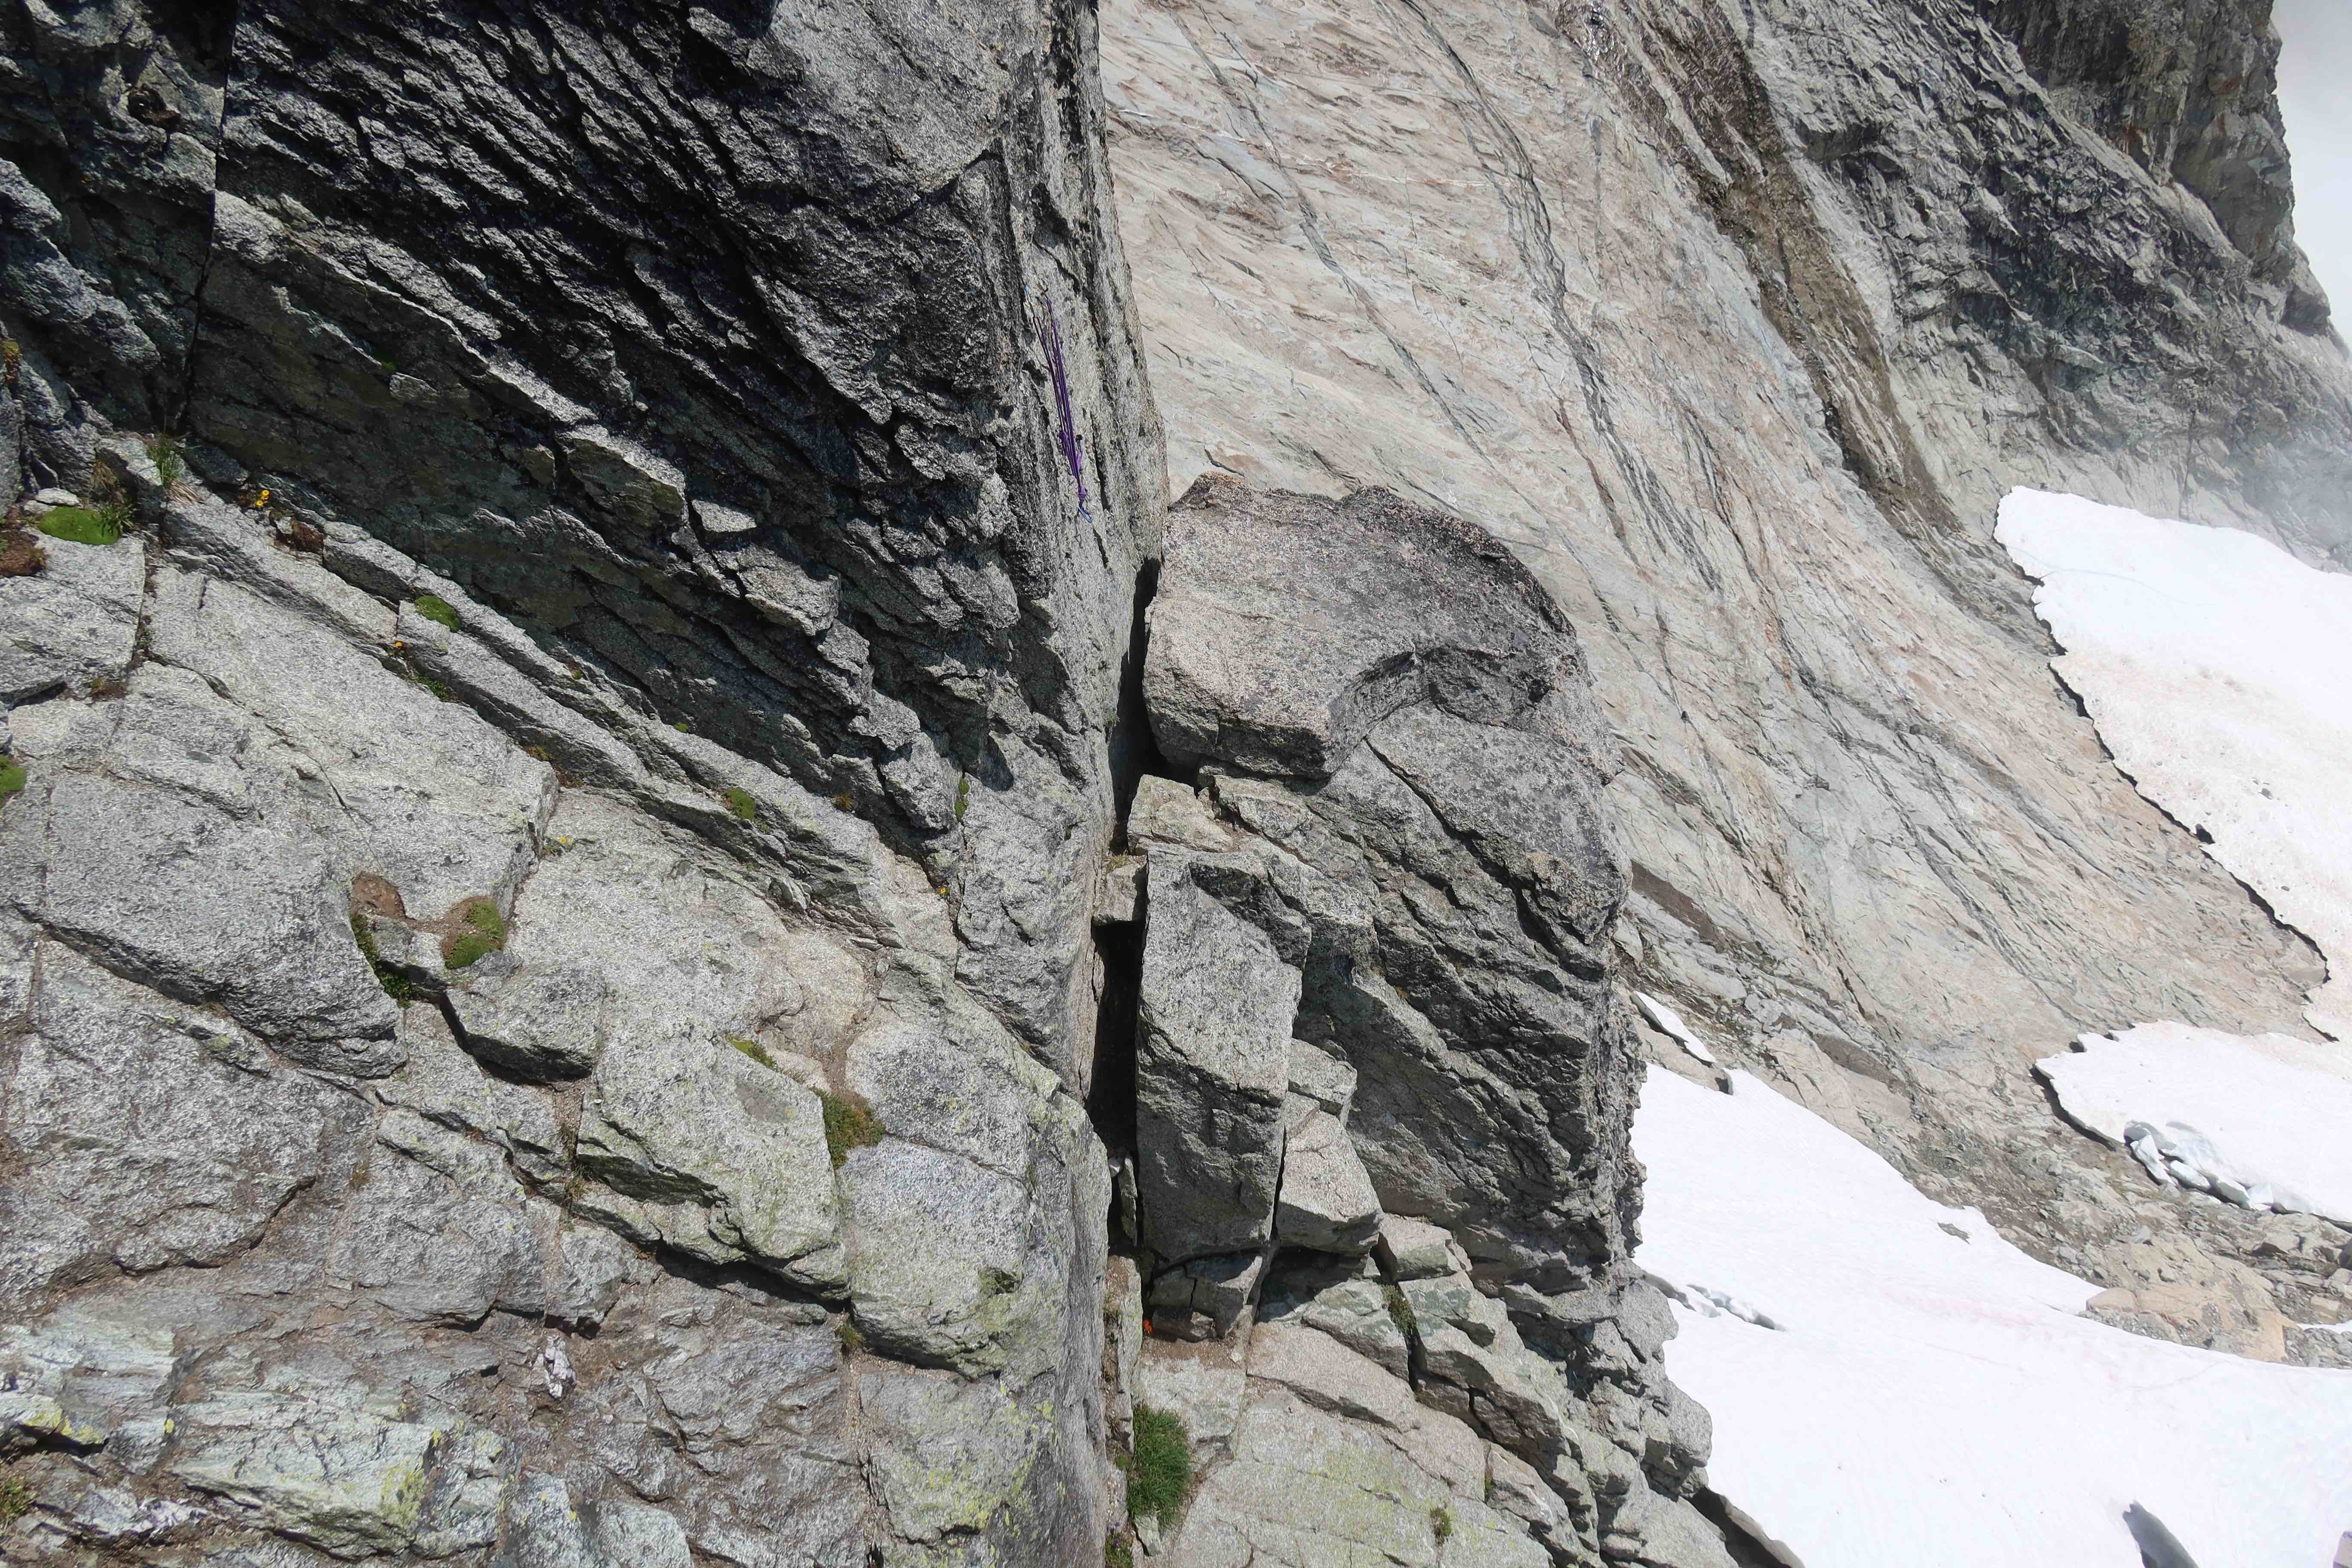
Rappels 1, 2, and 3 stay on the same rock rib. During rappel #4, cross over the gully angling climber’s-right (east) to land on a flat-topped semi-free-standing rock tower, where anchor #5 is constructed from two fixed nuts & two pitons, rigged with purple cord (in July 2025.) Rappel #5 returns you to the base of the Cat Scratch Gullies. You only really need to save copies of two photos here: the photo for locating rap anchor #1, and the photo for locating rap anchor #5. All the others are straight along the fall-line, making them intuitive to find while out there. I’m just sharing an over-abundance of beta having photos of all of them.
Rappel Anchror #1

Rappel Anchor #2

Rapple Anchor #3


Rappel Anchor #4

Rappel Anchor #5
Why Not Bolted Rappel Anchors?
“Why not??” indeed! The back-story is best explained here: https://washingtonclimbers.org/index.php/2014/09/01/12534/#
Here’s my personal opinion on the matter. In April 2014, during a public comment period, I wrote in with the following comment, and I still feel exactly the same way now, eleven-plus years later:
I would love to have a thoughtfully placed pair of bolts at any rap or belay station that would benefit from them, but I do not think bolts should be any more prolific than that in a Wilderness Area. Not only would having bolted rap stations give me peace-of-mind as a climber, I strongly feel they’d be a net-reduction on human impact to the Wilderness Area, better preserving it for future generations. Foot traffic naturally goes to the rap station, so better to direct it to a rocky area that can endure the traffic by strategically placing bolts there, than have people trampling the roots of an alpine tree that’s barely hanging on already. Also, a pair of drably-painted bolts is much less visually “loud” than a rainbow of tattered webbing strands draped around a tree or rock feature.
Unfortunately, the North Cascades National Park Service policy has yet to change.
Gear
- Approach shoes would be ideal. The West Ridge itself has only a few moves of 5.6, and is otherwise a heck of a lot of high-consquence 4th class. The advantages of better-foot-comfort and fewer transitions (changing shoes) make approach shoes the ideal thing to climb in here. Approach shoes should be fine for everything starting in mid-July & later. There is still some snow you have to cross, but not much, so even non-waterproof-shoes should be okay. An exception might be early-season (i.e. June), when there’s still a lot of snow on the approach, where light 3-season mountaineering boots might be a better choice for the snow. If you wear mountaineering boots for the approach, I could see doing any of three options: (1) stay in mountaineering boots for all climbing. The little bit of 5.6 would be harder, but if you can otherwise lead trad 5.8 or 5.9, you can probably pull 5.6 moves in boots. (2) You could carry rock-shoes and change into them once you’re off snow. Really make sure you’re bringing sized-up and comfortable rock shoes if you do. (3) Heck, you could carry light approach shoes on your pack, to change into after the snow. That might be my preference if I had to bring mountaineering boots.
- ice axe for sure. Even in later season (mid-July & onward), you’ll still have to cross a little snow near the end of the approach, to reach the base of the Cat Scratch Gullies. That last bit of snow is steep enough that you’ll definitely want the ability to self-belay and self-arrest in order to cross it safely. In mid-July, I found a single basic ice axe (CAMP Corsa Nanotech) was perfect. I’ve seen photos from early-season trip reports where people had a second axe or perhaps even an ice tool, so that may or may not be needed early season, but I haven’t personally been out there any earlier than July, so I don’t know firsthand.
- crampons –> In July and onward, when conditions would allow bringing approach shoes for everything, it would be prudent to still have crampons that you could put on your approach shoes, in case the bit of steep snow you have to cross ends up being firm. Aluminum full-strap crampons, which you’ve tested to make sure they fit reasonably-well on your approach shoes, are ideal.
- 60-meter rope. Or at least: the ability to do 30-meter rappels. Alternatives to a 60-meter rope could be a ~35m rock rope, plus a 30-meter pull cord (would save a little weight, but how much really? Would make the prospect of a stuck-rappel-rope worse.) Or perhaps bring a 60-meter skinny twin-rated rope, and lead with it folded over, so there are two strands of 30m rope between lead-climber & belayer. (A nice way to save weight, and still make 30-meter rappels without any extra hassle. However, two strands makes it difficult to use progress-capture devices like Microtraxions or Tiblocs while simul-climbing.) If you do bring a full 60-meter Single-rated rock rope, you may want to shorten it during the periods you are simul-climbing: take in coils, leaving about ~120′ between leader & follower, which tends to make simul-climbing work a little better than having the full 200′ of rope out between leader & follower.
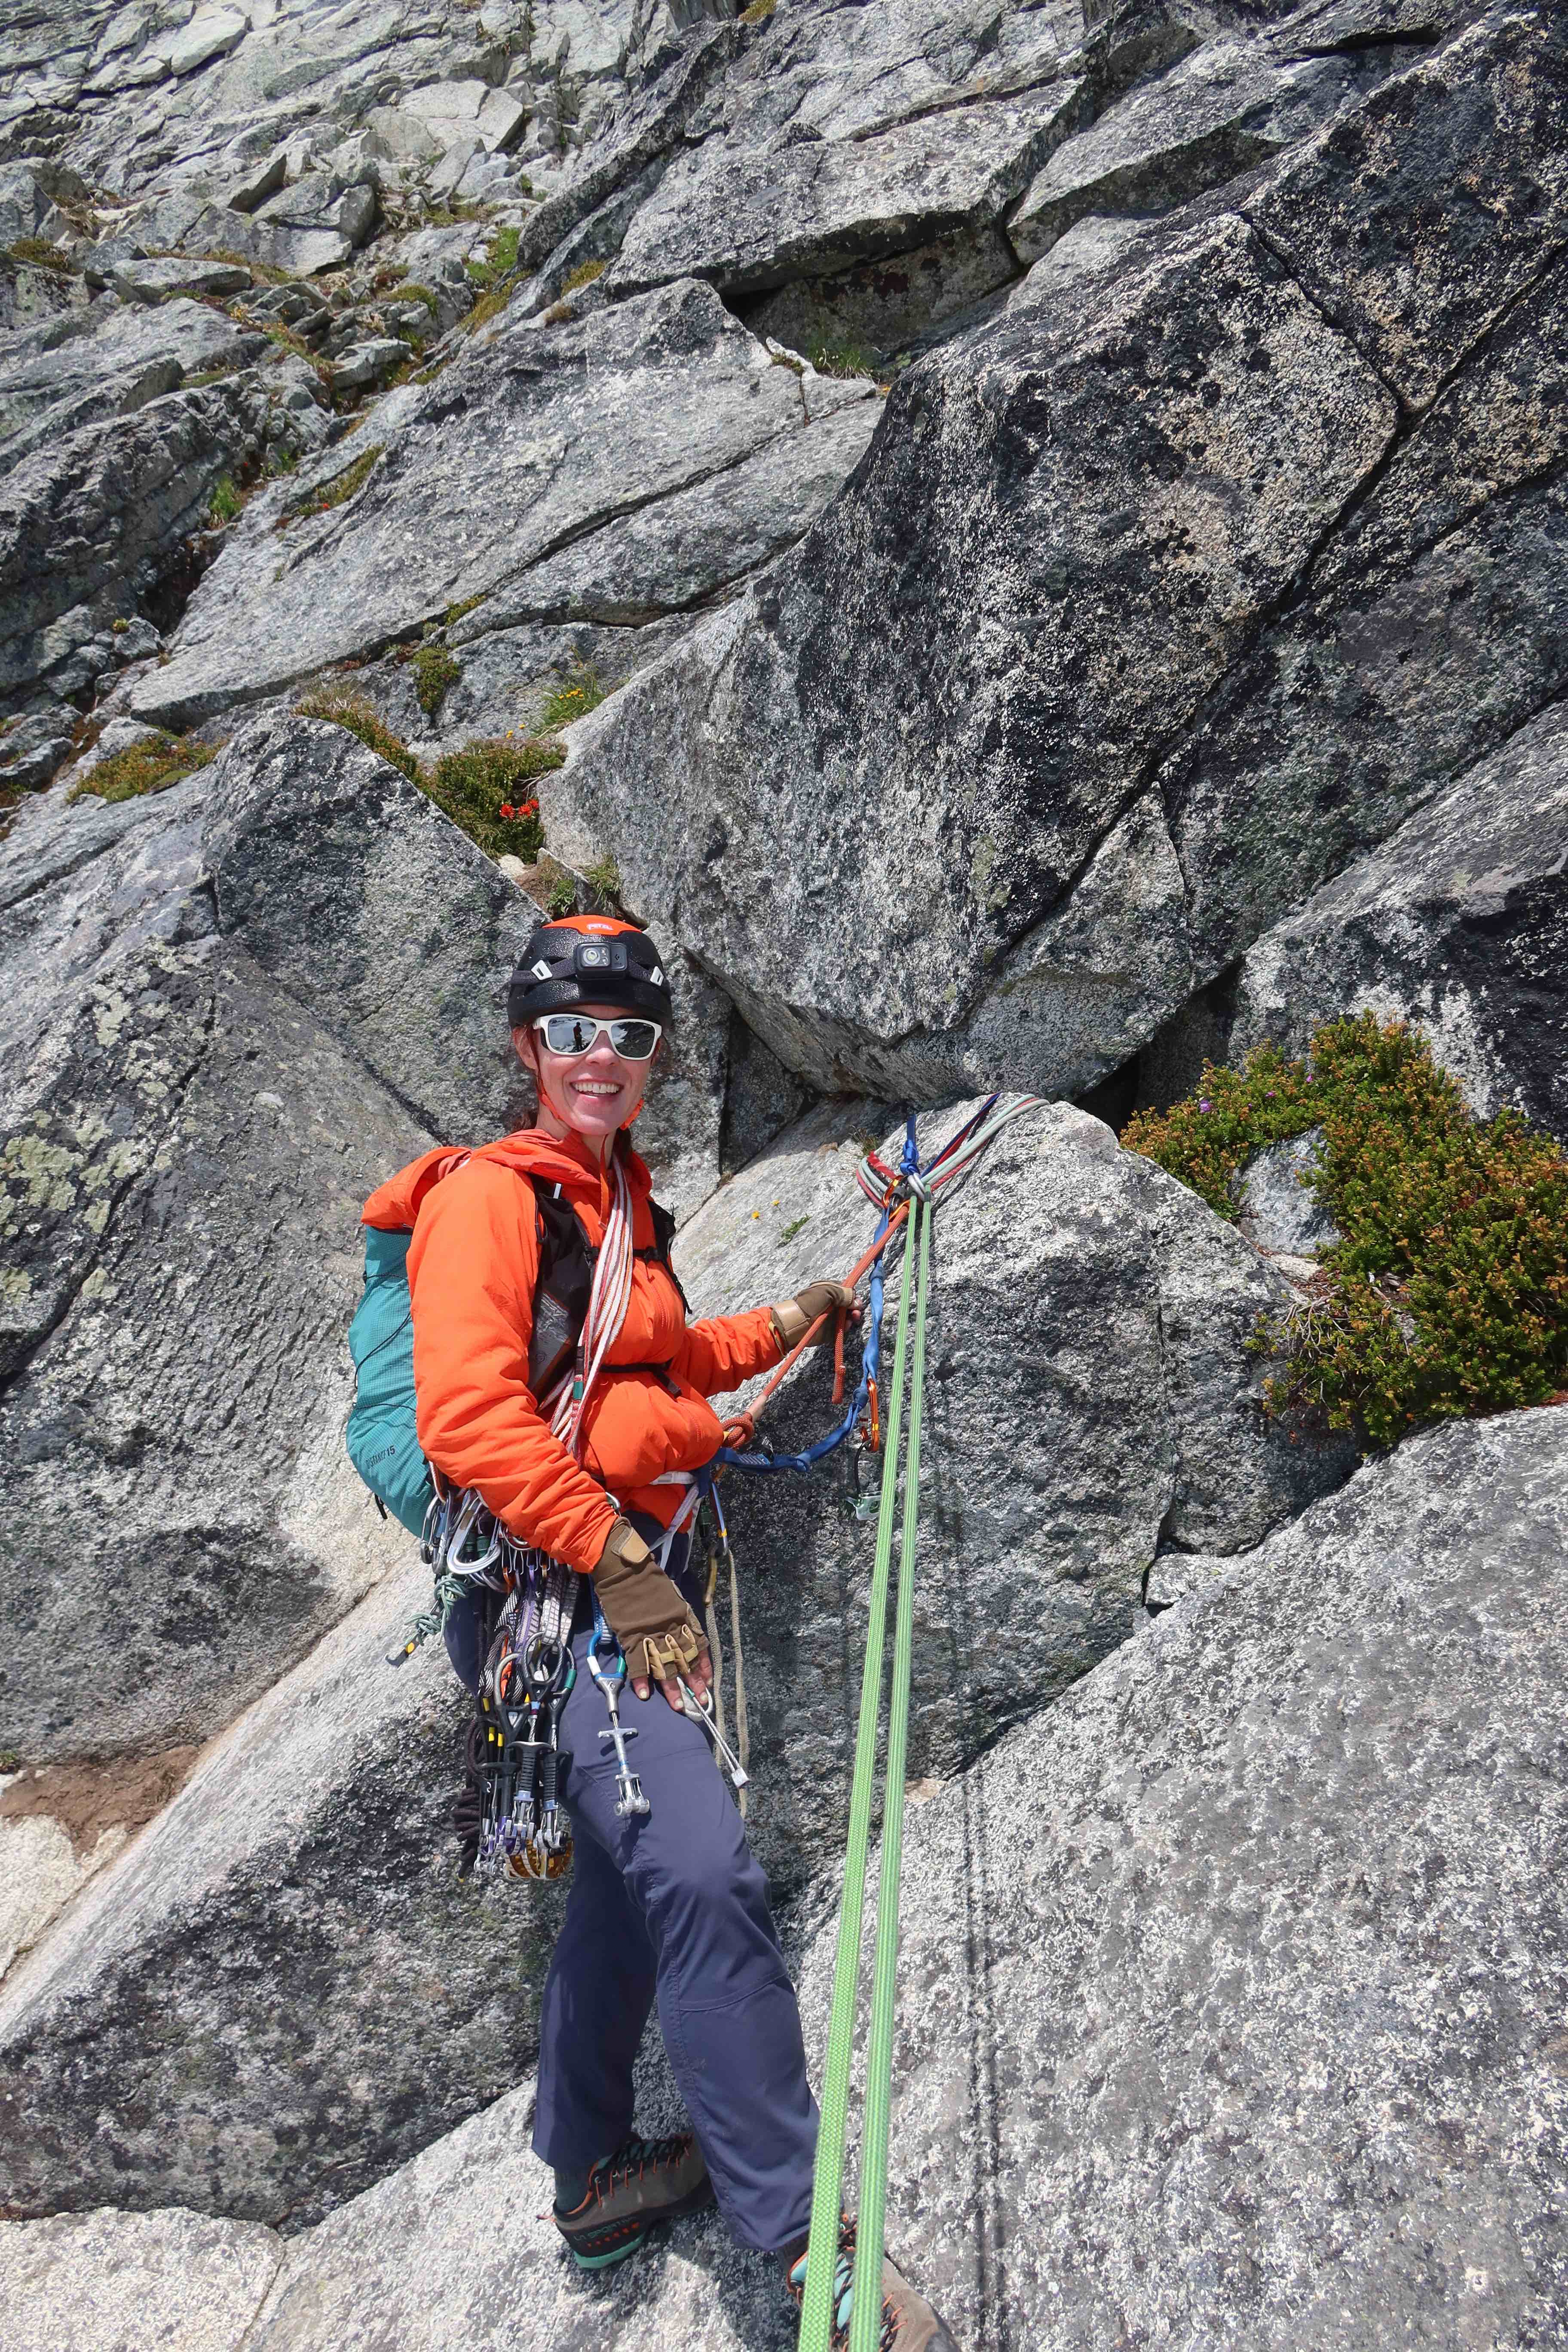
- Rack: It doesn’t matter too much, no specific pro size is make-or-break here. Many people do singles of BD cam sizes #0.2 to #2, a set of nuts, and many many slings, and that works well. I happened to also bring a BD #3, and if you’ve got it, there certainly are places to put it, but it’s never a critical size. Doubling-up cam sizes is not necessary, but if you really wanted to double up, the most-used sizes are around #0.5 purple and #0.75 green. Having A LOT of slings is fairly important, both to allow long simul-pitches, and because a ton of your pro will be natural opportunities to sling rock horns with double-runners. I recommend having 8 single-runners and 8 double-runners. (Yes, 8 double-runners!) Normally for something this alpine, I strip a bunch of carabiners to save weight, having a single-carabiner on each sling, instead of having every sling be an alpine-draw with two carabiners. However, after having done that, I ended up wishing I had way more carabiners anyway. I placed nuts surprisingly frequently and needed two carabiners per runner a lot more often than I expected. Also, there’s a lot of extraneous rappel anchors strewn about, and any time I passed one, it was an easy thing to clip as pro, but that also needed two carabiners per runner. So, don’t skimp too much on the number of carabiners.
- Gear for simul-climbing –> Technically, you can simul-climb without any special gear at all. However, there are some optional things that I personally quite like to bring that help manage the simul-climbing. First: assisted-breaking belay devices, like a GriGri, or Edelrid MegaJul. While simul-climbing, the follower keeps their belay device on the rope, and uses it to manage some of the slack, even if their hands aren’t always on it. Second: progress-capture devices can be a nice-to-have while simuling, like a Microtraxion pulley, or Tibloc. While simuling, after the lead-climber completes a sequence of harder moves, they can place a progress-capture device on a good multidirectional piece of pro, which may catch the follower if they fall while following those harder moves, somewhat reducing the probability of them dangerously pulling the lead-climber off of a stance. Of course, neither of these ideas should be new to you, you should already have experience having simul-climbed somewhere else before making any attempt on Forbidden. If you have not practiced simul-climbing before, I recommend going and climbing Blues Buttress on Poster Peak up at Washington Pass first, it’s a perfect route for first-time simul-climbing practice.
