
I recently had a chance to reclimb this old classic, and figured while the details were fresh in my mind, I might as well write up a detailed guide for anyone doing it for the first time. Of all the routes The Mountaineers club considers “Intermediate Alpine Rock” climbs, this is the shortest and easiest, though it is a notable step up from a Basic Rock climb with a decent amount of sustained 5.6. If you’re feeling good leading 5.6-ish / 5.7-ish trad, and have practiced leading pitches on a number of other multipitches (like many of the Leavenworth classics) so that your efficiency is good and you’re not going to hold up people behind you too much, this could be a good first alpine trad climb beyond the Mountaineers Basic routes.
tl;dr / minimalist-beta
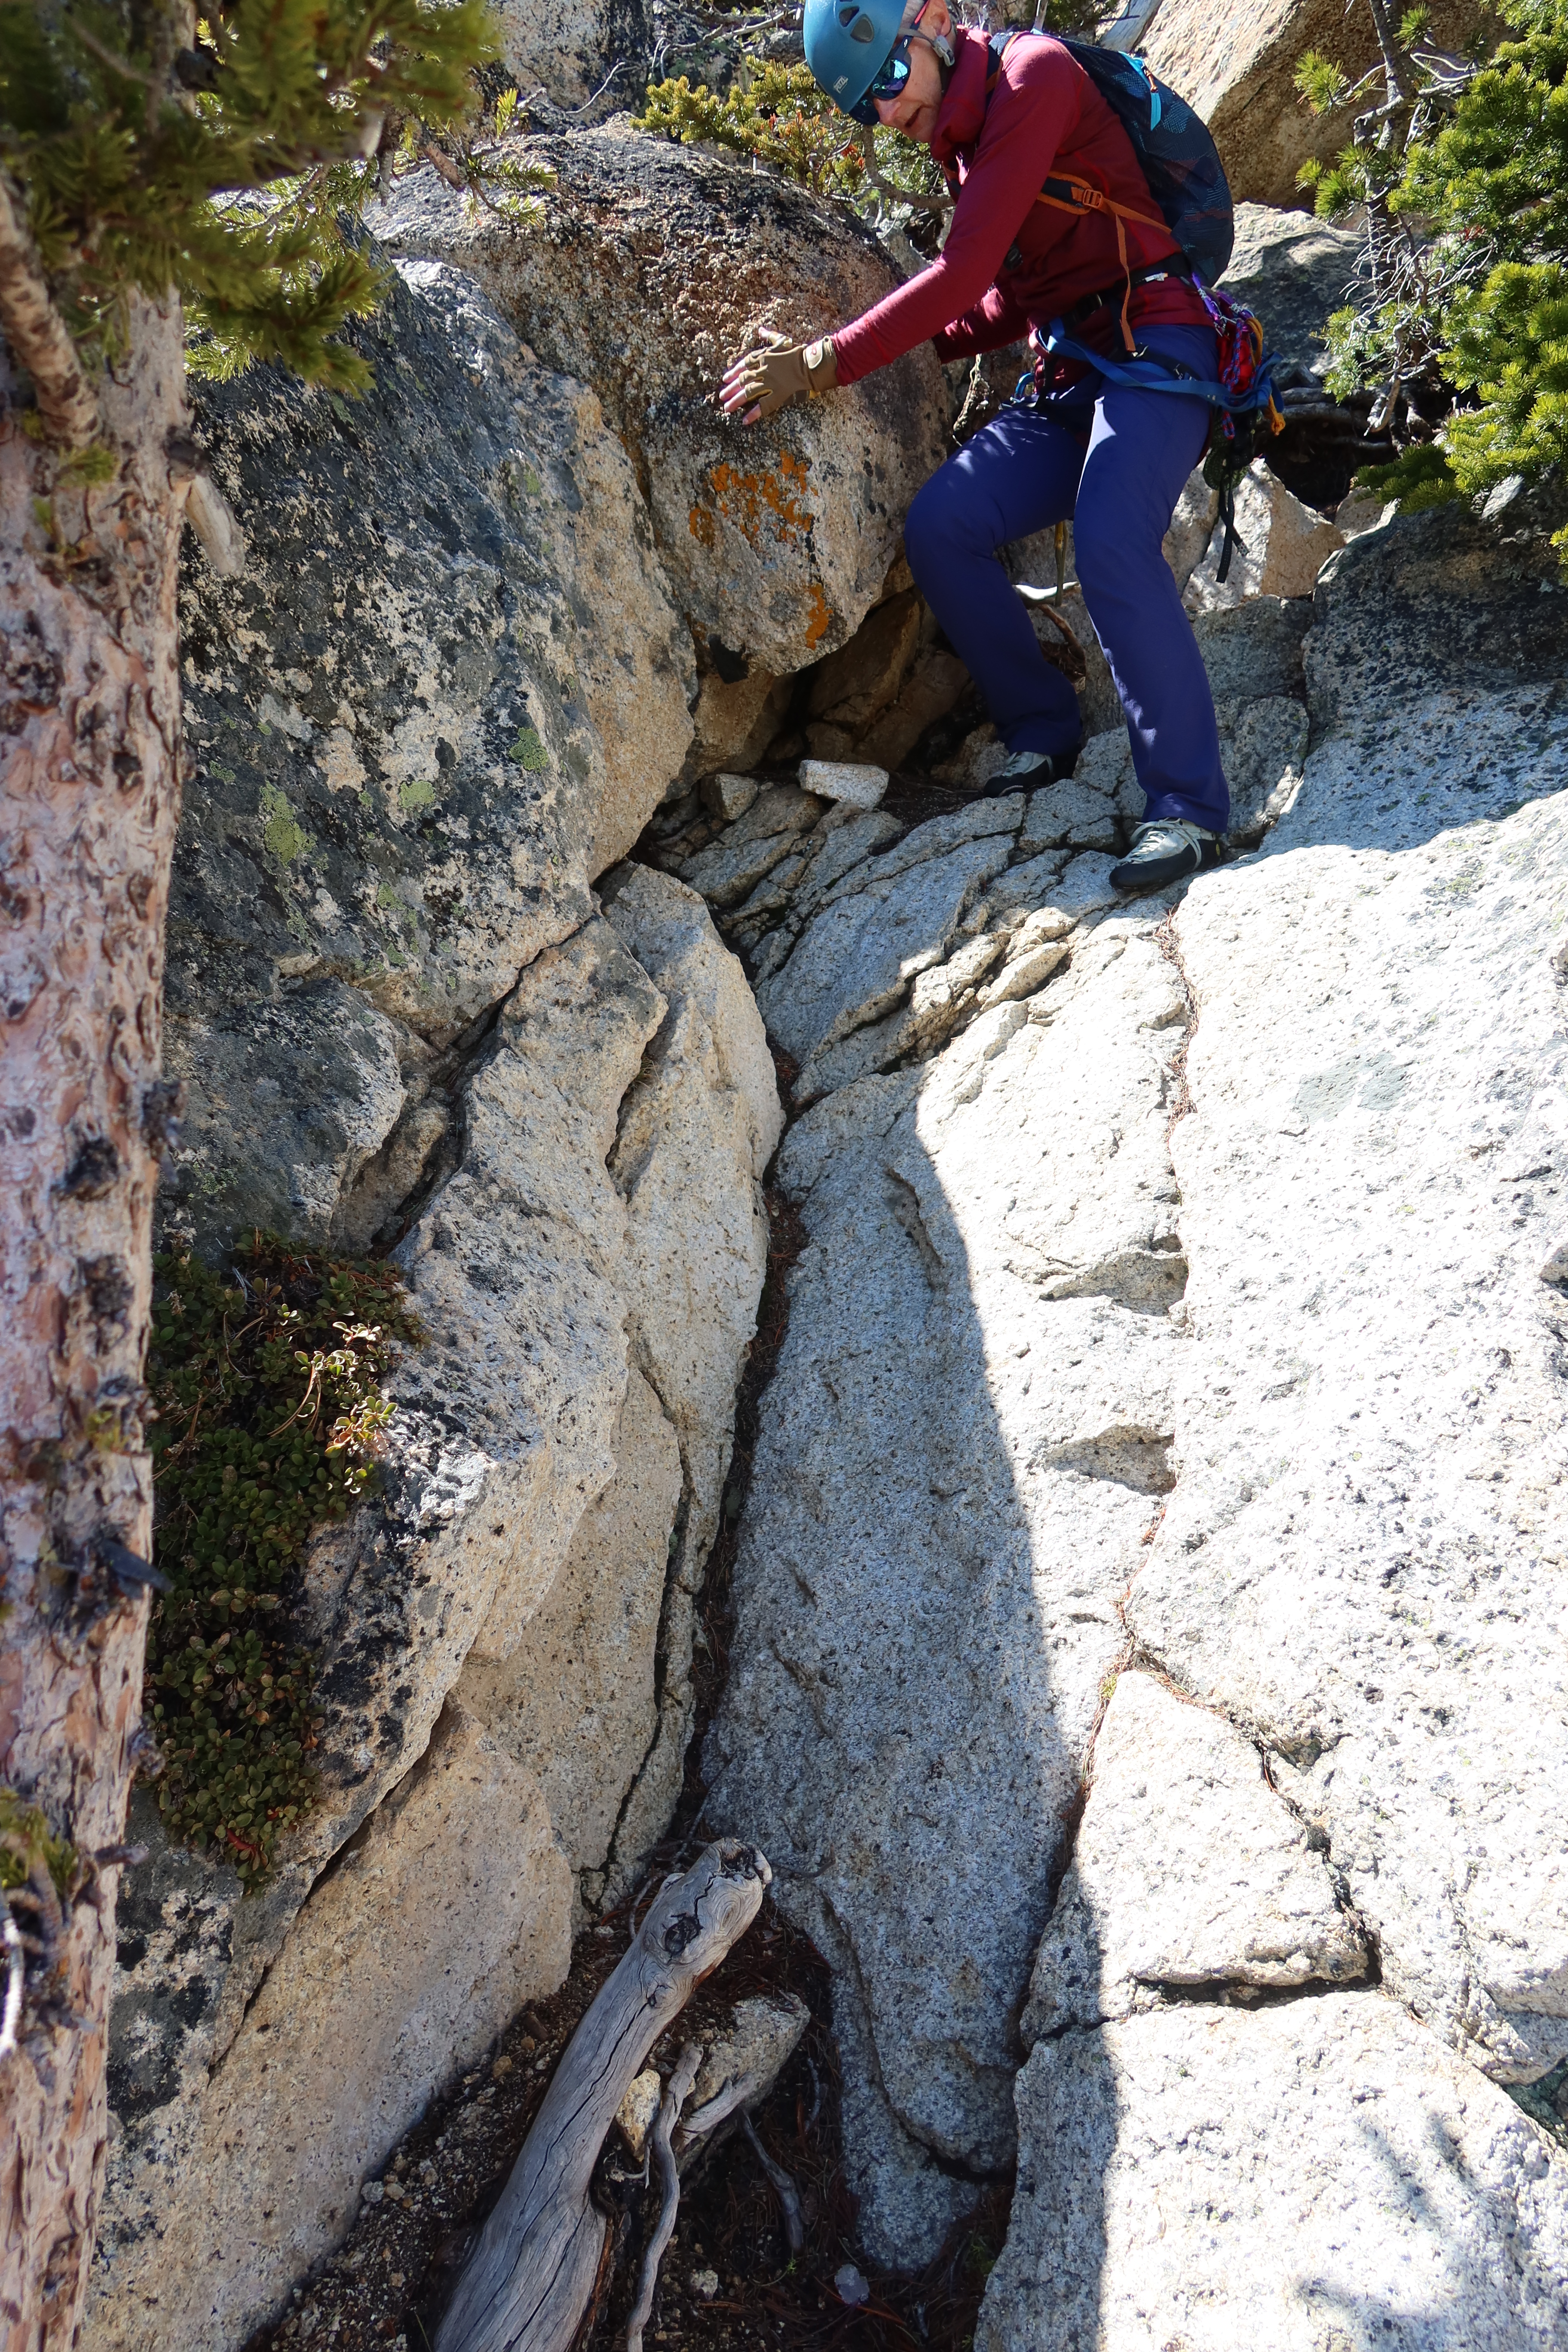
The two least-intuitive route-finding parts worth bringing photos of are: (1) where to start the first pitch, shown here, and (2) finding the rappels on the descent, shown in this overview photo, and this photo of the chains. The rest of this page is an over-abundance of information, more than you really need, so if you’re an experienced alpine trad climber, you’d probably be fine if you ignored the rest and only saved copies of those three linked images to have with you for reference.
Overview
- Of course, First Ascent by Fred Beckey, in 1946. (26 years before Hwy 20 connected all the way through!!)
- Season: The route is likely in good climbing shape app all summer, from whenever Hwy 20 opens in May, through early October, until the first snowfall shuts it down.
- If snow is present, bring ice axe & crampons for the approach gully.
- 5.6 (5.6 is the original rating, though by modern standards I’d call it more like 5.6+ or 5.7-. It’s fairly sustained too. And as I’m sure you’ve found out by now, sustained-old-school-alpine-trad 5.6 roughly equates to 5.10b or 5.10- by indoor-climbing-gym status.)
- 4 pitches (Arguably just three-and-a-half pitches. 1st pitch is 5.5 and <100′. 2nd & 3rd pitches each have specific-cruxes but also sustained 5.6 elsewhere and are long, both >100′. 4th pitch has a 12′ friction-slab problem to boulder up, but is otherwise just 3rd class scrambling.)
- The rappel-route is different than the climbing-route, but not by much, so it’s only minorly committing. Once you’re past the early-crux of the 2nd pitch, you’ll need to finish at least the 2nd & 3rd pitches in order to access the rappel-route to bail without sacrificing a part of your trad-rack.
- Time-wise, I’d say par-for-the-course is 9 hours car-to-car, so I’d aim to keep your time under that. (Though I could also see problems like particularly-unfavorable snow conditions, or a particularly large crowd of people, potentially making it a 12-hour car-to-car day.) Also be aware that this route is very, very popular. It’s worth starting early, to either be first on the route, or at least be relatively-early-in-line amongst the people at the base waiting to climb it.
- The trailhead is the Blue Lake Trailhead. (Display a NW Forest Pass or America The Beautiful Pass.) If you live in Seattle, that drive takes 3h10m with no traffic, and could potentially even be 4 hours of driving-time if rush-hour times are involved. To get a sufficiently early start, I recommend driving out the afternoon/evening before, and doing some low-profile camping right in the parking lot of some trailhead nearby. Either sleep inside your car; or if you use a tent or bivy bag, do so on a durable surface like the parking lot itself, set it up after 8pm and break it down before 6am, and it’s pretty unlikely that any ranger will see or care. You could do this in the Blue Lake TH itself, but it is both one of the smallest and one of the busiest, so I often find it more pleasant to disperse to some other trailhead in the area to sleep, then drive the short remainder to the Blue Lake TH in the morning. (Also, top up your car’s gas tank right after leaving I-5 via exit 208 onto Hwy 530, or at least don’t go beyond Marblemount with less than half a tank.)

Gear List
Note: I’ve heard a lot of folks recommend only bringing a single set of cams on this route. That’s fine if they want to, but personally, I think doubling up some cam sizes is well worth it, and I continue to do so when I go up this. I often end up building a 3-piece trad-gear anchor between pitch 2 & pitch 3. Yes, there is a tree, but often the route is crowded and someone else is already using it. Pitches 2 & 3 are both pretty long and may go through a lot of gear as-is. Your rack might feel pretty sparse if you only have singles.
- Trad rack:
- cams: Black Diamond sizes #0.2 through #3 (or equivalent sizes of another brand,) then double-up whatever subset of those sizes you’d prefer. For me, I’d double up BD #0.4 through #2, though more or less is probably also fine.
- set of nuts
- optionally, also a set of tricams
- slings: maybe 10 single-runners, and 4 double-runners. (You’ll want to utilize quite a few double-runners on the 3rd pitch.)
- two cordelettes for building anchors. All pitches end at something natural, either a tree, or cracks to build a 3-piece trad anchor.
- Other gear:
- 60 meter rope
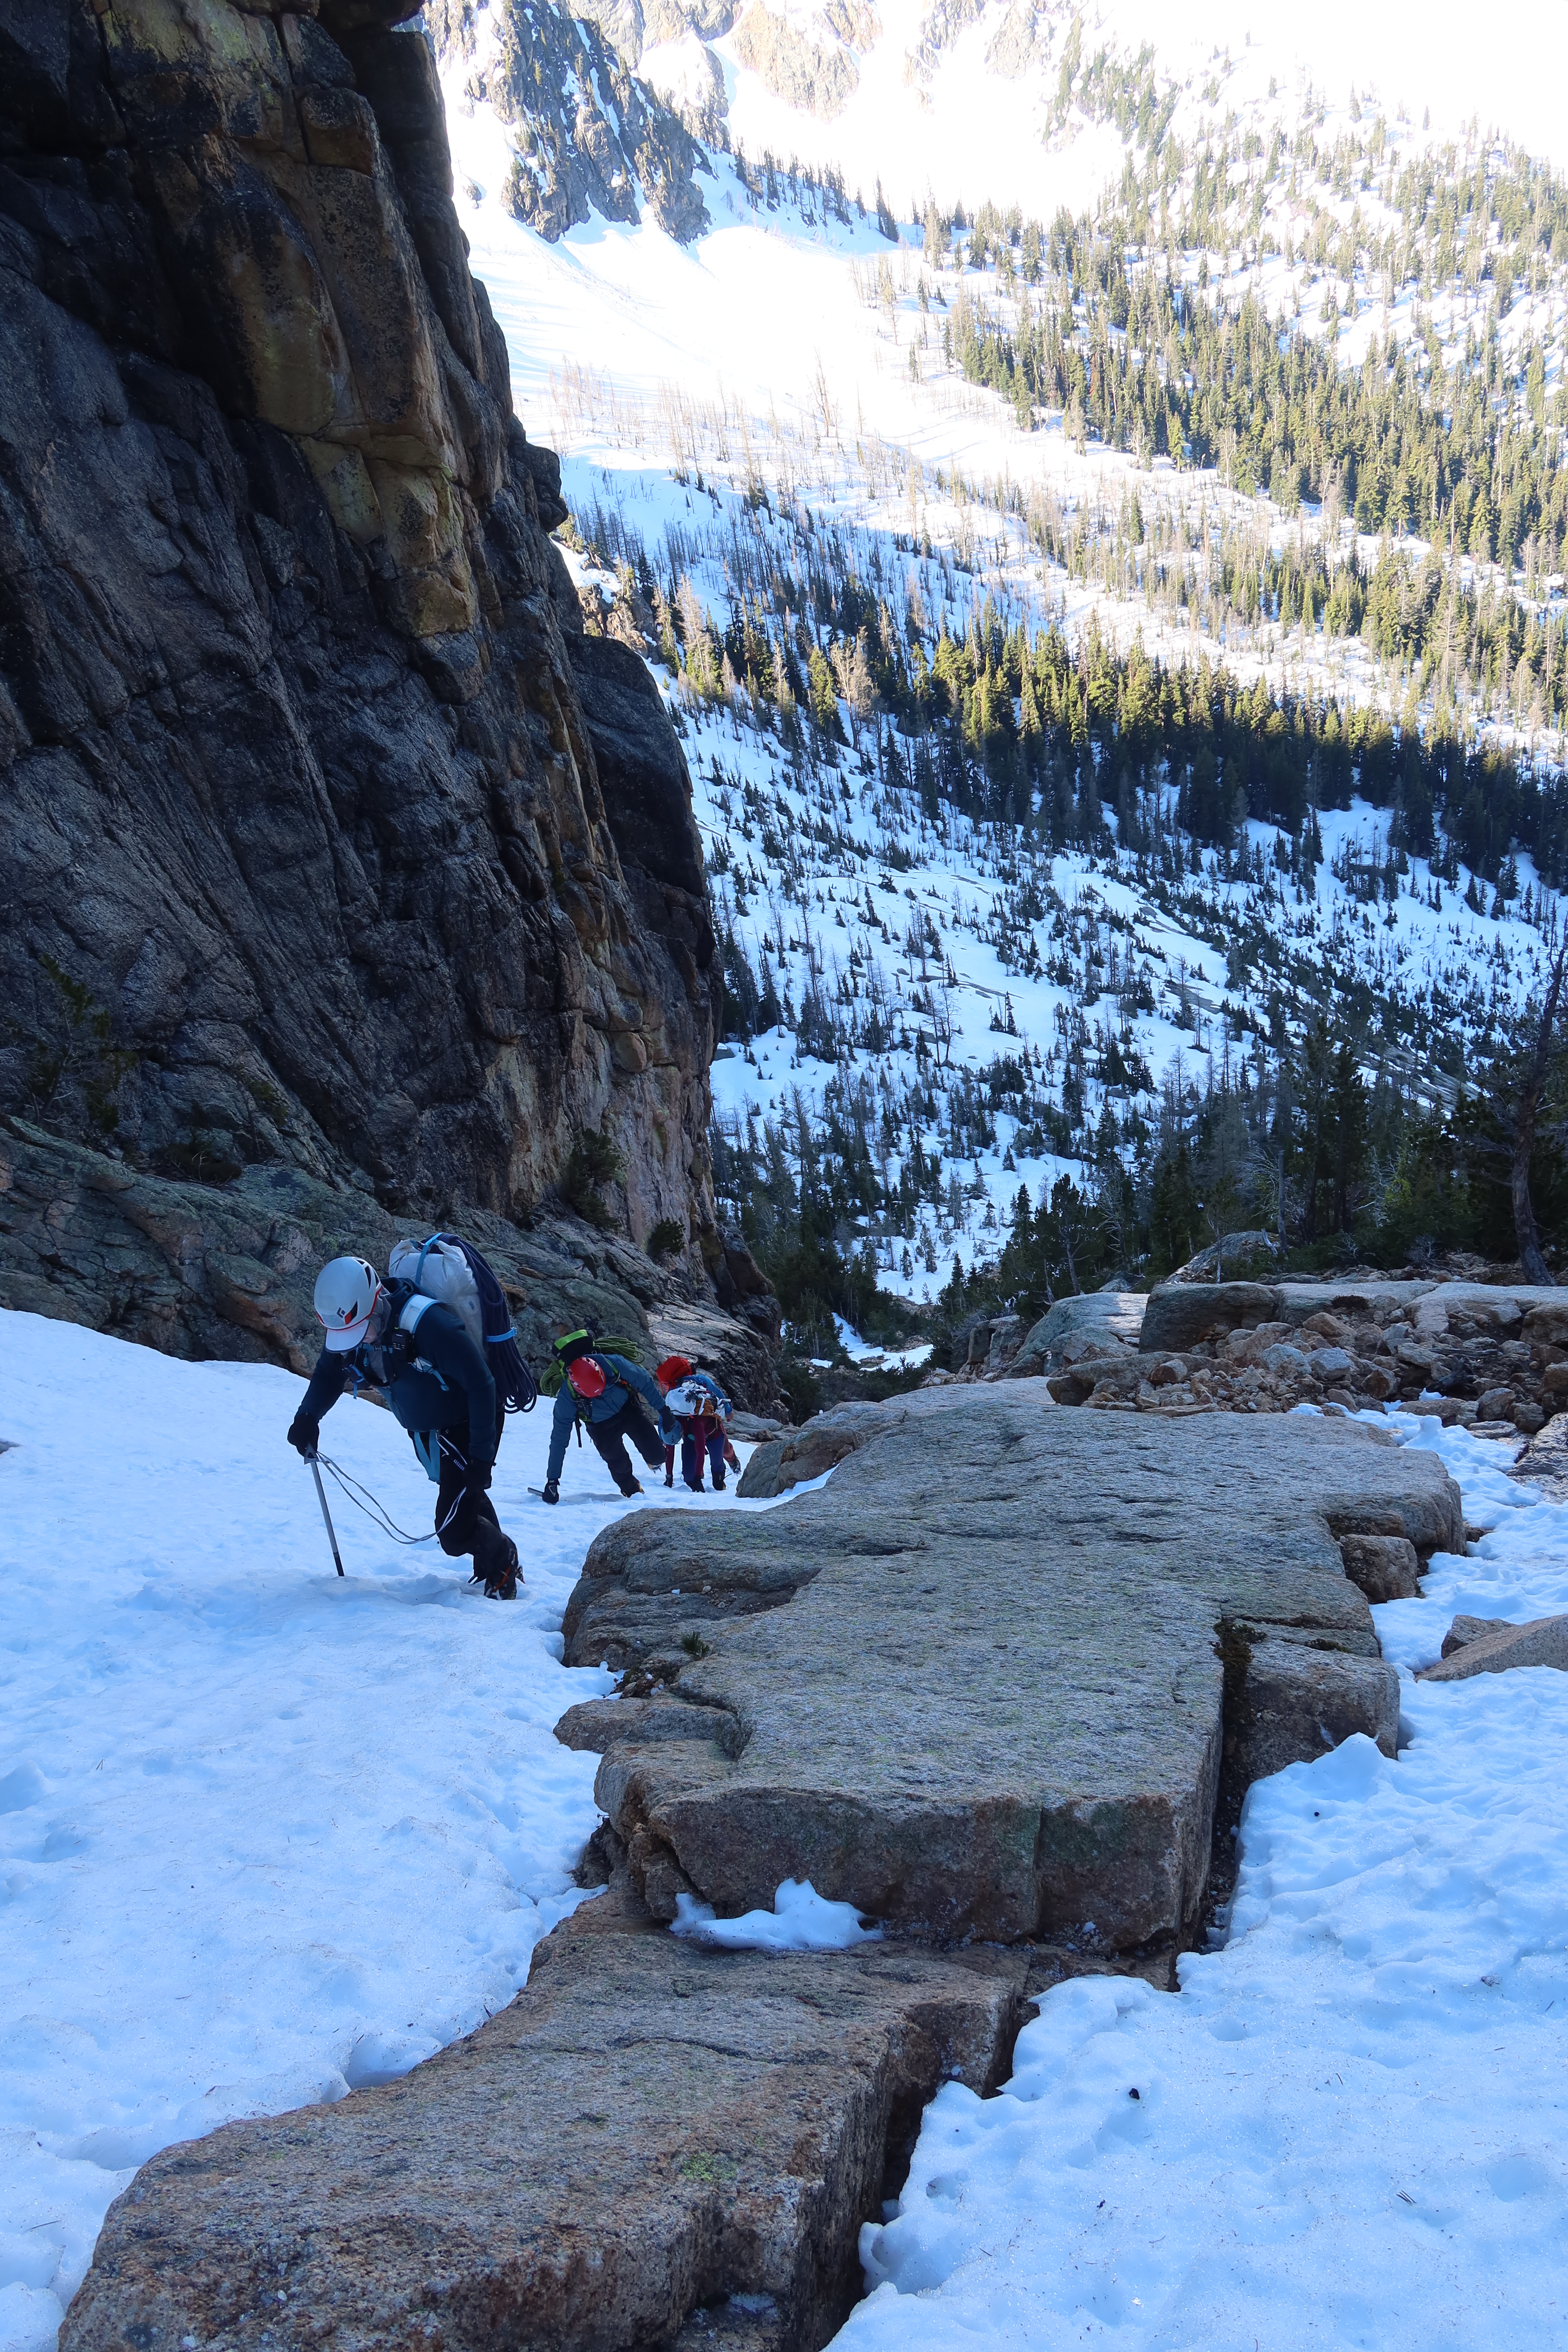
- If there is snow (and there probably will be through mid-July), bring ice axe & crampons. The gully that is the last piece of the approach can hold snow, and is decently steep enough to be non-trivial (maybe 40° slope angle?) If someone going up this slipped, and couldn’t immediately arrest, they would pick up speed fast, and hit a hard rock or tree at the bottom with an unhealthy force of impact. So wear crampons in the first place and prevent any slips 🙂 Later season when the snow is gone, going up the gully is a rock-scramble, probably Class 2, but with a decent bit of loose rock, which could get kicked down on you from above by either other people or goats. So whether there’s snow or not, wear a helmet while in that gully.
- radios are optional, but recommended. If by some oddity there aren’t a dozen other people out there all shouting to their partners, then it’s quiet enough that you could shout single-word commands if you had to, but still, nearly every pitch out-of-view of your belayer. Radios could help a lot.
- rock shoes. The old-school 5.6 on this is fairly sustained, and is probably comparable to gym-ratings of 5.10b or 5.10-, which I definitely wear rock shoes for, this is not a route I would try to climb in mountaineering boots. (Some guides will climb it in boots or approach shoes, but they’ve already done some double-digit number of laps on this route.)
- a little summit-pack with the standard four things: a little food, a little water, one spare layer in case it’s windy, and a headlamp in case your schedule goes wrong. It’s nice to take a lunch break up on top of the summit. Sunscreen & sunglasses could be added to the summit-pack too. (I often find that I’m coldest & in the shade at the start of the 1st pitch, then in the sun by the top of the 1st pitch.)
- Since you’re probably car-camping, don’t forget:
- headlamp (and if it’s the same headlamp that goes in your climbing pack, don’t forget to put it back in your climbing pack in the morning!)
- about a spare gallon of water in your car for the night out, since no potable water will be available.
- tent+poles+stakes, or bivy bag, if not sleeping inside your car
- sleeping bag
- sleeping pad
- perhaps a real pillow (why not?)
- ear-plugs!! (I can’t imagine sleeping at a trailhead without them)
- eye-mask (helps block the light of other vehicles headlights rolling through)
- melatonin?
- toothbrush / toothpaste / deoderant (if you want to bother at all)
- possibly spare toilet paper & hand sanitizer? (Many trailheads have drop-toilets available, but they may be out of provided supplies)
- a quick breakfast (I often bring a canned-coffee for the morning too)
- if you’re going to stay at one of the paid campgrounds nearby, like Colonial Creek (40 minutes before), then bring some cash in a variety of good old paper bills, so that you can put the right amount of money in the envelope to pay for your site.
Route description – Approach:
If you’d like a GPS track, this is an example of one that is spot-on: https://www.peakbagger.com/climber/ascent.aspx?aid=2221721
- The usual start for many climbs in the Liberty Bell group: Park at Blue Lake TH (5300′), hike the Blue Lake trail, until the usual left-turn for the well-marked climber’s trail at 6100′.
- Follow the climber’s trail, and pretty soon you’ll be able to see straight up that gully between Liberty Bell and Concord towers, separated by a deep notch. I think you get that sight-line around 6400′-ish? But don’t go straight for it yet. Instead, continue on the trail, going seeming-further climber’s-right of the gully, up to about 6850′. Then cut back left, and enter the gully there. That makes the approach just slightly faster & easier, by staying on easier-angled terrain for a bit longer.
- Put on helmets at the base of the gully if you haven’t already done so. Depending on snow, it may be a good time for ice axe & crampons too.
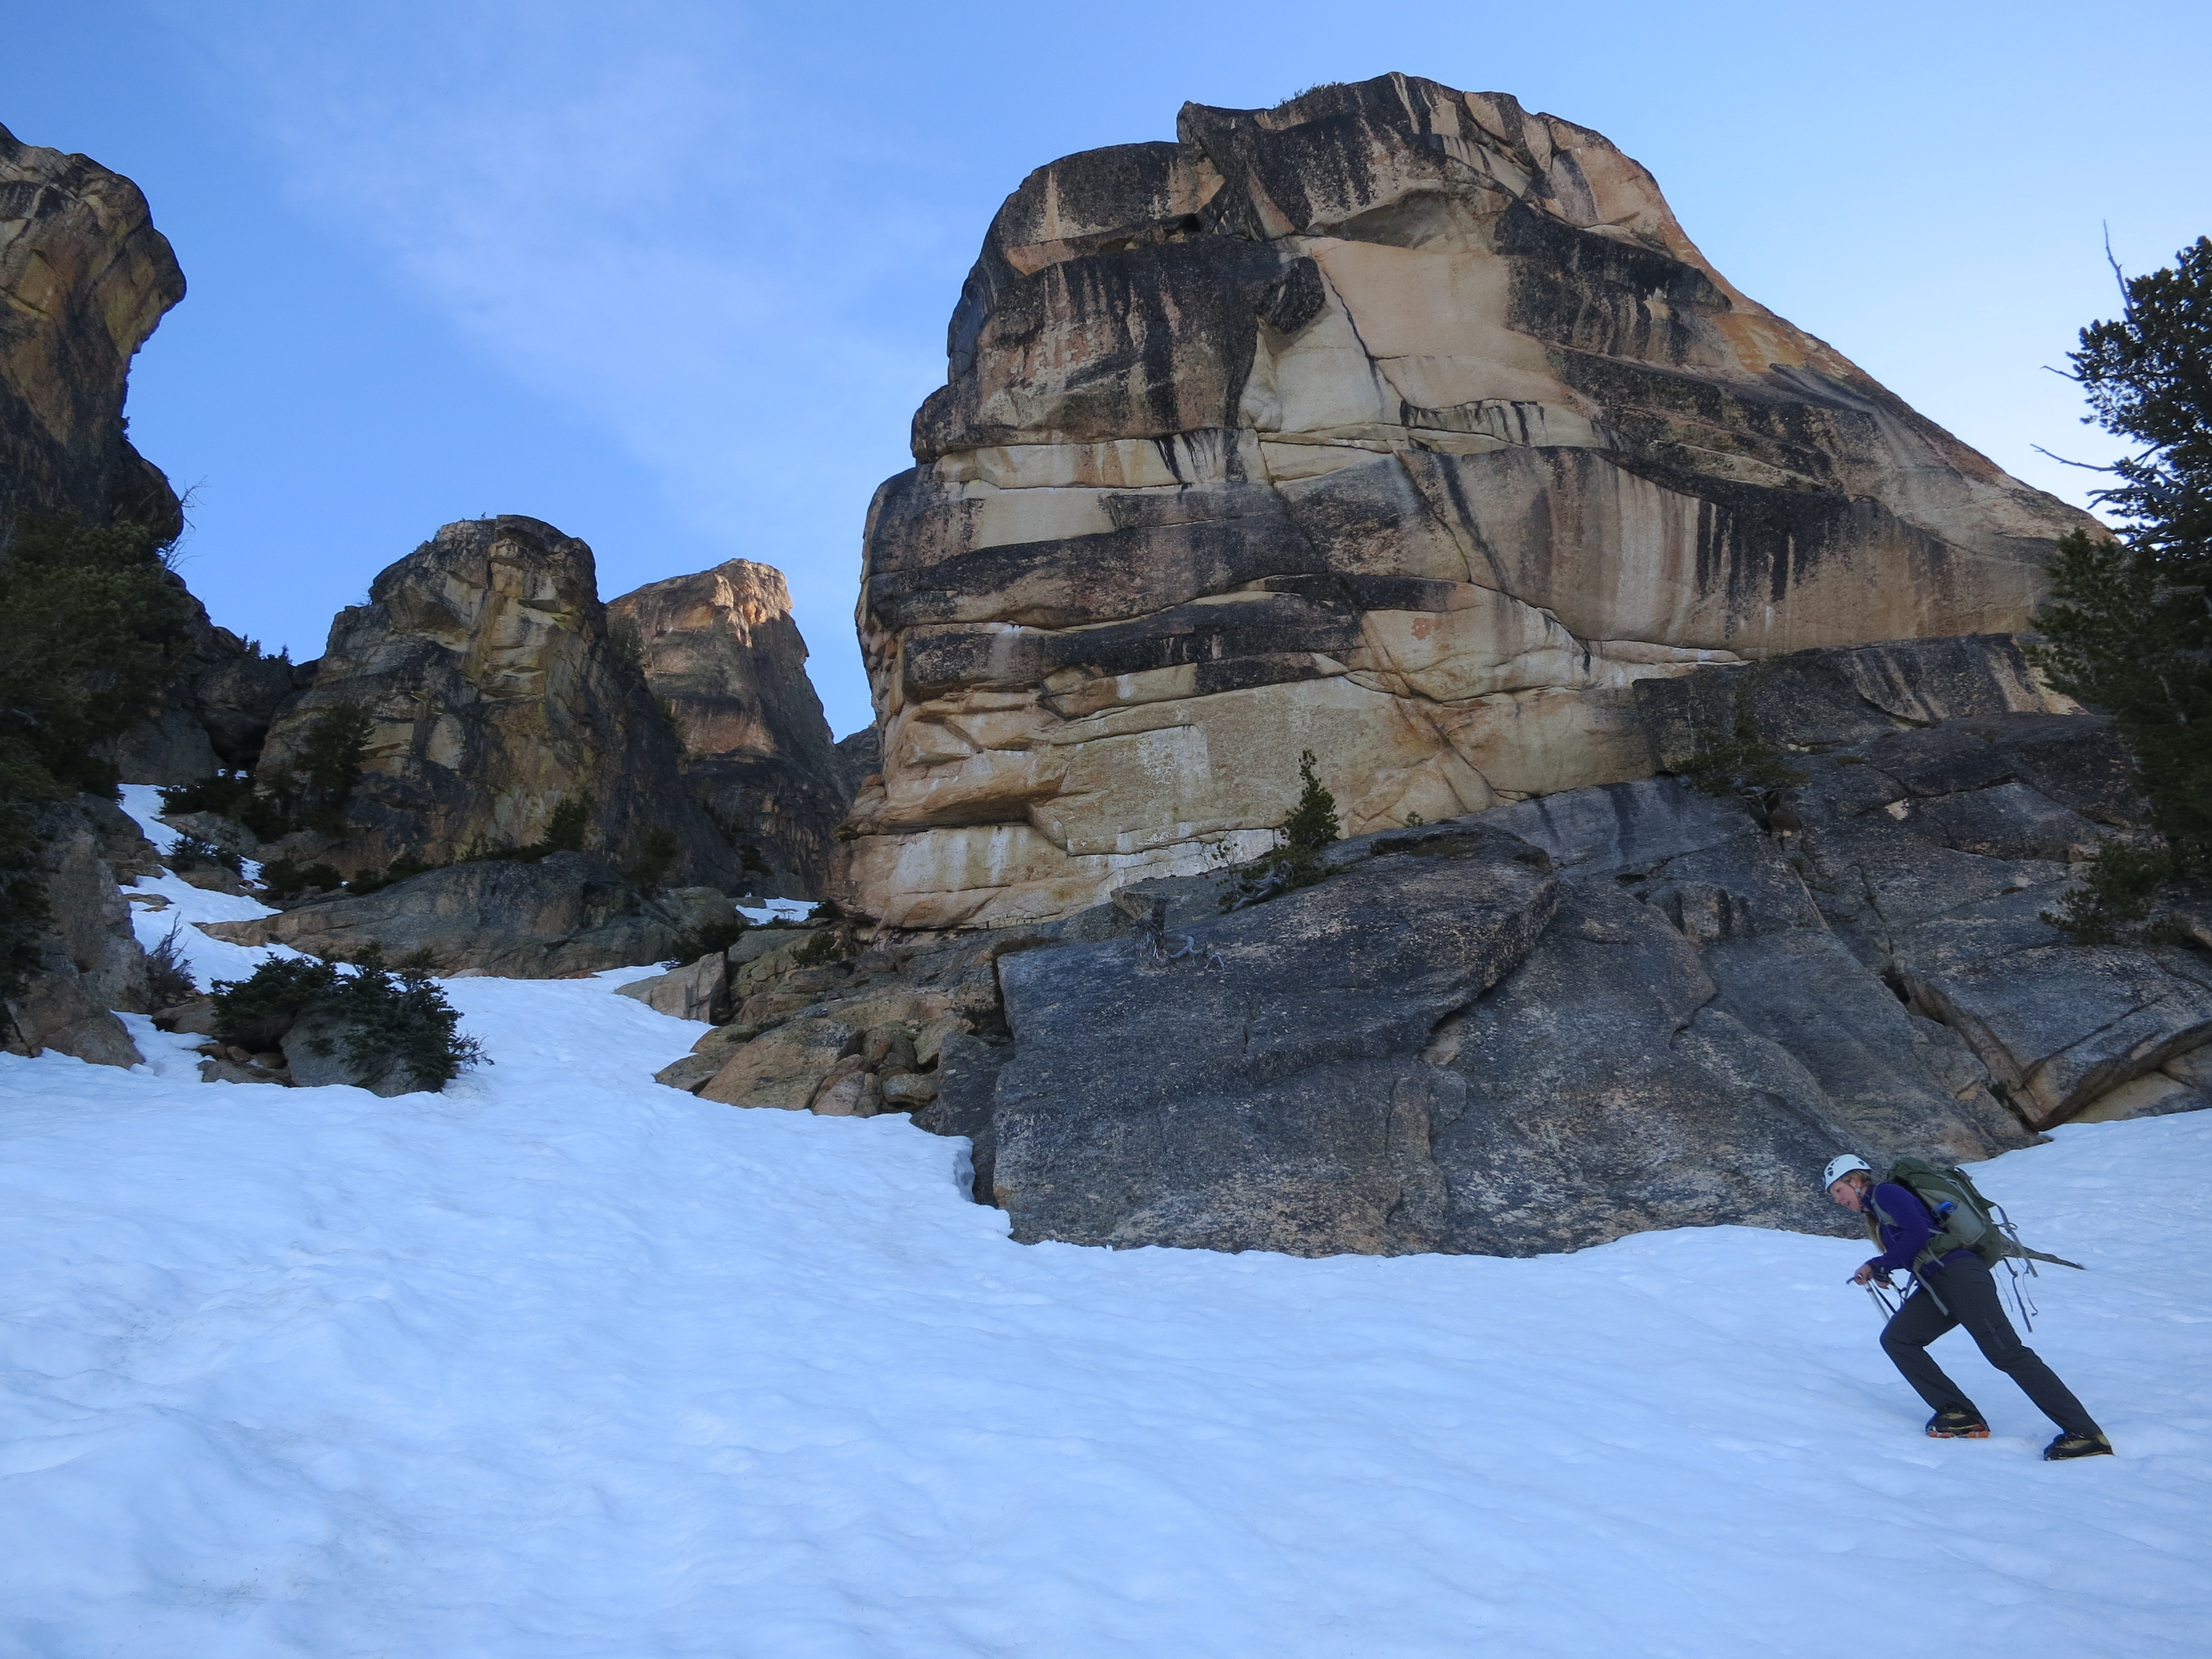
- Ascend the gully all the way up, until it ends. (7300′) At the top, you’re squarely between Liberty Bell and Concord tower. On the wall to your left is the Liberty Bell Beckey Route, and on the wall to your right is Concord North Face climbing route. There you’ll find kind of a tilted-rock-shelf on the left side of the gully, along the base of Liberty Bell. This is where you want to transition into your climbing gear (rock shoes on, harness on, etc.) and leave any gear you’re not climbing with here, in a neat pile on the ground, so it’s not in the way of other parties who arrive after you. It’s okay to leave boots here, the rappel-route later drops you off very close to where you left your gear. Goats do hang out here, and may nose at your gear a bit while you’re gone, but so far I’ve been lucky and nothing has been chewed on. But maybe take all your food with you in your summit pack, just to be safe.


Route description – the climbing route
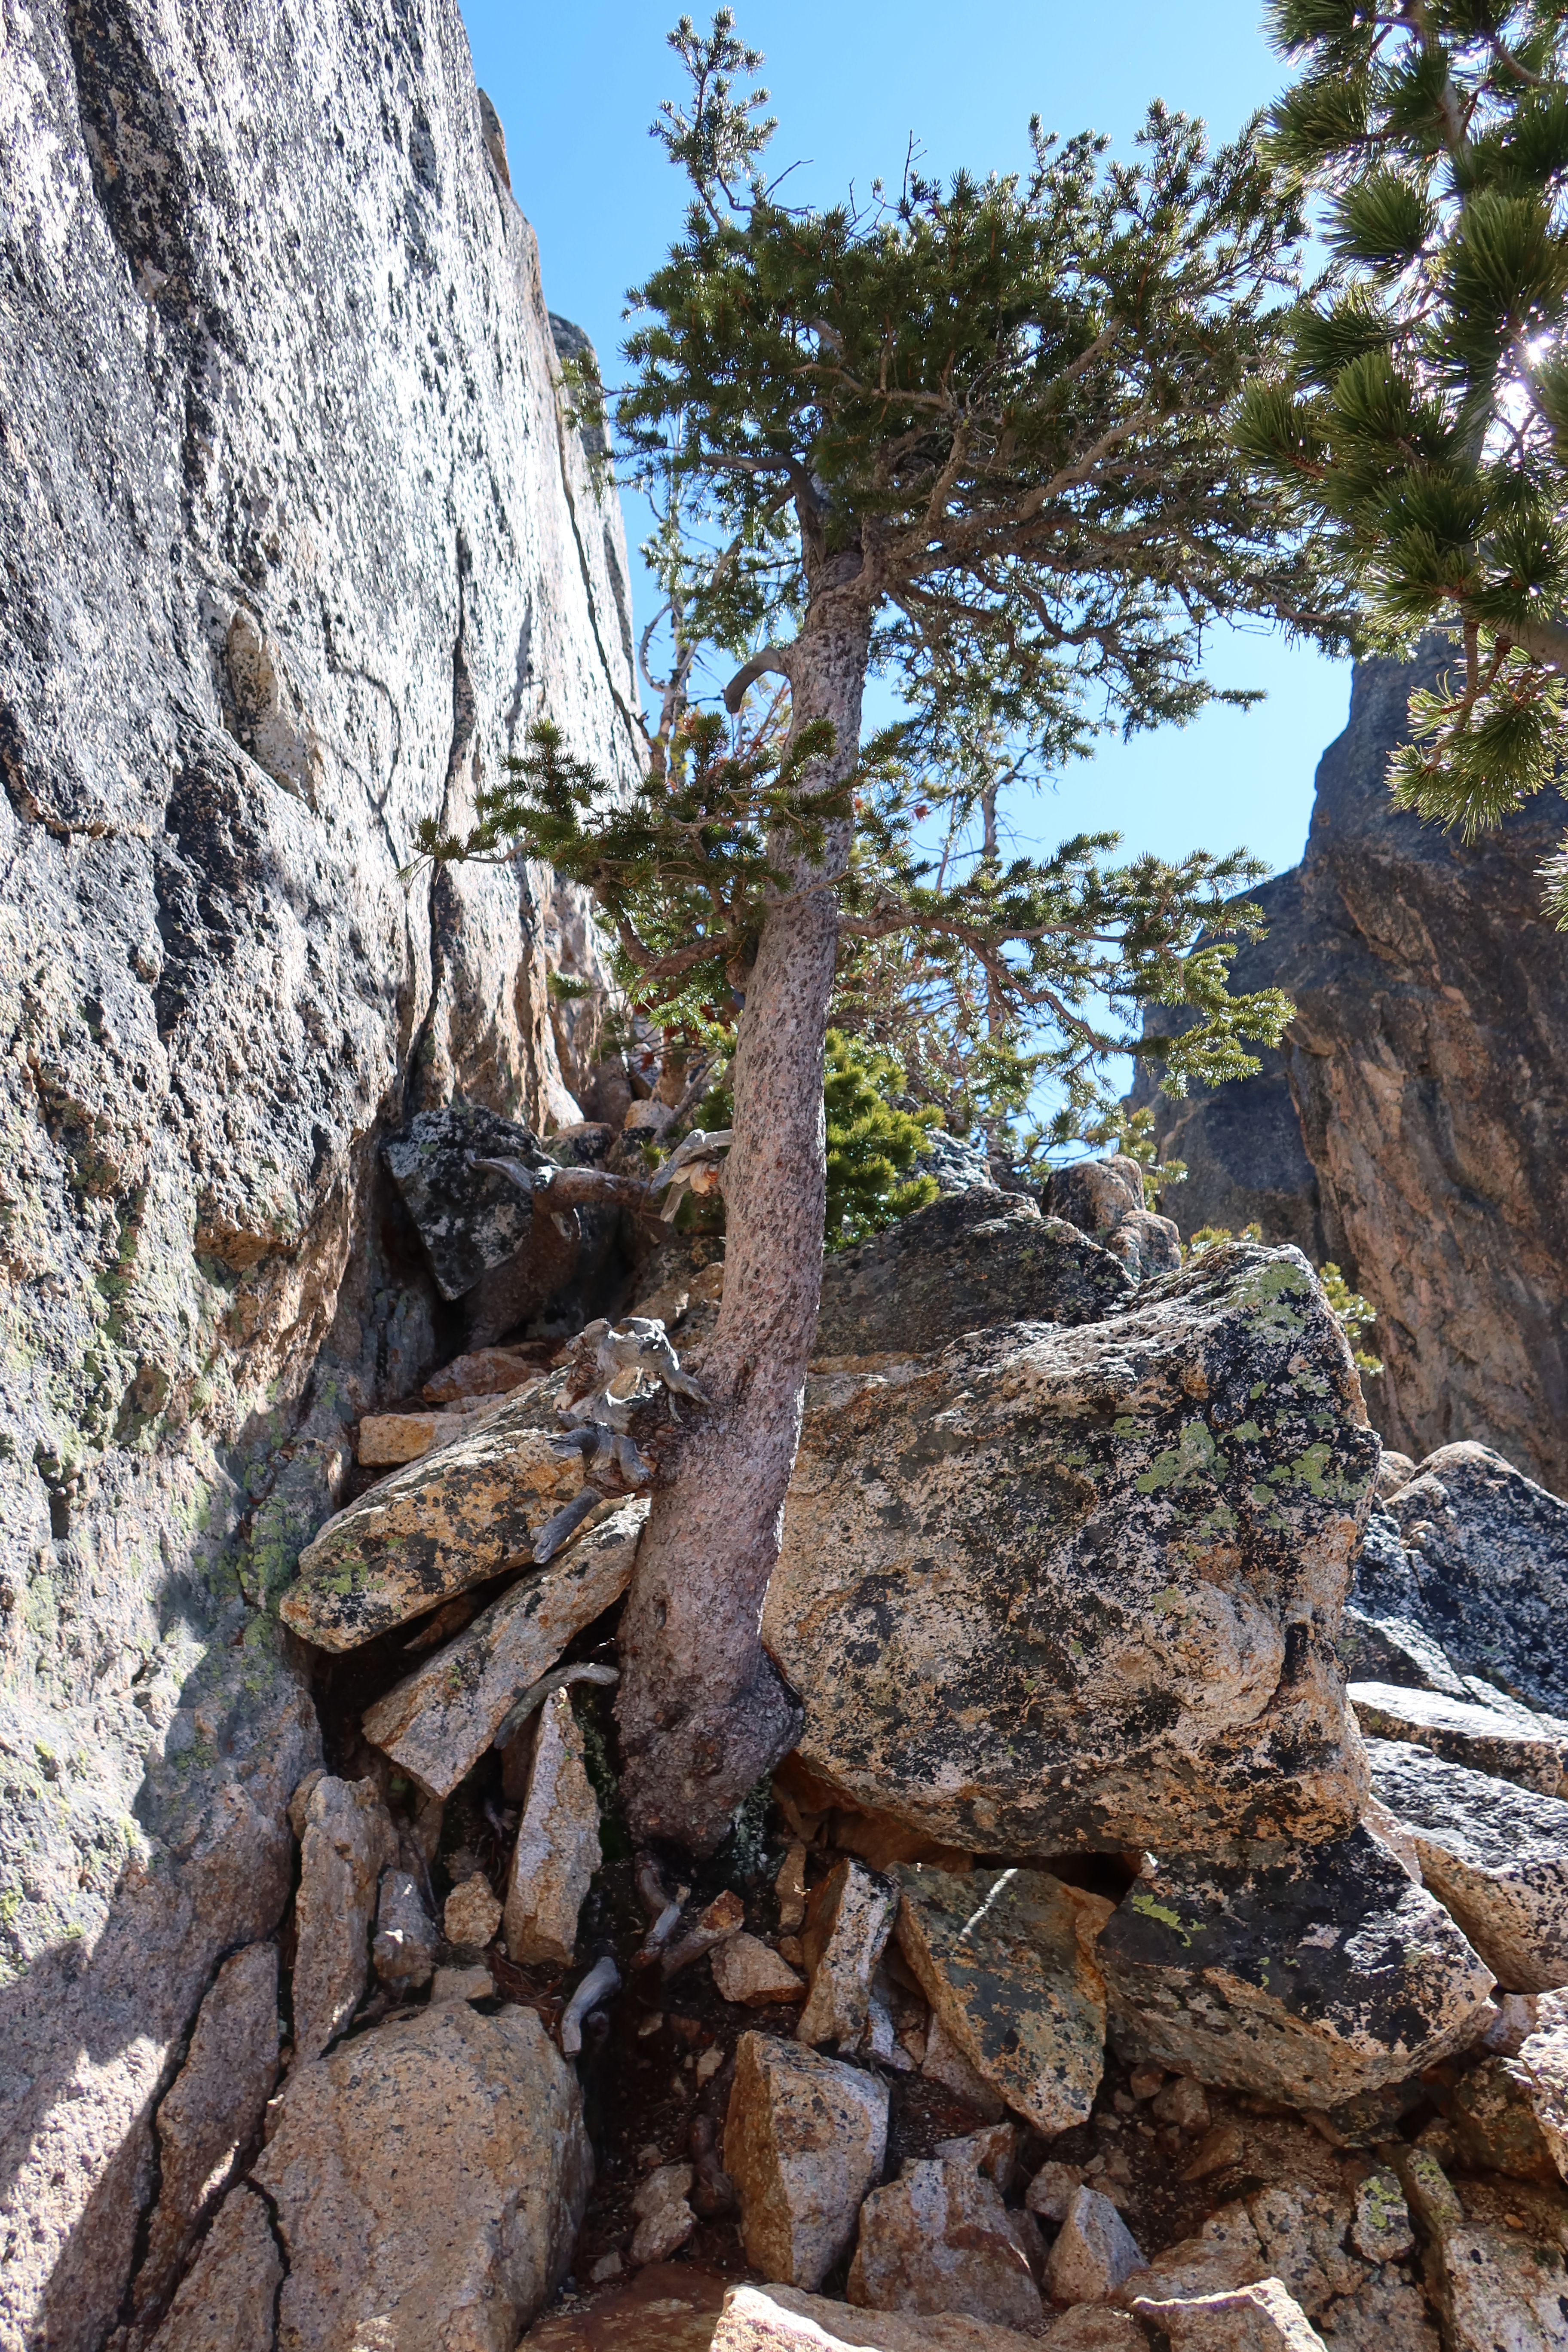
- Pitch 1: To find the base of the 1st pitch, turn around and face west, sort of looking back the way you came up the gully. Scramble on the rock westward (Class 2, but with some exposure, so easy, but you wouldn’t want to fall) to a small platform that at-first looks like it’s going to be a dead-end. But once you’re there and look up, you’ll see well-featured granite that looks pretty friendly for climbing, that’s the 1st pitch. Consider building a little trad-gear anchor for your belayer to be clipped into at the base here, since although their platform is just enough to stand comfortably, if they took a step back without thinking they would fall off of it. Climb the pitch, and end the pitch at a tree.


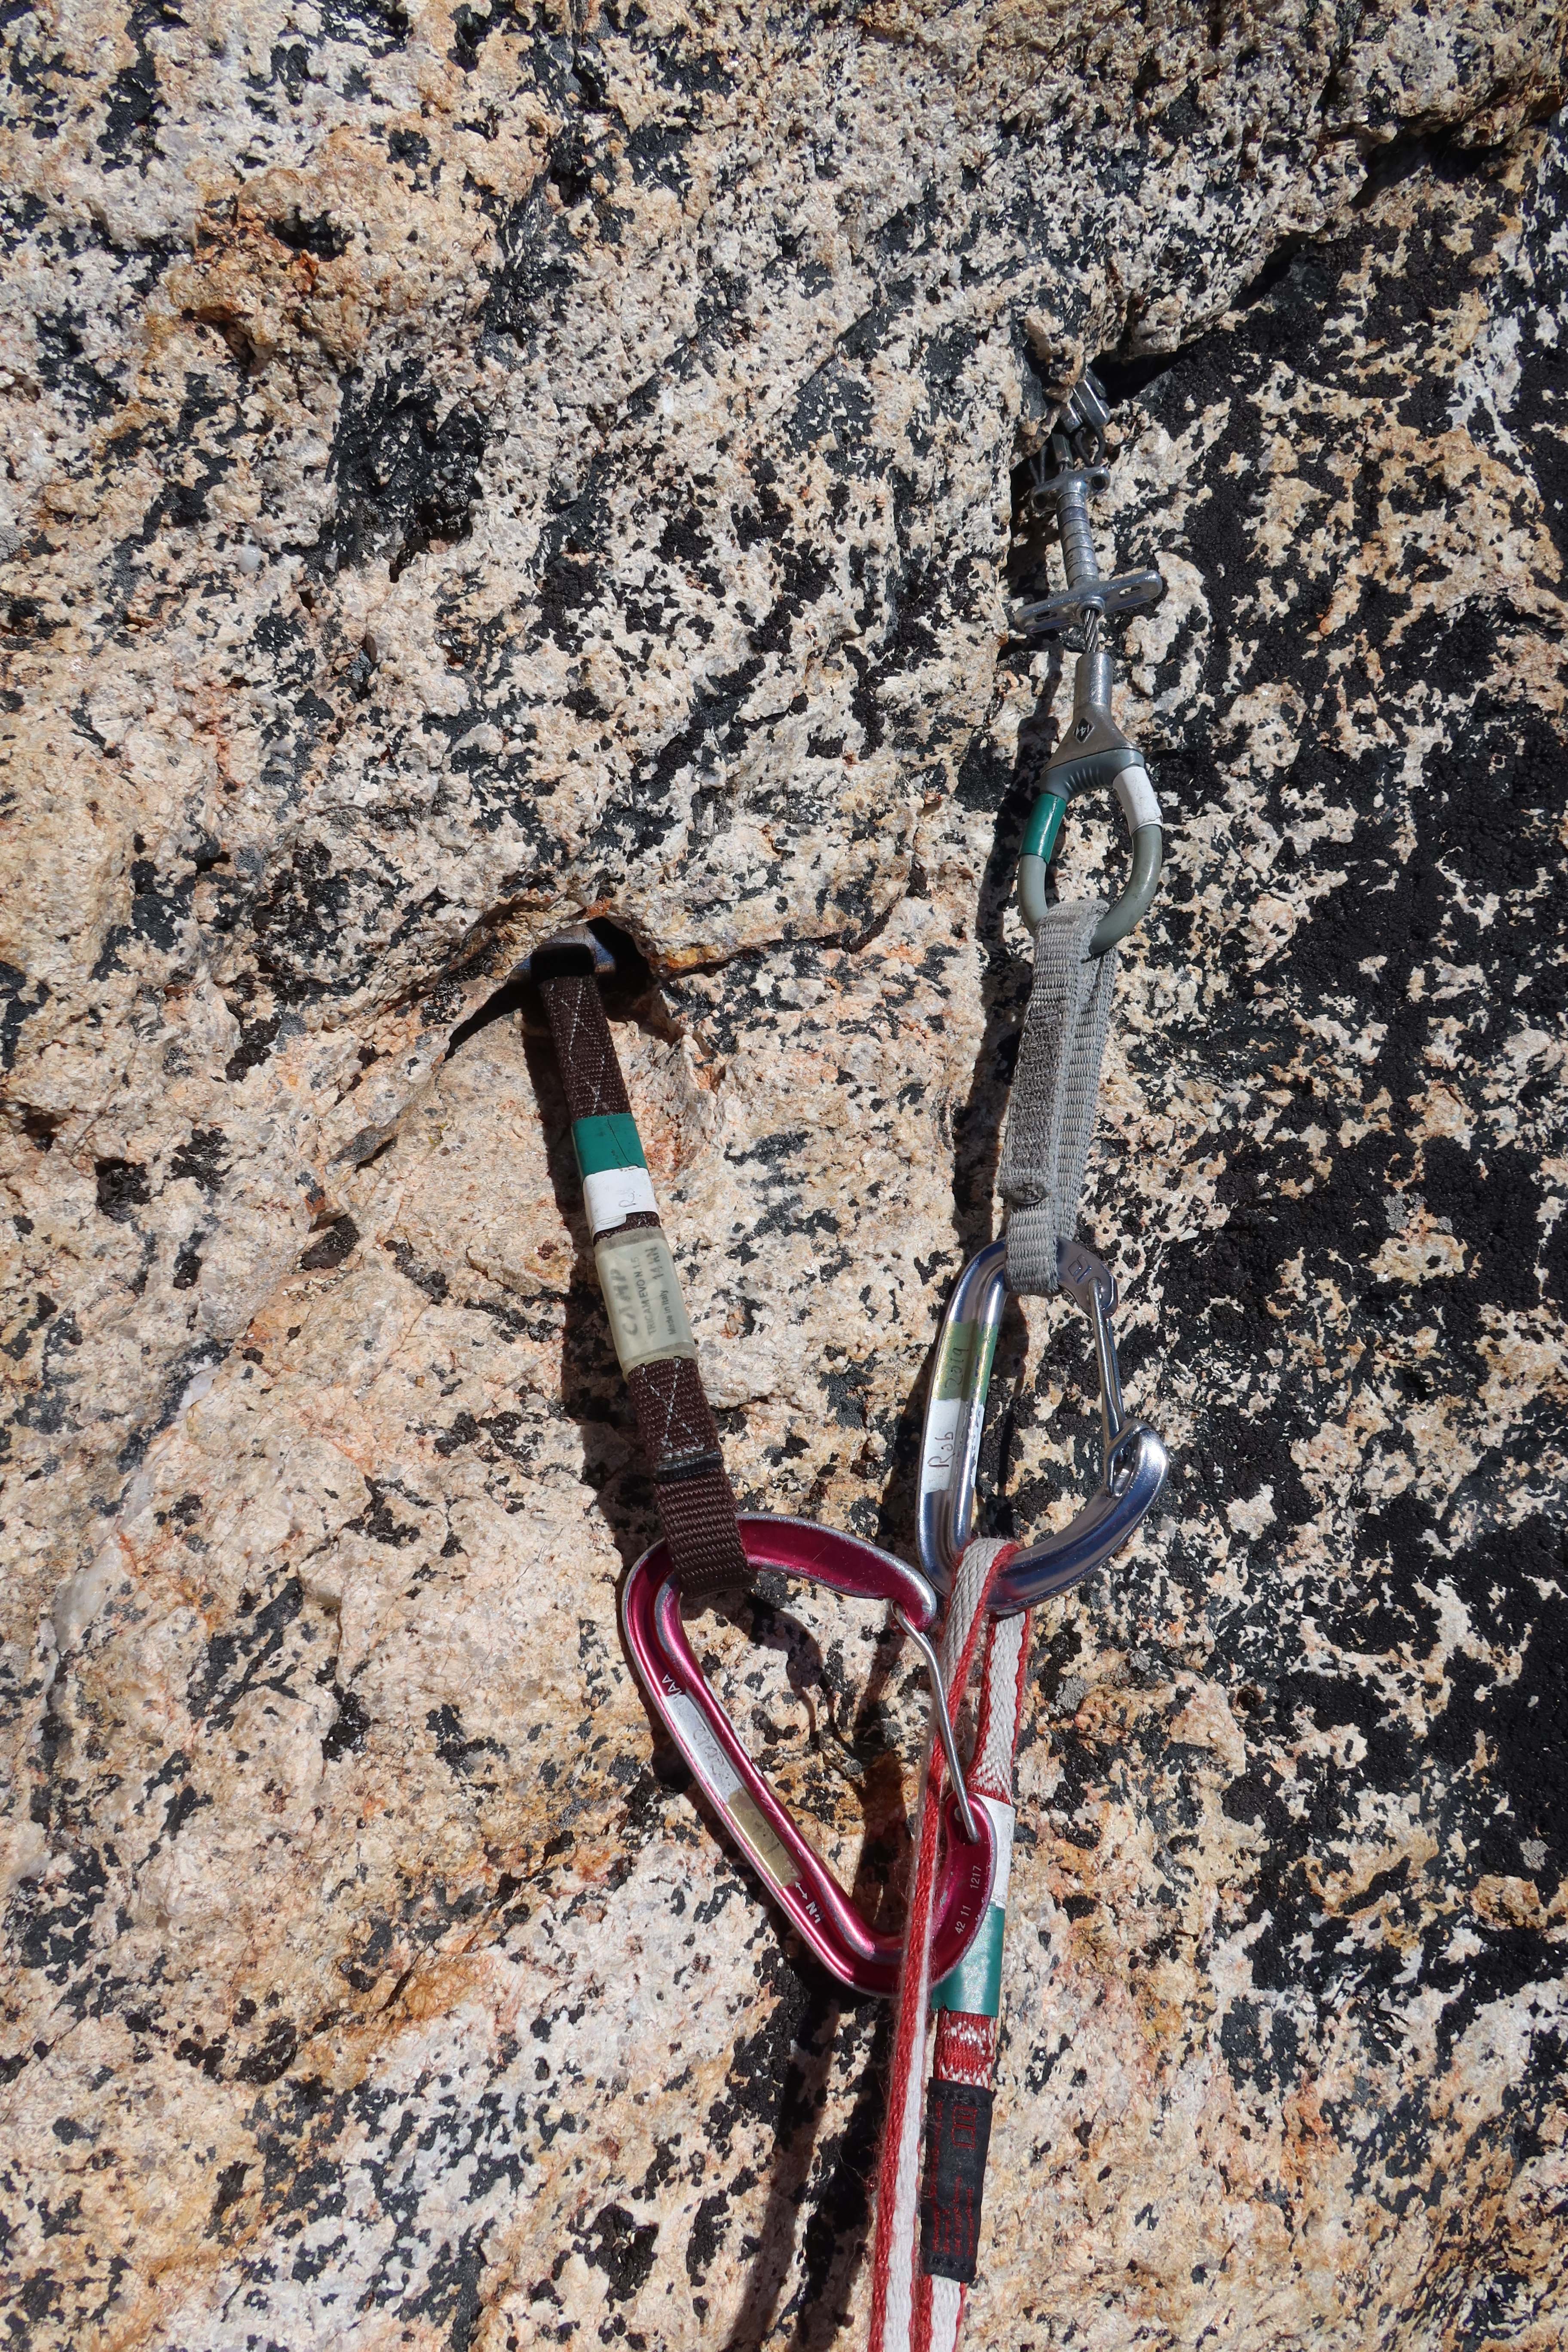
- Pitch 2: To start pitch 2, turn around and go backwards for about 10′ left, to a sort-of a chimney-feature that’s chock-full of well-wedged rocks. One of the two main cruxes of the Beckey Route overall is the start of this chimney, the move to get yourself up and on to the ledge left of the chimney start. You can get a BD #3 cam in to the side of one of the chockstones in the chimney before committing to the move, but you probably should put a double-runner on it so it doesn’t create rope-drag later in the pitch, even though then it unfortunately becomes questionable if it would really protect you in a fall, since you’re not very far above the ledge below. Just be careful, and be sure of your movement through there. After that, keep going relatively straight up the rest of this chockstone-choked-chimney-ish feature, until it tops-out, and you get a view of the third pitch. Either belay off the biggest tree if it still looks good and isn’t already in-use by some other climbing team, or look around and build a 3-piece trad anchor, there’s quite a few cracks around that can be used.


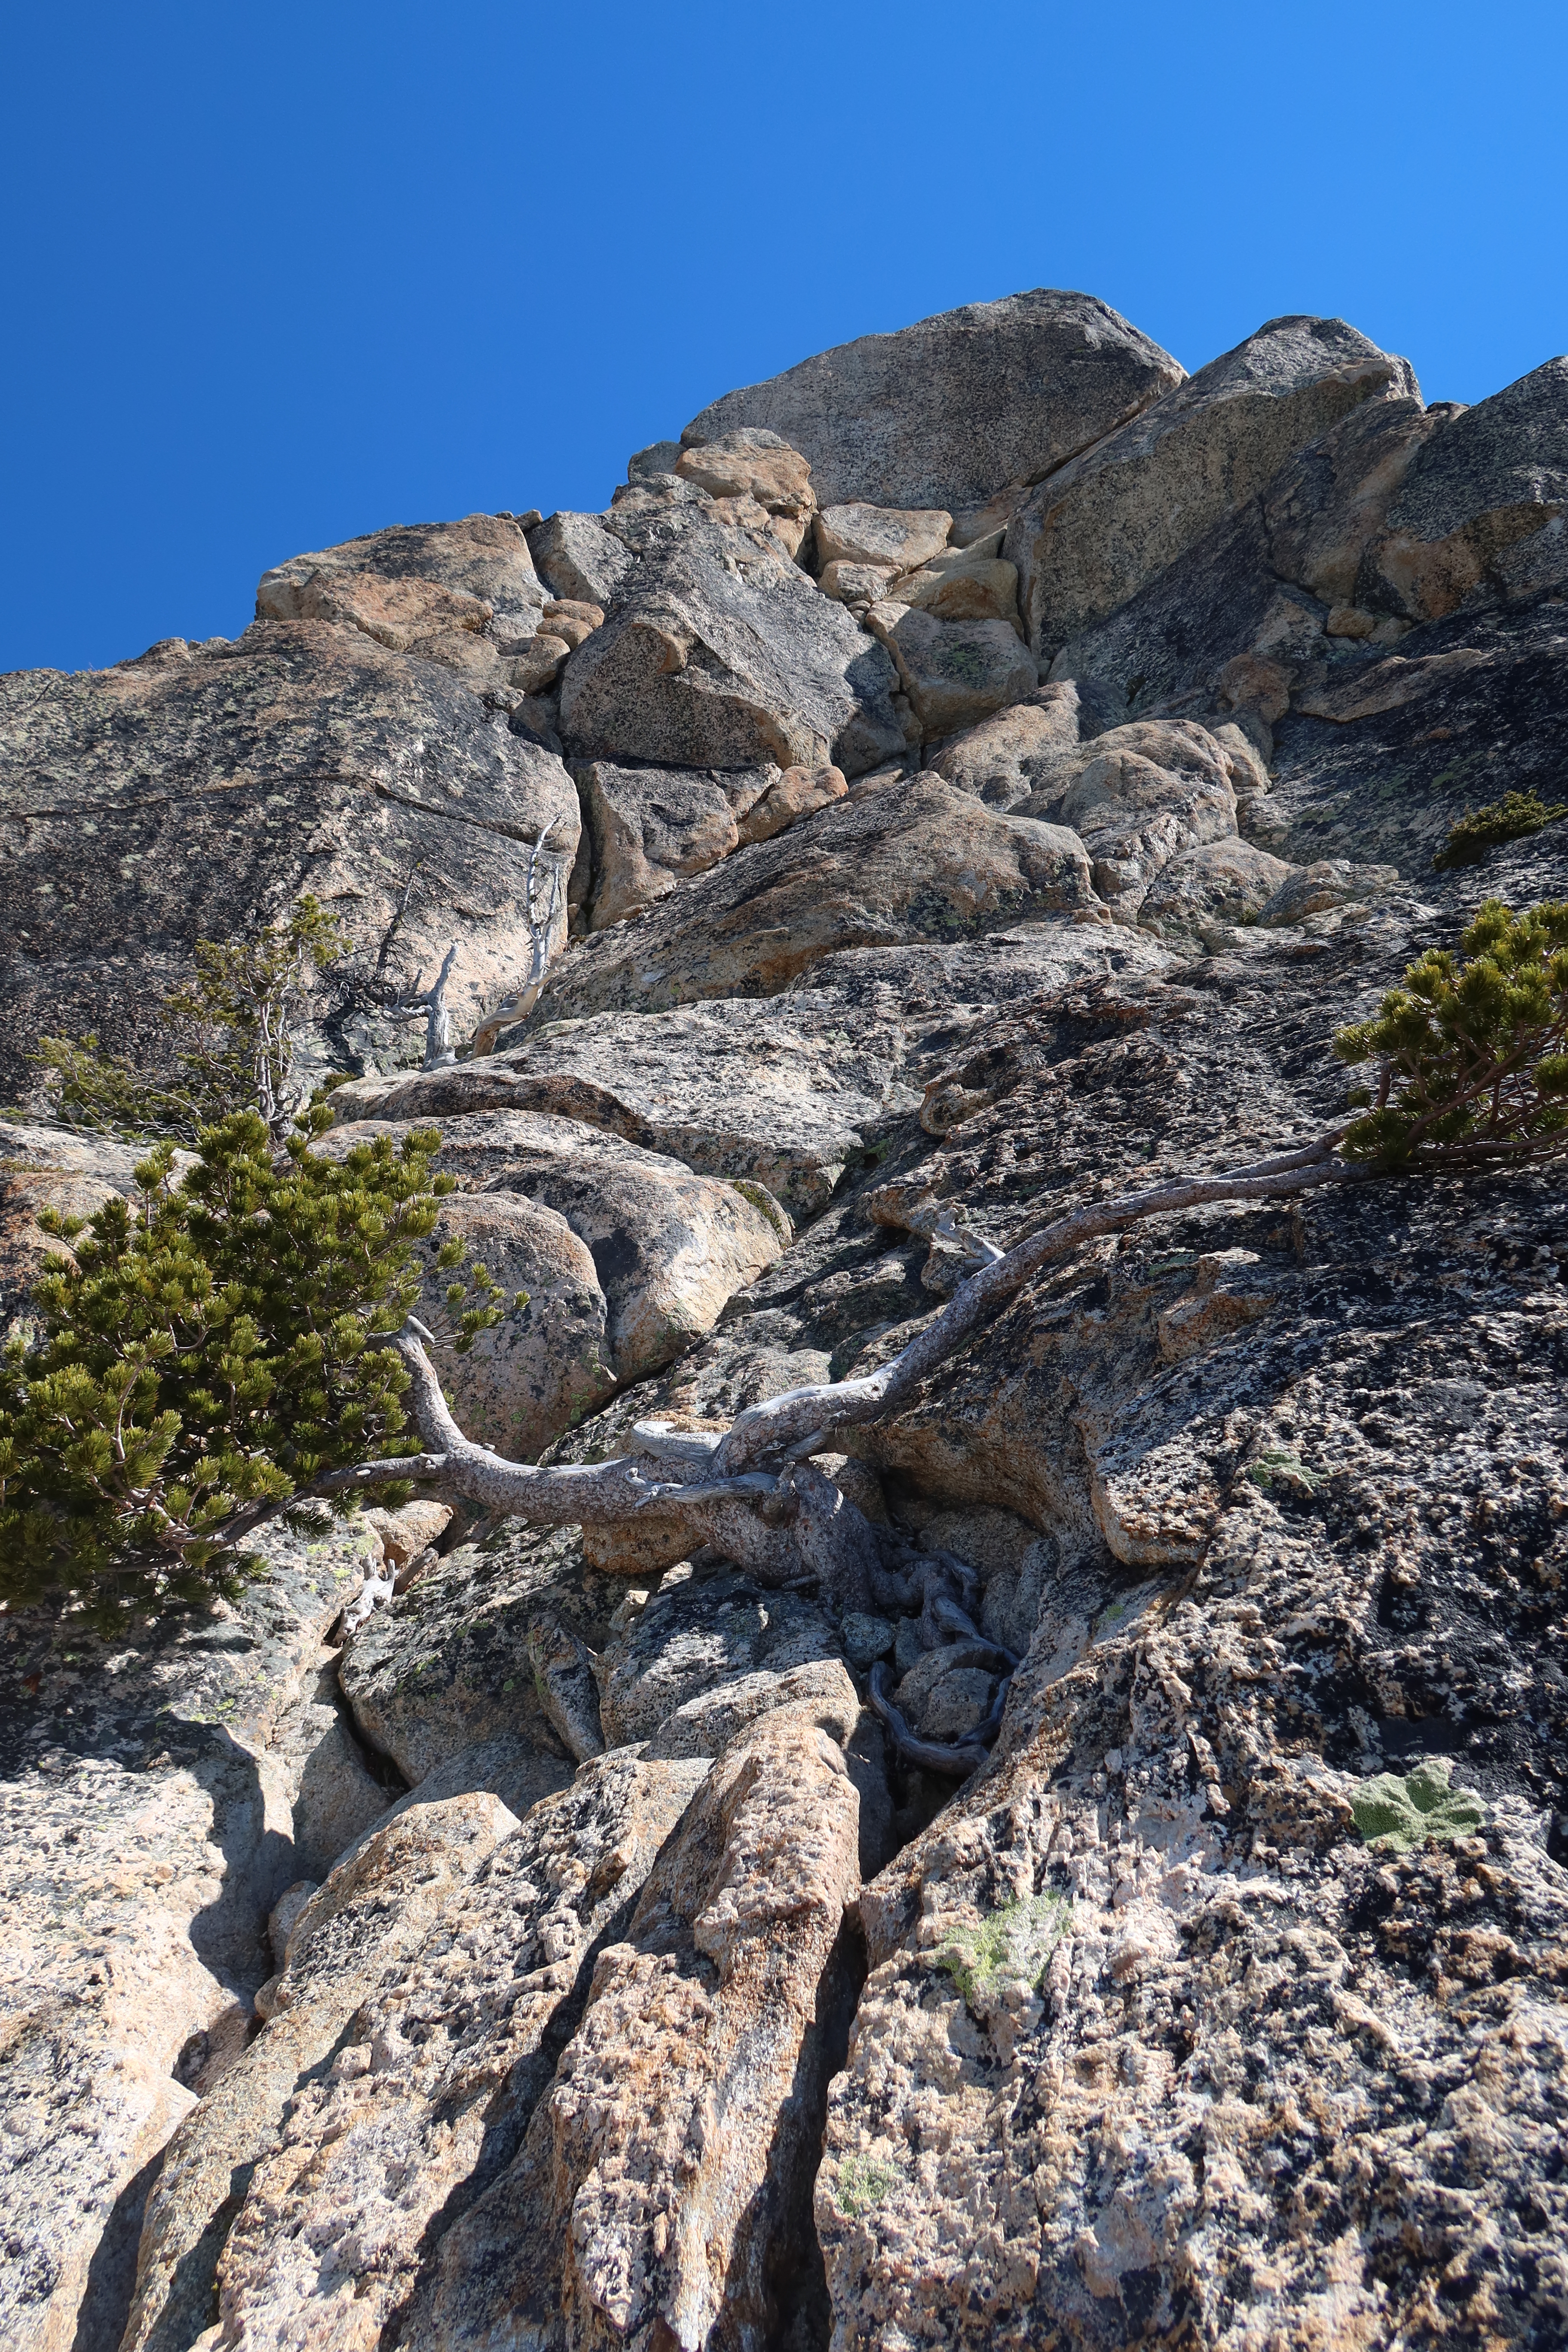
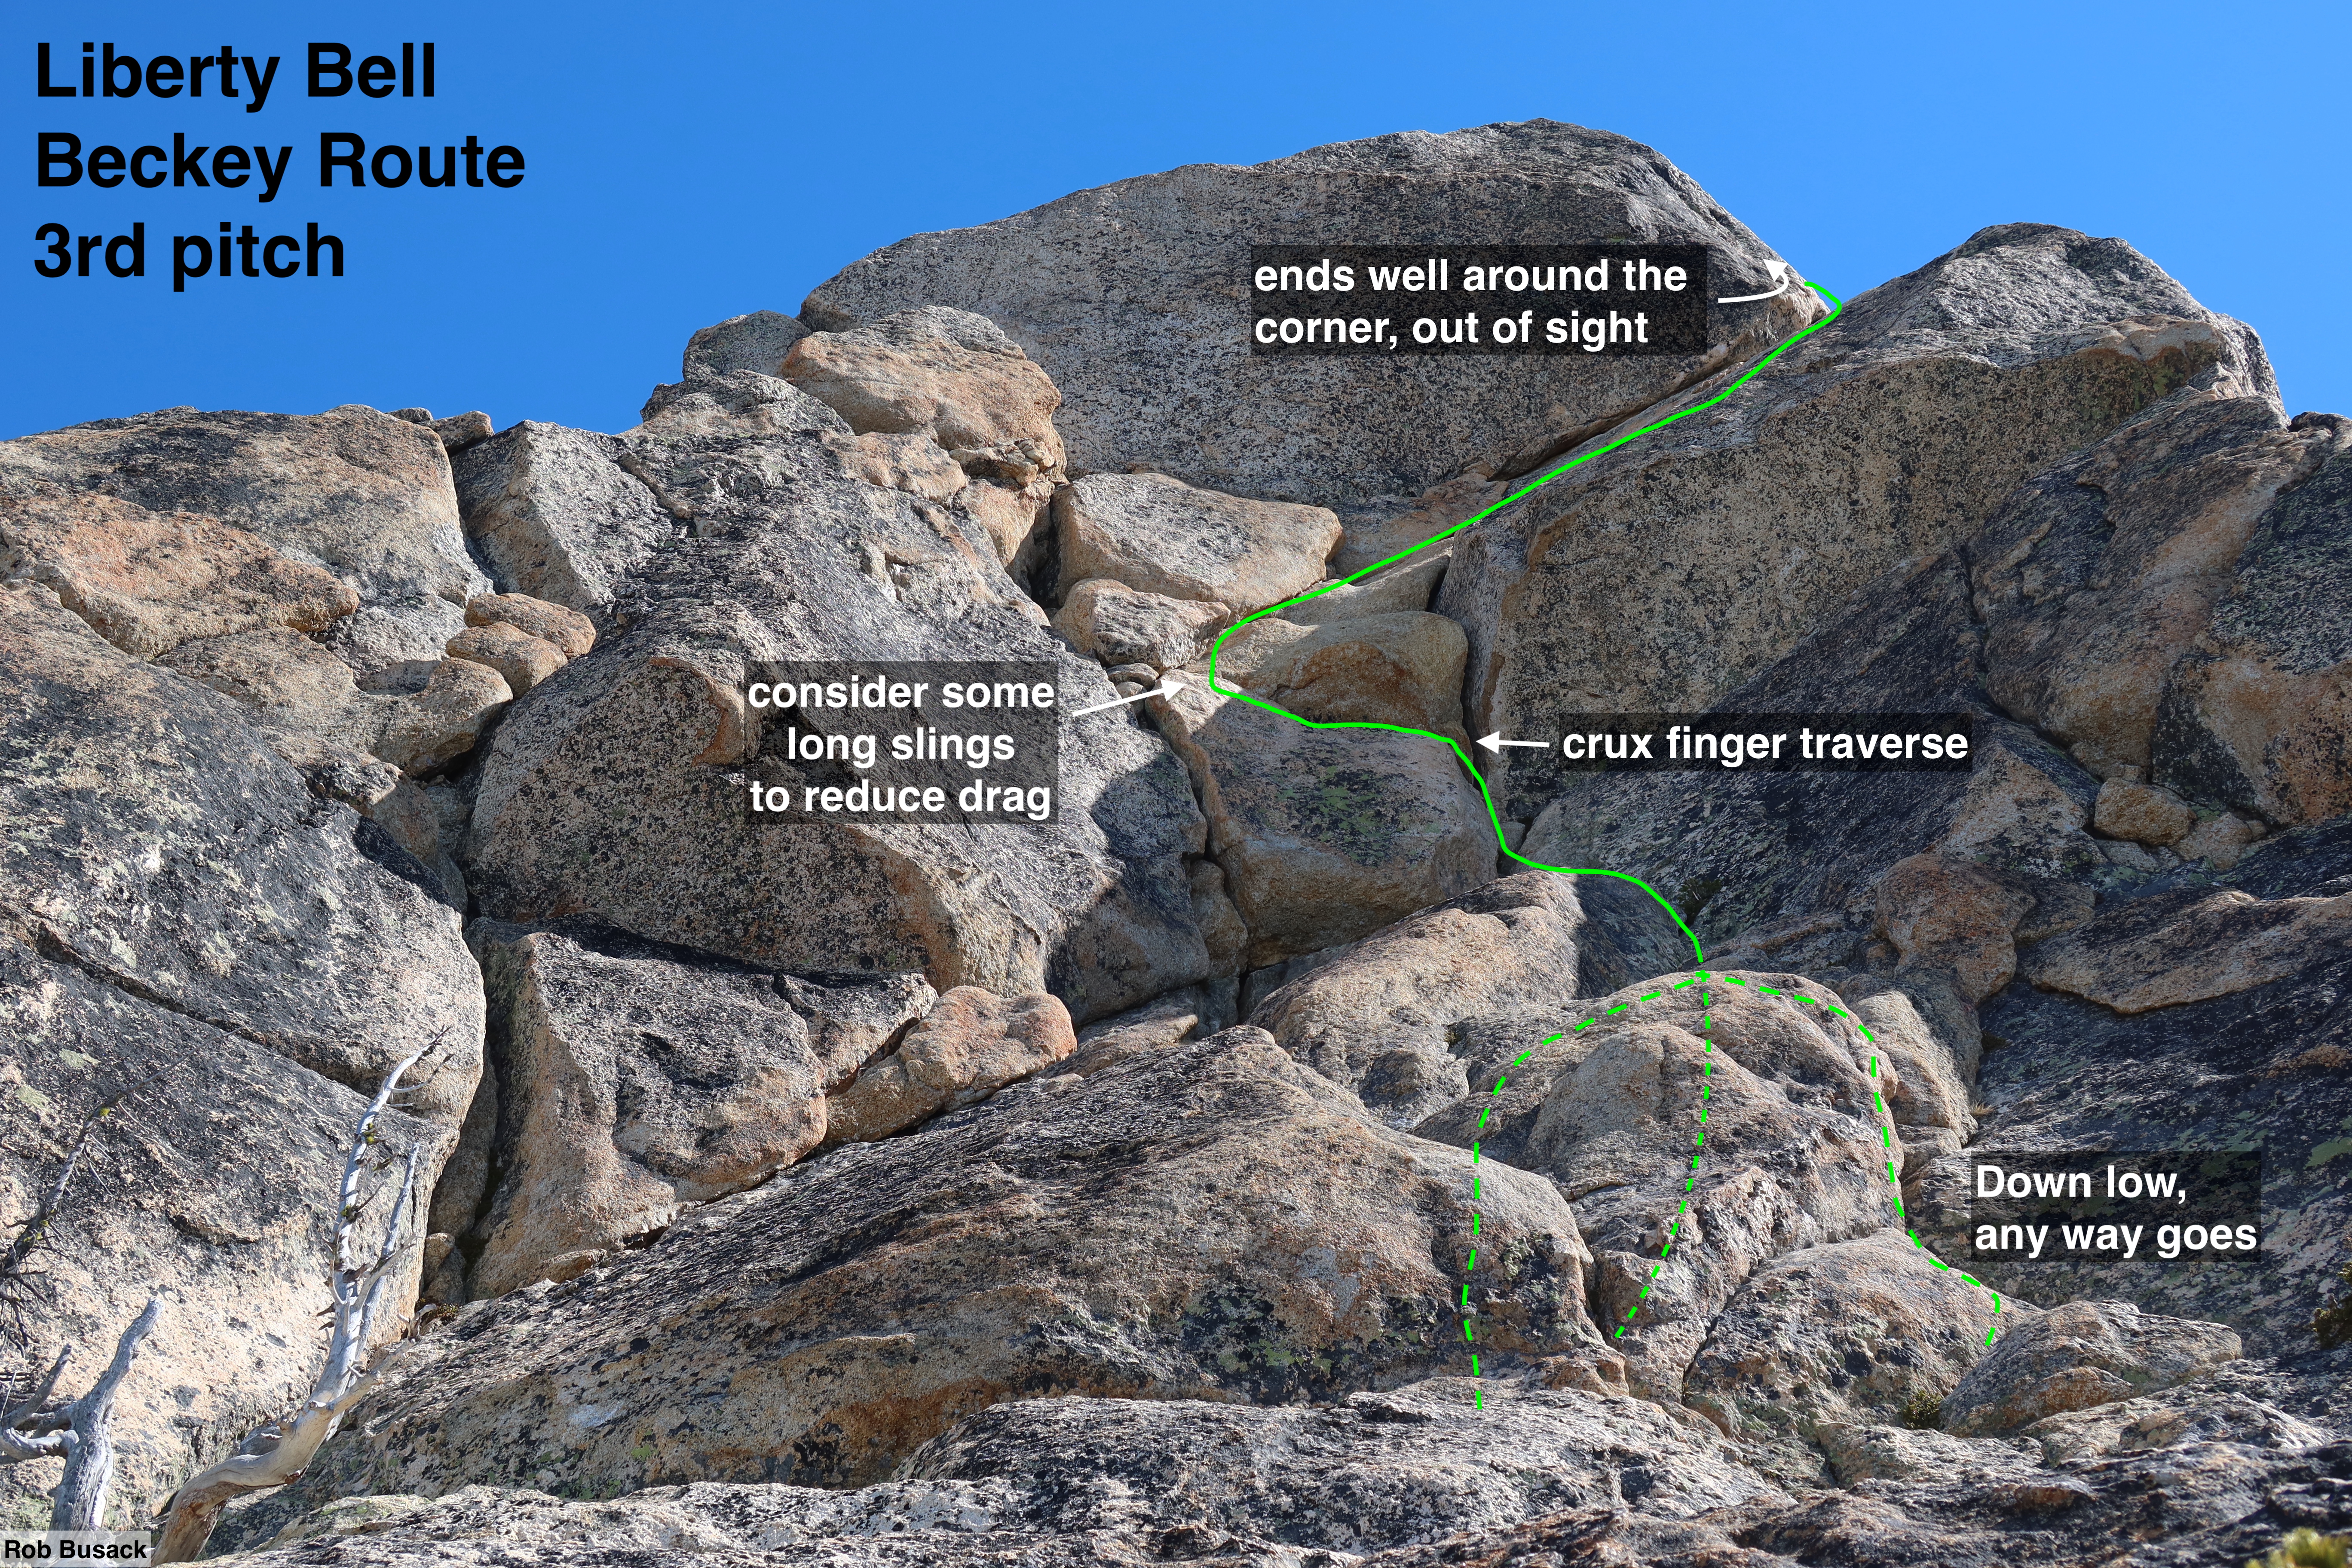
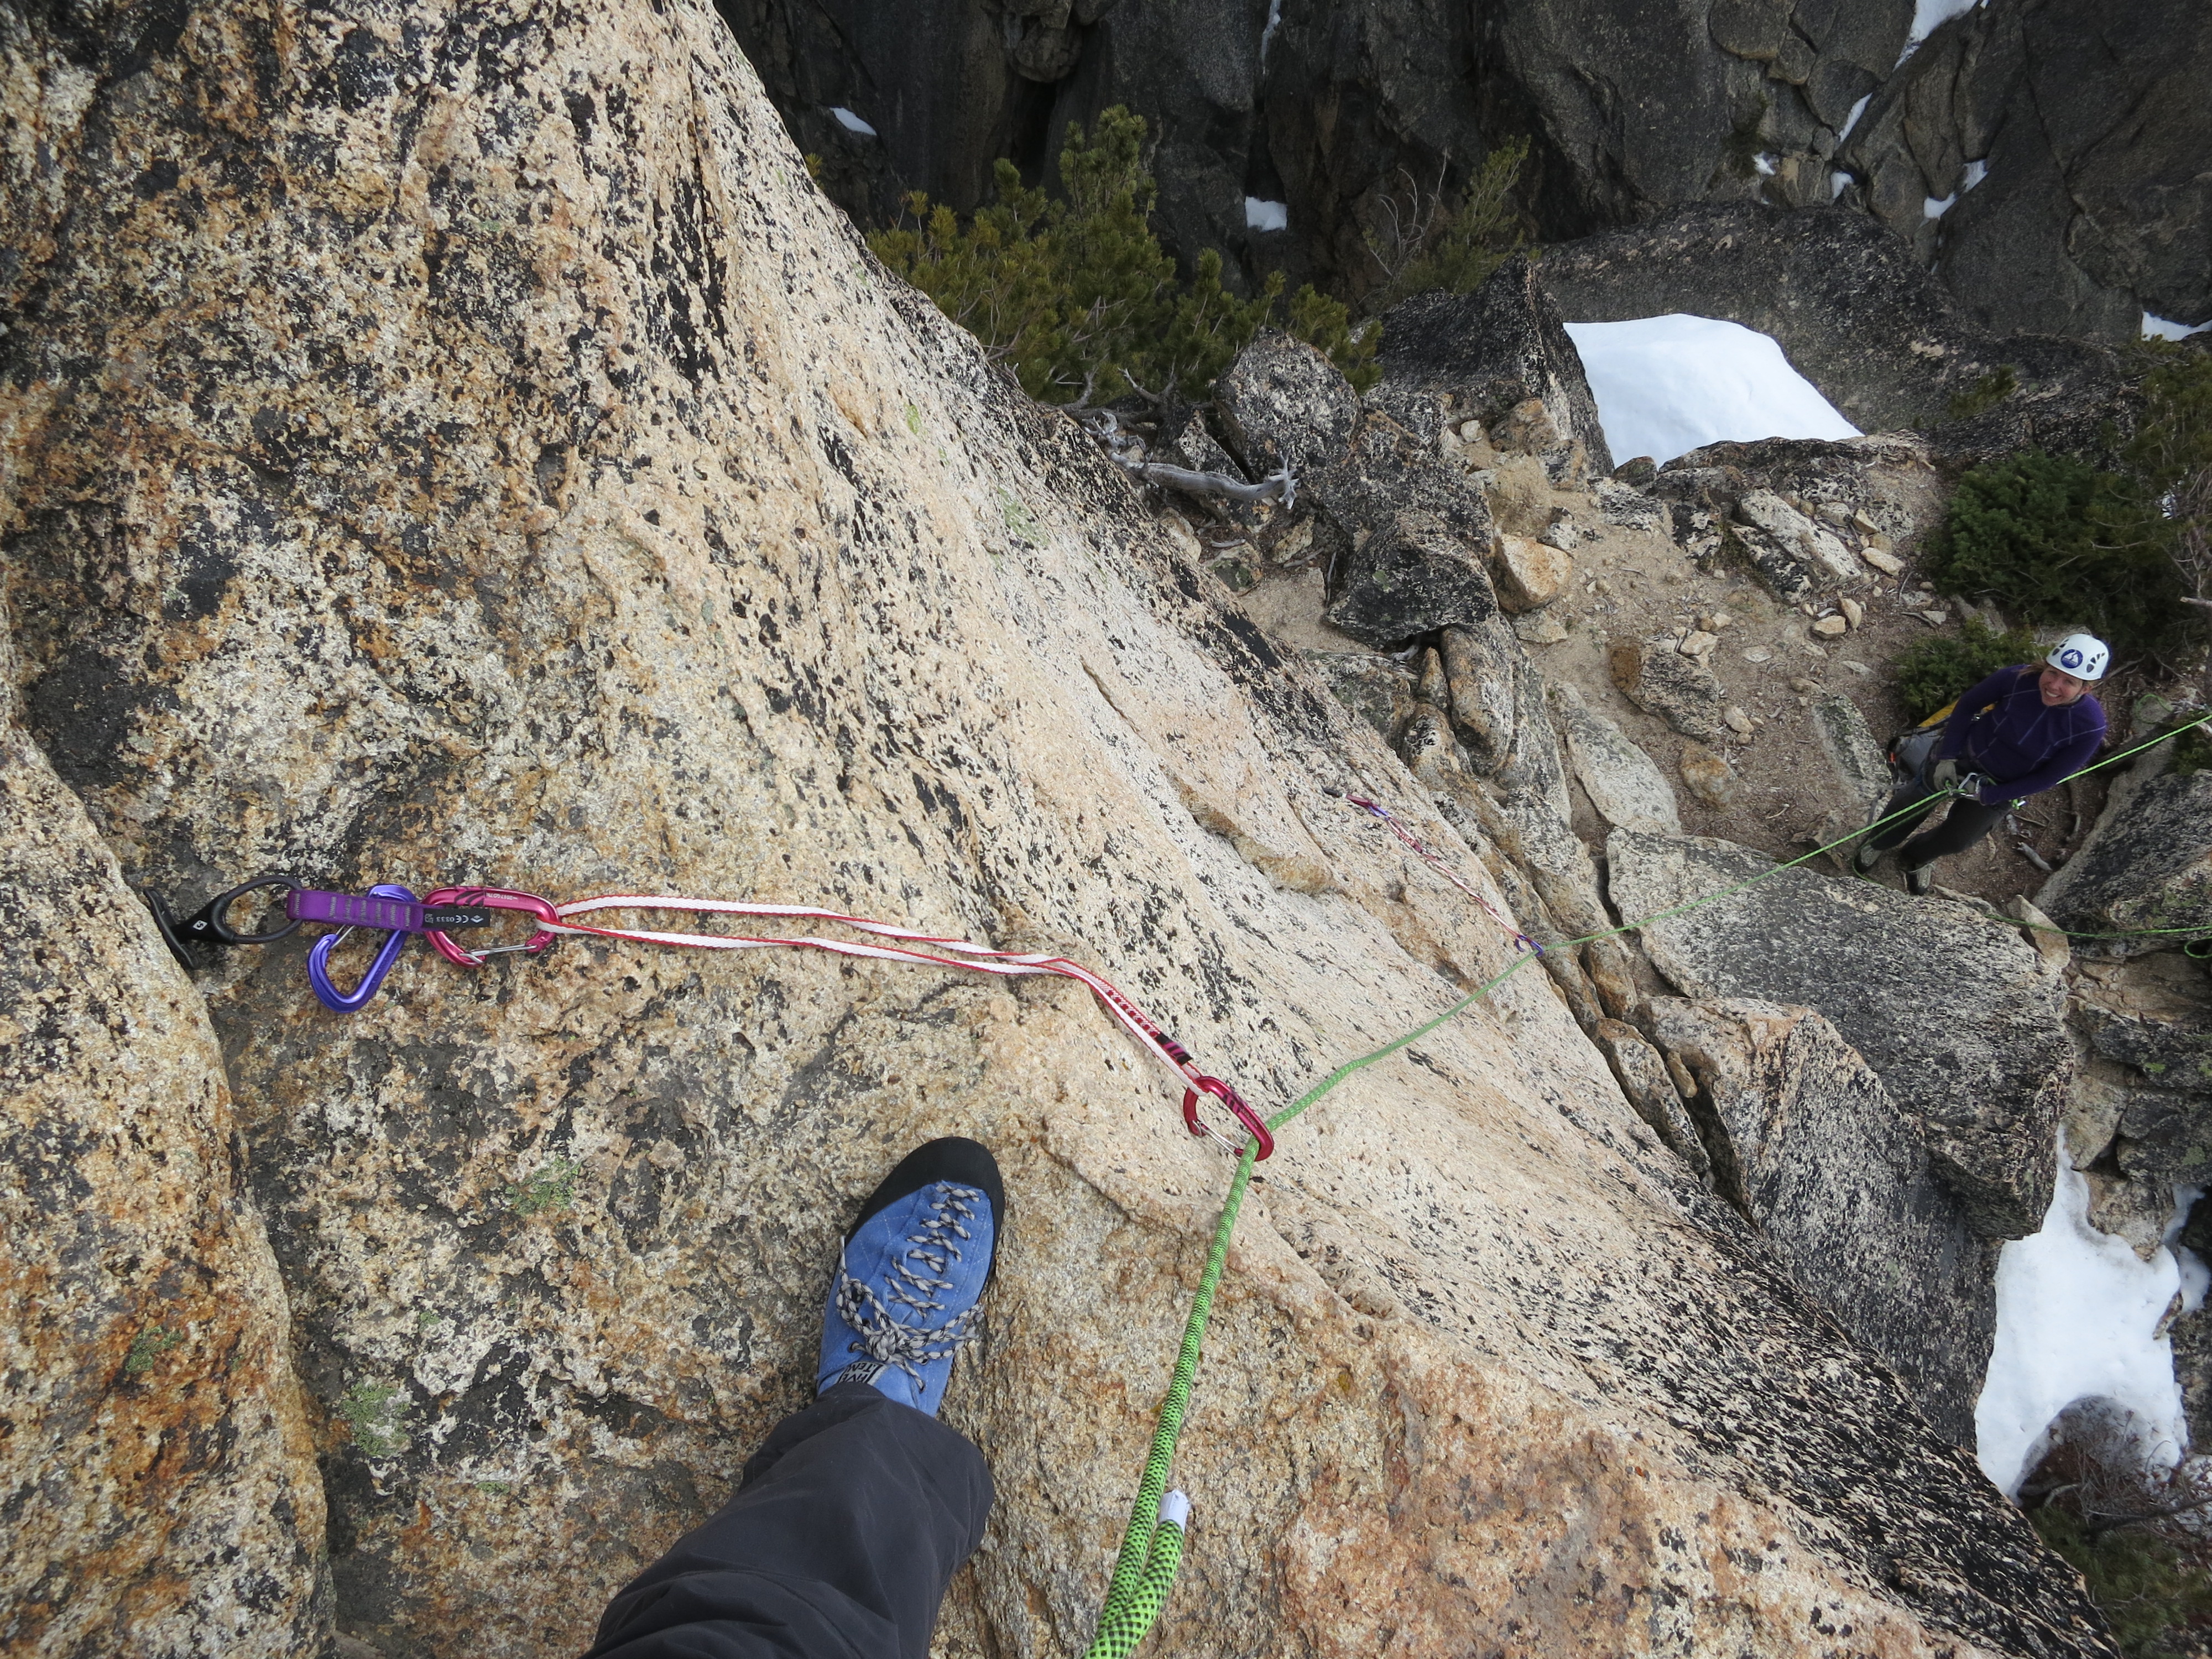
- Pitch 3: See the picture below. It starts out rambly, any-way-goes, until all options eventually funnel together to arrive at the righthand edge of the crux finger traverse, and then it gets real. You can clip an old piton there, but I wouldn’t put absolute trust in it. Better though: I was able to place a BD #0.2, the little yellow microcam, just before pulling the crux finger-traverse move. (A black totem probably also works, it’s about the same size.) After you’re through the crux-finger-traverse moves, on whatever the next few gear placements after that, consider using double-runners to extend them. You are still going to have bad rope-drag on this pitch no matter what you do, but less-bad is better than more-bad. Finally, up top the lead-climber will step around the prow and go out of sight. The climbing beyond that is an easy walk, but continues far enough (~20ish feet more to reach a nice big tree,) that communication without radios becomes unlikely.
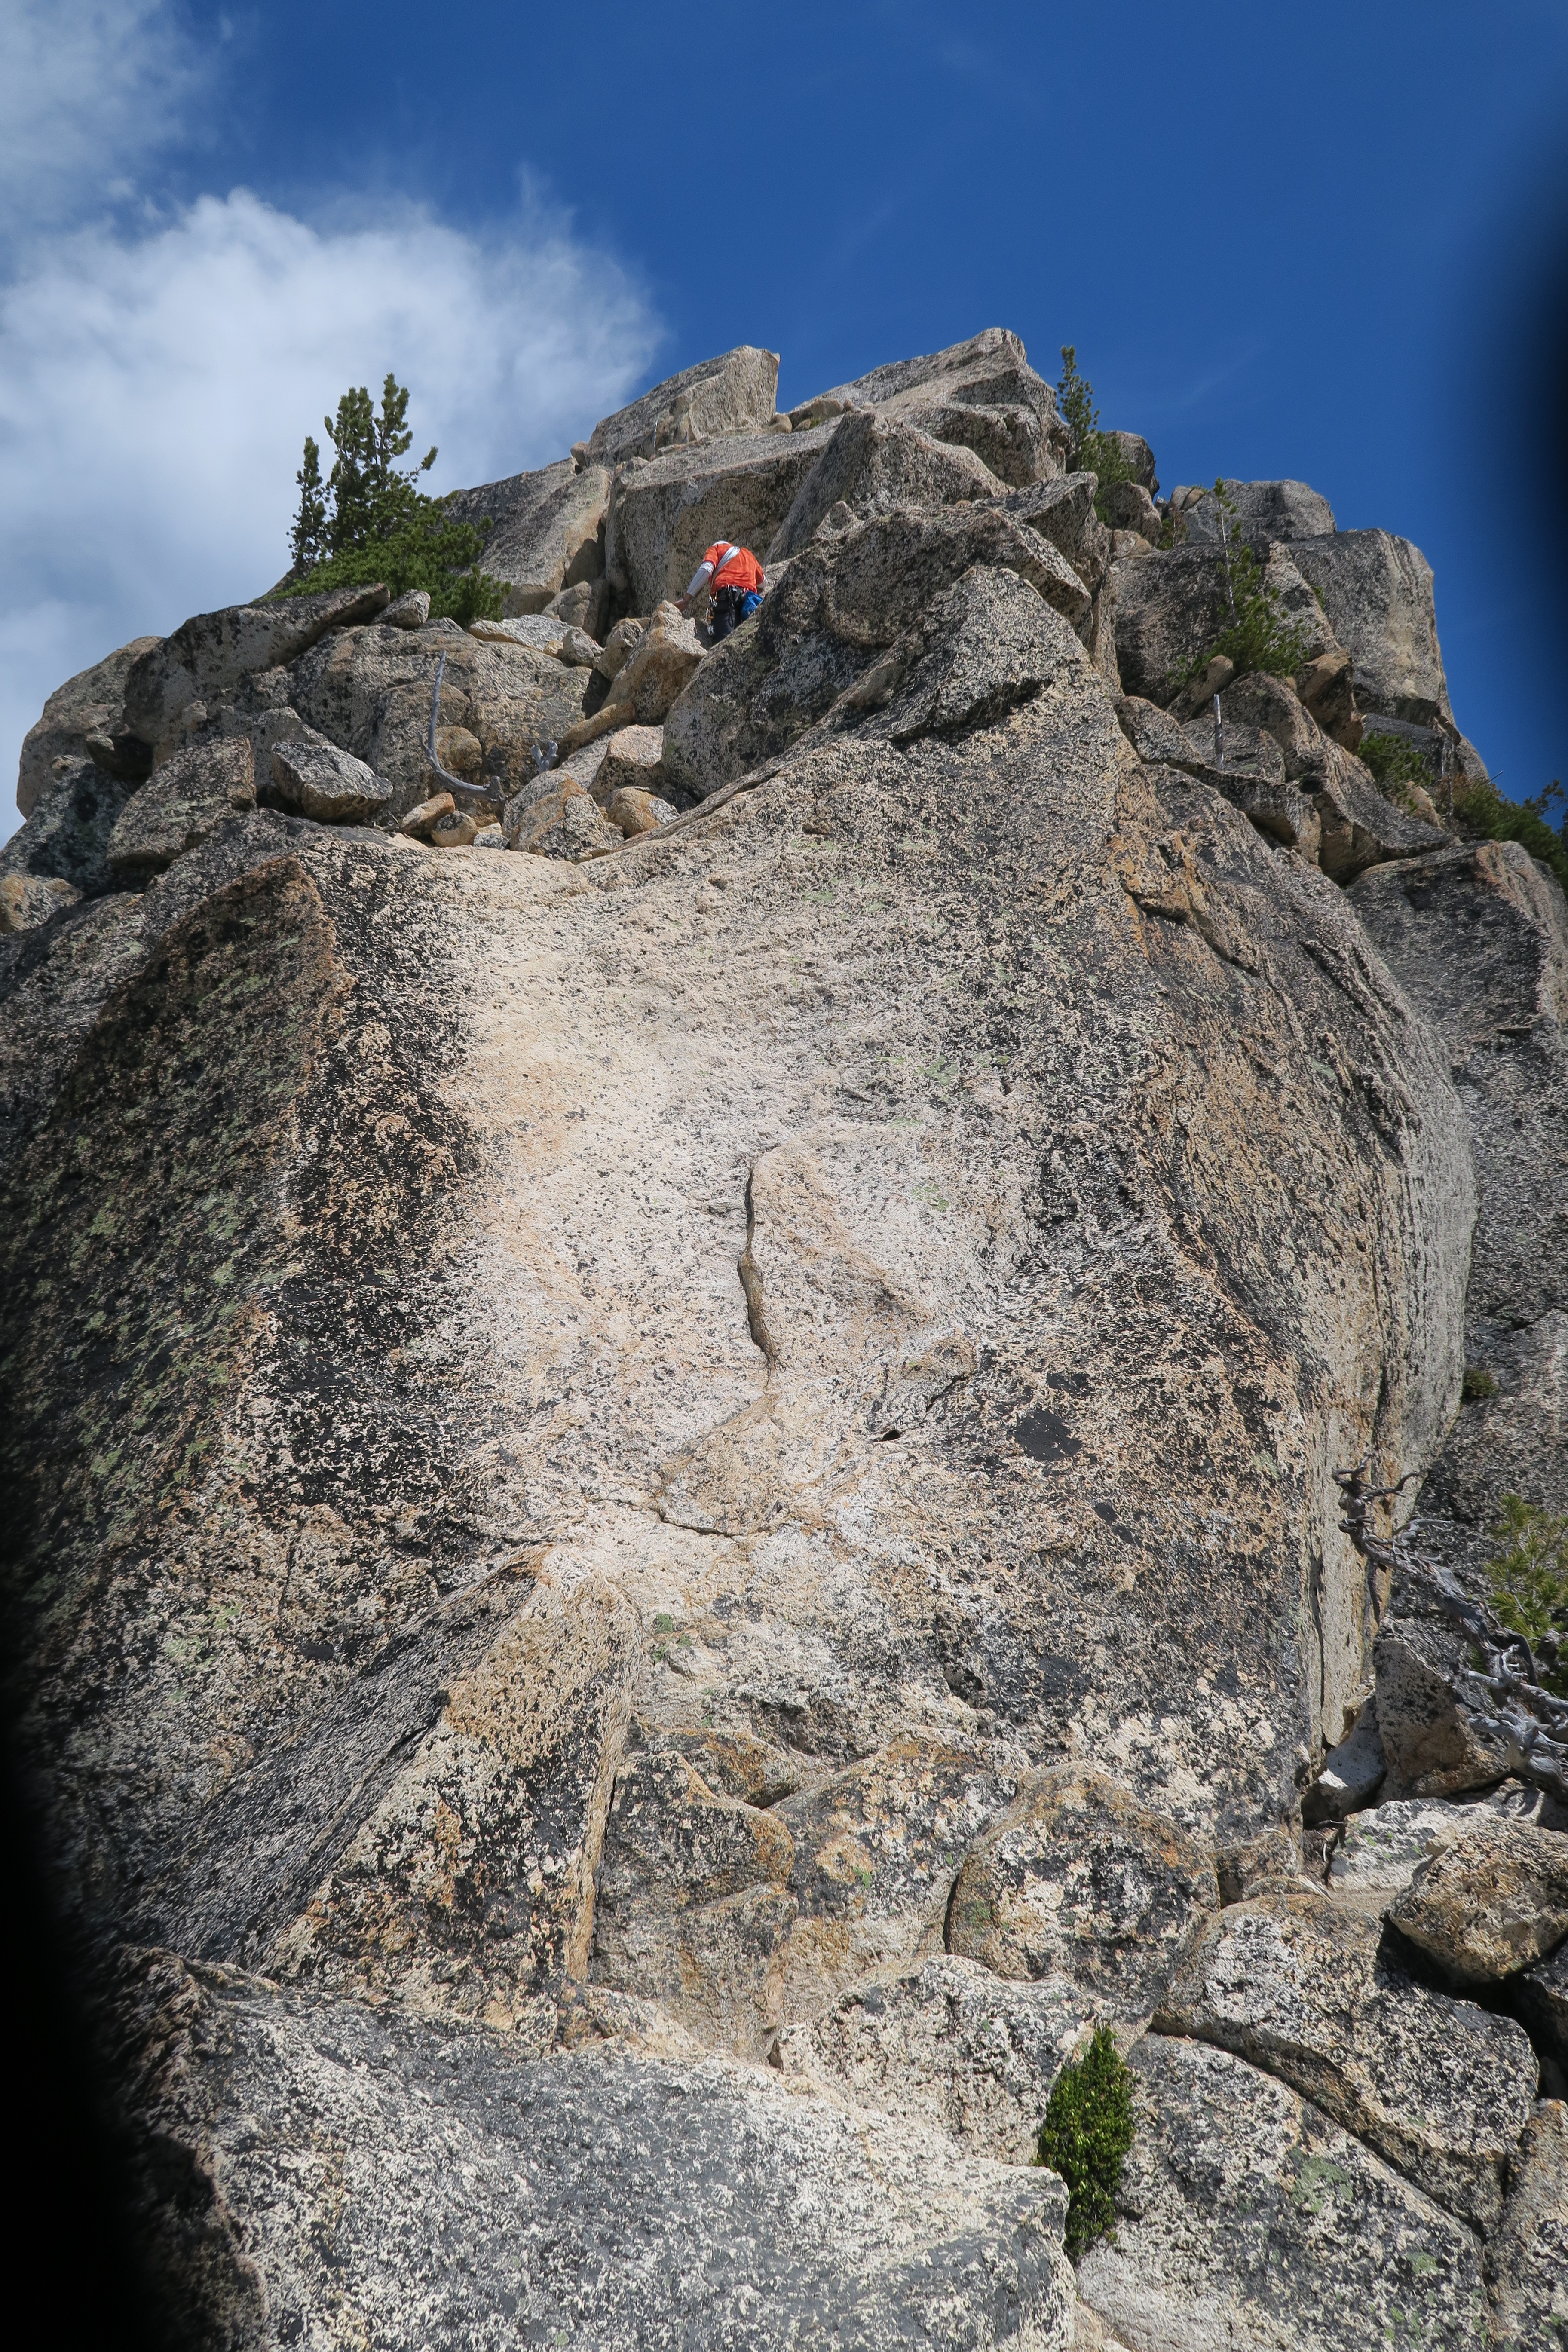
- Pitch 4: Pitch 4 is mostly scrambling, but with one hard friction-slab in the middle, that’s maybe ~12 feet tall. You mostly have to do the friction-slab move unprotected. If you have one very specific piece of gear, if you have specifically the Z4 version of the BD #0.75 green cam, it will fit in a little-pocket that’s lower-right on that friction-slab. (The Z4 has a narrower head-width, and the head-width is too wide if you have an Ultralight or C4 version of the #0.75 green cam.) Back in 2015 when I got to first climb this route, it used to be that a red tricam (size #1) fit well in that pocket, but the pocket has gotten bigger over time, and now even the brown-tricam (size #1.5) is insecure in it. Alternatively, the little silver BD #0.4 can fit in a little crack just up and right of the pocket. Anyway, the pro doesn’t matter too much, it’s so low on the slab it isn’t going to do much to protect the lead-climber, it just makes you feel better. Once you can grab the top edge of the friction slab, it’s good, and you’re home free. Once above the friction slab, I tend to just keep scrambling, letting my belayer feed out rope, but I may not place any more protection, just go until I get close-ish to the summit, find somewhere to build an anchor, and then belay up my follower. (As you get close to the summit, keep watching to your right for a tree with a rappel anchor on it, you’ll be scrambling back to that spot when it’s time to rappel, and it helps to know where it is.)


Route description – rappelling:
- First rappel: From the summit, scramble back down the way you came up for something like fifty feet, and keep looking for a tree with a rappel anchor on it. It’s on the side towards Concord Tower, so generally the south side of things. It’s easier to notice that tree when going up than when going down, so keep an eye out for earlier as you finish up your 4th pitch of climbing. From that tree, rappel down to the sandy & treed ledge below. The length of the rappel is kind of a slight hair over 30-meters. It’s fine with a 60-meter rope with rope-stretch, but as always, tie stopper-knots, and you might have to stand on your tip-toes at the bottom to get off rappel.


- scramble between rappels: Now for the most puzzly part of the descent: Wandering around on this sandy and treed ledge, looking for the next rappel anchor. This picture on Mountain Project gives you a sense of where to look. It’s chains, on a steep wall skiers-right of everything, but they can be quite hard to find. Go generally right, then down, then right again. (Also, sometimes in the early season, the sandy ledge may still have snow on it, but I’ve always found it fine to walk through snow there even with just rock shoes on and no actual snow-related tools. It’s often soft & mushy in the sun by the time you get there, and there’s plenty of trees to hold on to, or fence you in if did slip.)

(skier’s right-ish after that 1st rappel)

- Second and third rappels: Once you find those chains, the 2nd & 3rd rappels are straight-forward, as they are simply straight down. After the 3rd rappel, you’ll land very close to where you stashed your pack at the beginning.
After that, pack up your climbing gear, and reverse the approach to wrap up your day!
